Adjustments
WARNING
To reduce the risk of electric shock, fire, explosion,
serious injury or death:
• Disconnect electric power to the dryer before
servicing.
• Close gas shut-of valve to gas dryer before serv-
icing.
• Never start the Dryer with any guards/panels re-
moved.
• Whenever ground wires are removed during serv-
icing, these ground wires must be reconnected to
ensure that the dryer is properly grounded.
W001R1
IMPORTANT: When reference is made to directions
(right or left) in this manual, it is from operator’s posi-
tion facing front of washer.
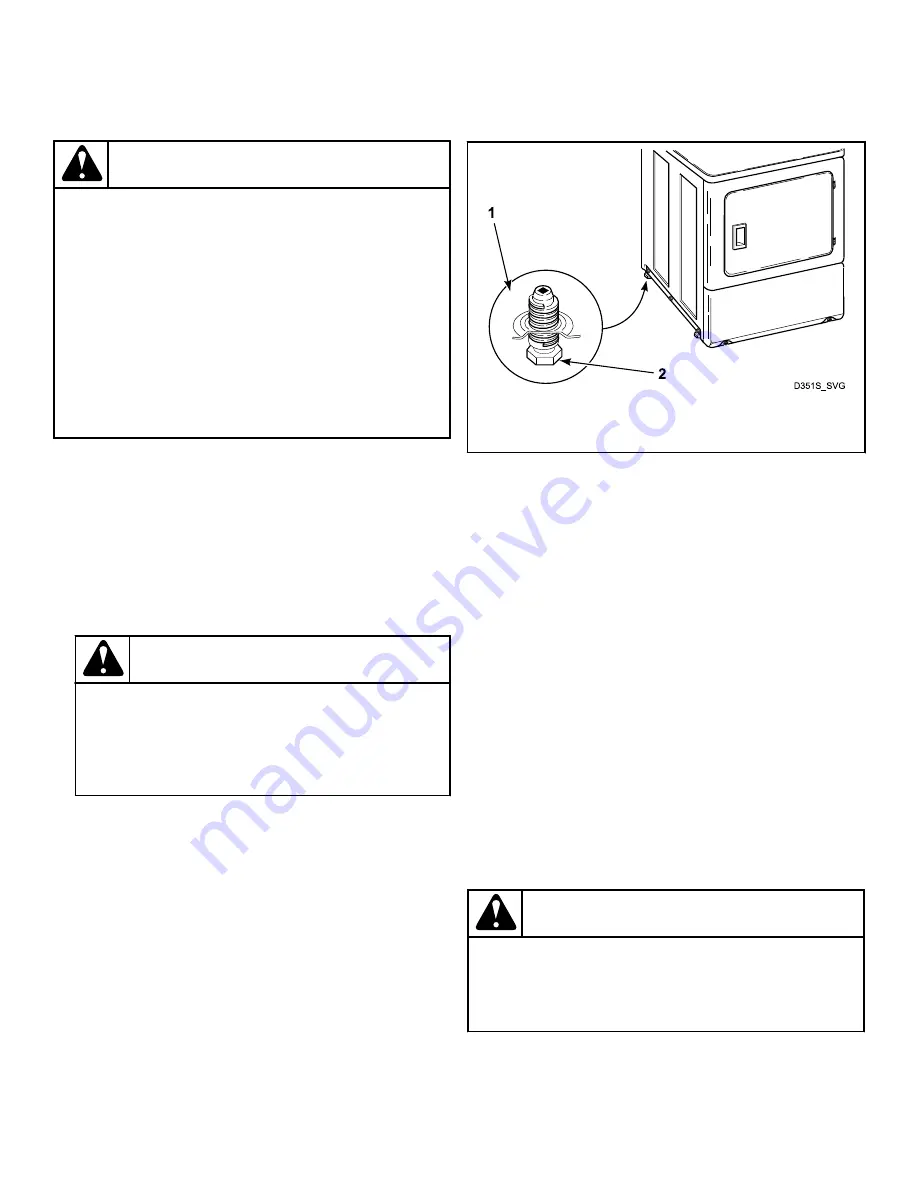
Leveling Legs
.
NOTE: Dryer should be installed on a solid and level
floor.
1. Place dryer in position, adjusting the legs until dryer is level.
WARNING
To reduce the risk of serious injury or death by
carbon monoxide and other gases in gas dryers,
carefully read and follow all instructions given in
this section.
W005
NOTE: Legs can be adjusted outside the dryer by
using a 1-1/4 inch size wrench, or from inside the
dryer (with lower front access panel removed) by
using a 1/4 inch drive ratchet with extension.
2. Keep dryer as close to the floor as possible. All four legs must
rest firmly on the floor so weight of the dryer is evenly dis-
tributed. The dryer MUST NOT rock.
IMPORTANT: DO NOT move the dryer at any time
unless the dryer is completely assembled. DO NOT
slide the dryer across the floor once the leveling
legs have been extended as the legs and base could
become damaged
1.
Dryer Base
2.
Leveling Leg
Figure 21
Burner Flame (Gas Models)
1. While supporting the access panel, remove two screws from
bottom edge of access panel.
2. Gently lower the access panel to disengage locators from bot-
tom edge of front panel.
3. Set drying time to 60 minutes, if applicable.
4. Close the loading door. Start the dryer in a heat setting (refer
to dryer's Operating Instructions). The dryer will start, the ig-
niter will glow red, and the main burner will ignite.
5. Allow the dryer to operate for approximately five minutes,
then loosen the air shutter lockscrew. Refer to
.
6. Turn the air shutter to the left to get a luminous yellow tipped
flame, then turn it back slowly to the right to obtain a steady
blue flame.
7. After proper flame is obtained, tighten air shutter lockscrew
firmly. Refer to
8. Reinstall access panel and screws.
WARNING
To reduce the risk of fire or serious injury, the ac-
cess panel must be in place during normal opera-
tion.
W262
NOTE: After the dryer has operated for approximately
three minutes, exhaust air or exhaust pipe should be
warm.
Adjustments
©
Copyright, Alliance Laundry Systems LLC -
DO NOT COPY or TRANSMIT
65
Part No. D515519R3
Summary of Contents for BD3NGBGS303EW01
Page 2: ......


