Step 3:
To adjust the angle of legrest, pull on the lever located underneath
the seat whilst pulling legrest upwards or pushing down. Release
lever once desired angle has been achieved to lock legrest securely
into place.
To adjust the height of the legrest undo bolt located above footplate, pull or push the
bar until desired length is achieved, line two holes up and replace bolt and tighten.
3.5
ADJUSTING THE BACK HEIGHT
Where to adjust the backcane height
When looking at the rear of the
wheelchair, where the round
backcane tubes meet and enter
the square tubes of the frame,
three bolts are visible. By removing
these bolts it is possible to adjust
the height of the back.
Adjusting the back height
Step 1:
Remove the two top bolts on each side of the backcanes (see arrow
A in fig 3.5 above) - 4 bolts in total
One pair of identical 5mm allen key head bolts are positioned closely
together and towards the top of the square frame tubing. These run
through both the frame and the backcanes. They are attached with a
nut and spaced with small washers.
Step 2:
Remove the lower bolt on each cane if necessary (see arrow B in
see fig. 3.5 above) - 2 bolts in total
A third bolt is attached through the rear of the swingaway armrests
and the square frame tube.
This bolt is located directly below the bolts described in Step 1. It is
above and unrelated to the axle block and bolts that attach the wheel
to the frame.
*Only when the backcanes are already set relatively low will this bolt also
have to be removed to adjust the backcane height.
A
B
Figure 3.5
Step 2(cont):
down the quick-release mechanism (see fig 3.2).
Step 3:
Pull the wheel off.
3.2.2
To attach the rear wheel
Step 1:
Ensure that the brake is in the OFF position.
Step 2:
Take up the assembled wheel and axle and press the button in the
centre of the axle. This retract the ball bearings that will allow you
to push the axle into the wheel bracket that is located on the lower
rear frame of the wheelchair.
Step 3:
Remove your thumb from the button on the axle, the ball bearings
should now be visible protruding from the axle at the back of the
wheel bracket. The wheel should now be secured safely in the frame.
3.3
FITTING AND ADJUSTING A STUMP SUPPORT
Step 1:
Remove the standard footrest by pulling
the release lever and rotate the footrest
until it faces outwards. Lift and remove.
Step 2:
Locate the stump support onto the
frame lugs (at about 90 degrees to the
side of the frame) and rotate it inwards
until the support locks into place.
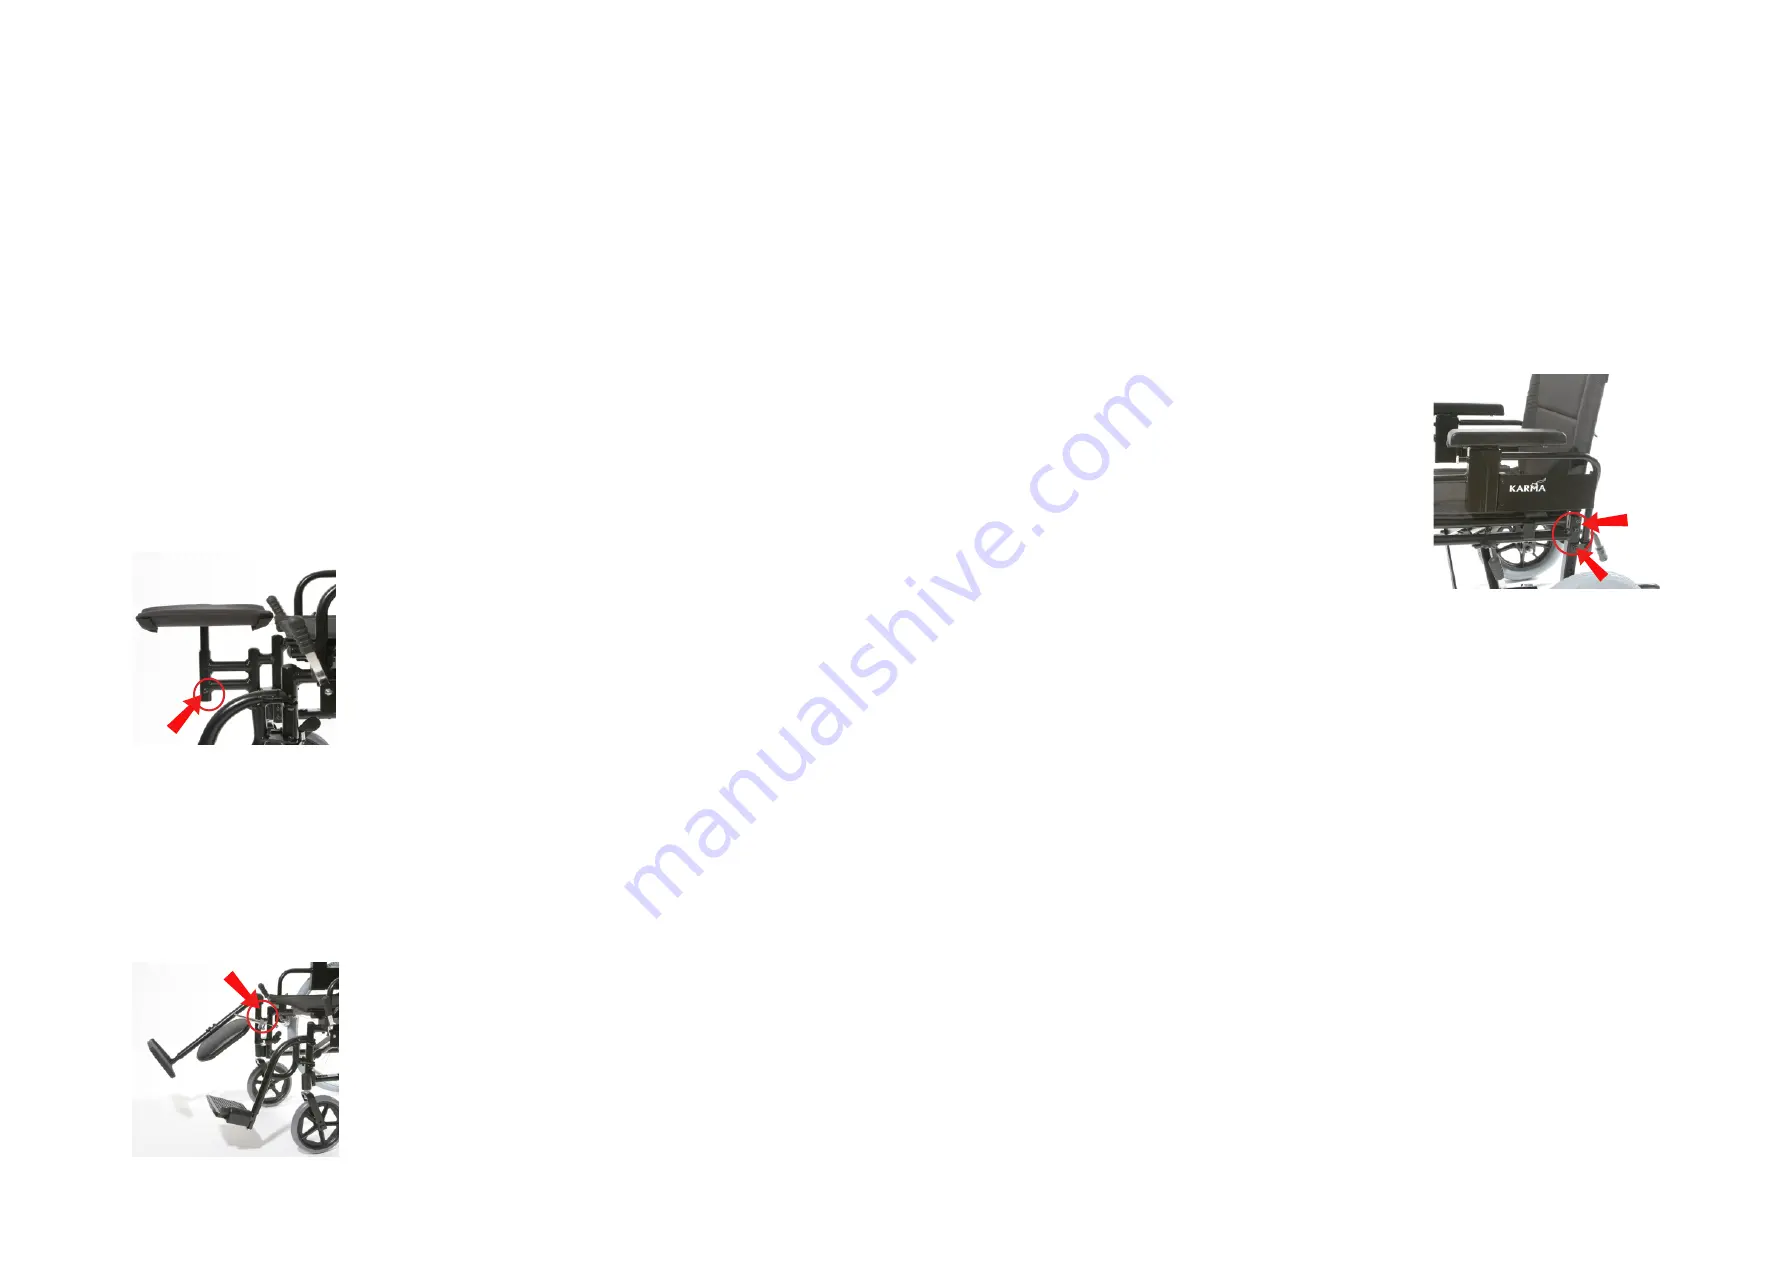
Step 3:
To adjust the height, undo the bolt located on the bar underneath the
stump support, lift the support until the desired height is achieved,
replace the bolt and tighten.
3.4
FITTING AND ADJUSTING AN ELEVATING LEGREST
Step 1:
Remove the standard footrest by pulling
the release lever and rotate the footrest
until it faces outwards. Lift and remove.
Step 2:
Locate the elevating legrest onto the
frame lugs (at about 90 degrees to the
side of the frame) and rotate it inwards
until the legrest locks into place.
Figure 3.3
Figure 3.4
Page 7
Page 8
Step 3:
To adjust the angle of legrest, pull on the lever located underneath
the seat whilst pulling legrest upwards or pushing down. Release
lever once desired angle has been achieved to lock legrest securely
into place.
To adjust the height of the legrest undo bolt located above footplate, pull or push the
bar until desired length is achieved, line two holes up and replace bolt and tighten.
3.5
ADJUSTING THE BACK HEIGHT
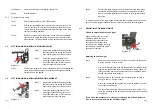
Where to adjust the backcane height
When looking at the rear of the
wheelchair, where the round
backcane tubes meet and enter
the square tubes of the frame,
three bolts are visible. By removing
these bolts it is possible to adjust
the height of the back.
Adjusting the back height
Step 1:
Remove the two top bolts on each side of the backcanes (see arrow
A in fig 3.5 above) - 4 bolts in total
One pair of identical 5mm allen key head bolts are positioned closely
together and towards the top of the square frame tubing. These run
through both the frame and the backcanes. They are attached with a
nut and spaced with small washers.
Step 2:
Remove the lower bolt on each cane if necessary (see arrow B in
see fig. 3.5 above) - 2 bolts in total
A third bolt is attached through the rear of the swingaway armrests
and the square frame tube.
This bolt is located directly below the bolts described in Step 1. It is
above and unrelated to the axle block and bolts that attach the wheel
to the frame.
*Only when the backcanes are already set relatively low will this bolt also
have to be removed to adjust the backcane height.
A
B
Figure 3.5
Step 2(cont):
down the quick-release mechanism (see fig 3.2).
Step 3:
Pull the wheel off.
3.2.2
To attach the rear wheel
Step 1:
Ensure that the brake is in the OFF position.
Step 2:
Take up the assembled wheel and axle and press the button in the
centre of the axle. This retract the ball bearings that will allow you
to push the axle into the wheel bracket that is located on the lower
rear frame of the wheelchair.
Step 3:
Remove your thumb from the button on the axle, the ball bearings
should now be visible protruding from the axle at the back of the
wheel bracket. The wheel should now be secured safely in the frame.
3.3
FITTING AND ADJUSTING A STUMP SUPPORT
Step 1:
Remove the standard footrest by pulling
the release lever and rotate the footrest
until it faces outwards. Lift and remove.
Step 2:
Locate the stump support onto the
frame lugs (at about 90 degrees to the
side of the frame) and rotate it inwards
until the support locks into place.
Step 3:
To adjust the height, undo the bolt located on the bar underneath the
stump support, lift the support until the desired height is achieved,
replace the bolt and tighten.
3.4
FITTING AND ADJUSTING AN ELEVATING LEGREST
Step 1:
Remove the standard footrest by pulling
the release lever and rotate the footrest
until it faces outwards. Lift and remove.
Step 2:
Locate the elevating legrest onto the
frame lugs (at about 90 degrees to the
side of the frame) and rotate it inwards
until the legrest locks into place.
Figure 3.3
Figure 3.4
Page 7
Page 8


