22
45-074, REV. 5/18
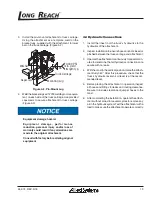
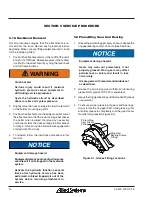
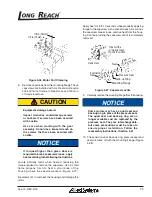
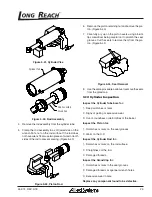
2. Place the motor in a vice and clamp across the edge of
the flange with output shaft down. When clamping, use
a protective device on the vise such as special soft jaws,
pieces of hard rubber or board. (Figure 5-22)
Figure 5-22, Motor Clamping
NOTICE
Equipment damage hazard.
Excessive clamping pressure on the side
of the housing causes distortion.
Use caution when clamping the motor
housing.
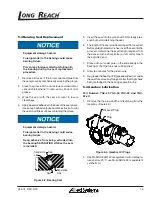
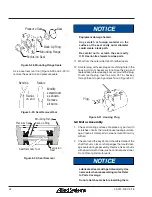
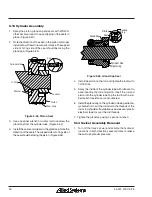
3. Remove the capscrews and seal washers (if appli-
cable) from the end cap. The seal on the end cap can
now be serviced. (Figure 5-23)
End cap
Capscrew
Seal
Washer
Figure 5-23, End Cap
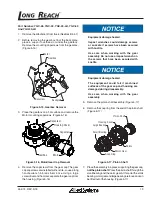
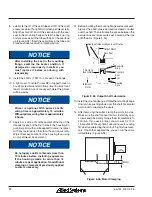
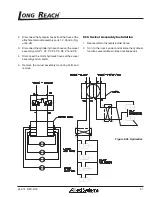
4. Remove the gerotor and the drive spacer (if appli-
cable). The seal on the gerotor can now be serviced.
(Figure 5-24)
Gerotor
Drive spacer
Seal
Figure 5-24, Gerotor
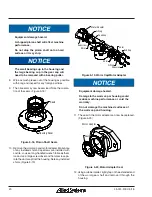
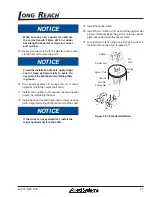
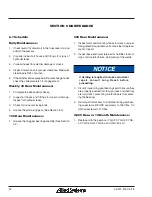
5. Remove the drive and the spacer plate. The seal in
the housing can now be serviced. (Figure 5-25)
Figure 5-25, Drive
6. Remove the output shaft and the needle thrust bear-
ing from the housing.
7. Reposition the motor in the vise. Clamp the motor
across the ports as shown in (Figure 5-26). Do not
clamp on the side of the housing. Be careful not to
clamp too hard, as too much pressure could distort
the motor housing.

