23
45-074, REV. 5/18
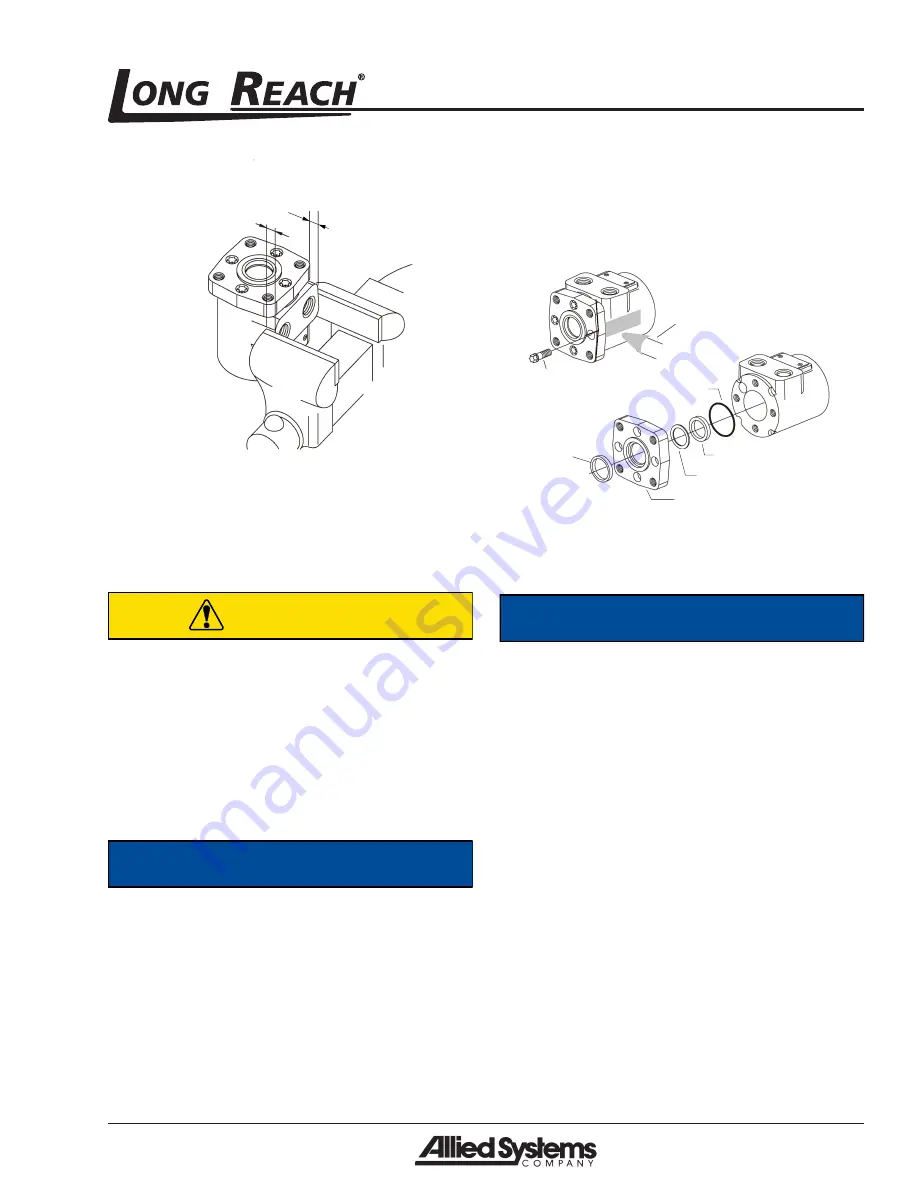
1/2 in. (13mm)
1/2 in. (13mm)
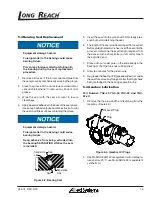
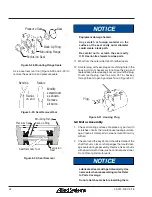
Figure 5-26, Motor Port Clamping
8. Remove capscrews from the mounting flange. These
capscrews are installed with Loctite and will require
300-400 lb-in of torque to break loose and 100 lb-in
of torque to remove.
CAUTION
Equipment damage hazard.
Impact wrenches could damage screws
or sockets if screws have been secured
with Loctite.
Use care when working with the gear
assembly. Do not use a impact wrench on
the screws that have been secured with
Loctite.
NOTICE
If torqued higher than given above is
required to break capscrews loose, apply
heat according to the following instructions.
Loctite partially melts when heated, reducing the
torque required to remove the capscrew. Use a small
flame propane torch to heat a small area of the
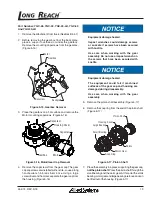
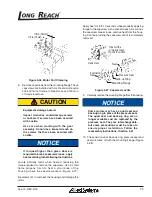
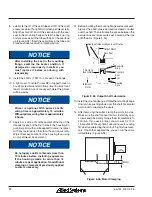
housing where the capscrew enters (Figure 5-27).
Be careful not to overheat the housing and damage the
motor.
Apply heat for 8 to 10 seconds while gradually applying
torque to the capscrew with a socket wrench. As soon as
the capscrew breaks loose, remove heat from the hous-
ing. Continue turning the capscrew until it is completely
removed.
Exclusion
Seal
Back-up Ring
Capscrew
Heat with a
propane torch
to melt Loctite
Pressure Seal
Mounting Flange
Seal
Figure 5-27, Capscrew Loctite
9. Carefully remove the mounting flange from the housing.
NOTICE
Some motors may have a quad seal and
back-up ring in place of the pressure seal.
The quad seal and back-up ring are no
longer available and are replaced by the
pressure seal. They are interchangeable,
but some precautions must be taken to
ensure proper installation. Follow the
reassembly instructions. (Section 5.8)
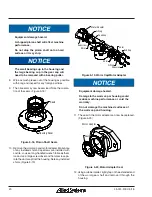
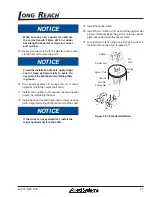
10. The exclusion seal, back-up ring, pressure seal and
seal will come off with the mounting flange (Figure
5-28).

