25
45-074, REV. 5/18
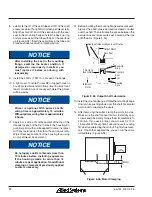
NOTICE
Fully cured Loctite resists most solvents,
oils, gasoline and kerosene and is not
affected by cleaning operations. It is not
necessary to remove cured Loctite that is
securely bonded in tapped holes; however,
any loose particles of cured Loctite should
be removed.
A. Wash the housing with solvent to remove oil,
grease and debris. Pay particular attention to four
tapped holes on the flange end.
B. Blow dry with compressed air. Clean and dry
tapped holes.
C. Wire brush screw threads to remove cured Loc-
tite and other debris. Discard any capscrews that
have damaged threads or rounded heads.
D. Wash capscrews with non-petroleum base sol-
vent. Blow dry with compressed air.
3. If you remove a plug or seal, lubricate the new seal and
install on plug. Some plugs have two O-ring grooves
but require only one O-ring. Install O-ring in groove
closest to the end of the plug. Push the plug into the
housing so the plug and housing are flush. Be careful
not to damage the seal.
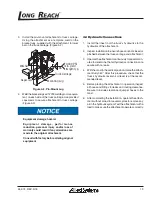
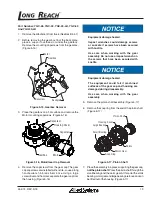
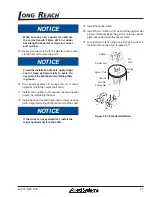
4. Lubricate the output shaft with hydraulic oil, then install
the output shaft into the housing. (Figure 5-32)
Output shaft
Bearing race
Lubricate these areas
Needle thrust bearing
Figure 5-32, Output Shaft
NOTICE
Do not permit oil to get into the four tapped
holes.
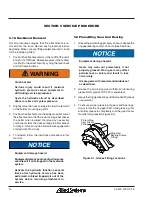
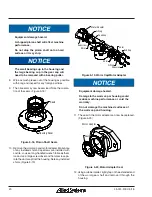
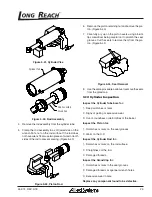
5. Install the needle thrust bearing, then the bearing race
onto the output shaft. Pull the output shaft partially out
of the housing. Push all three parts into the housing
together (Figure 5-33). The bearing race must rotate
freely when in position.
Figure 5-33, Output Shaft In Position
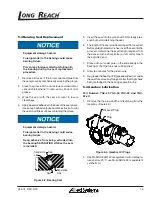
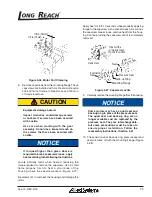
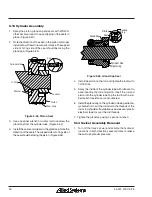
6. Install the exclusion seal into the mounting flange.
Carefully press the exclusion seal into place. (Figure
5-34)
Seal
Driver
Seal Tube
Backup
Ring
Mounting
Flange
Exclusion
Seal
Shaft
Pressure Seal
Figure 5-34, Seal Installation
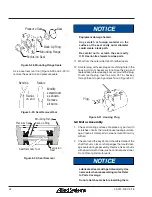
7. Visually check the seal seat in the mounting flange
for scratches or other marks that might damage the
pressure seal. Check for cracks in the mounting flange
that could cause leakage.

