45-008 REV. 1/22
18
4. Inspect for proper engagement of the locking lug in the notch closest to the center
of the truck’s carriage.
5. Weld on the (optional) extra locking lug supplied with the attachment, (two pieces
of 1/2" x 1/2" x 2.00" steel, shipped loose) with either E-6011 or E-6013 welding
rod, or equivalent, on each side of the truck carriage.
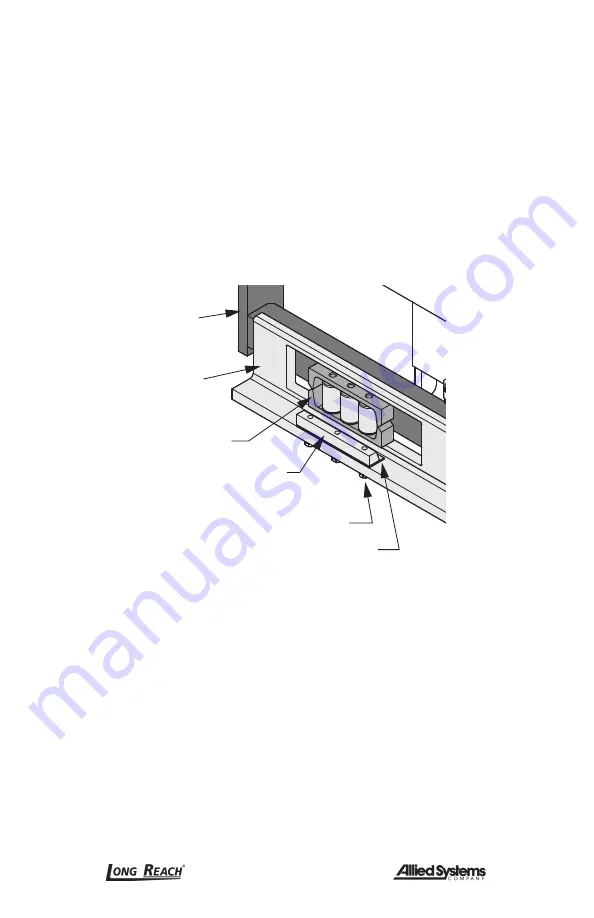
4.2.4 Lower Roller Assemblies (if Applicable)
1. Move the attachment away from the carriage about two inches. Place a block
between the attachment and the carriage to hold it in position.
2. Place the rollers anywhere in the heel plate pockets on the lower right and left
hand sides of the attachment. They are a loose fit, and do not need to face a
particular direction.
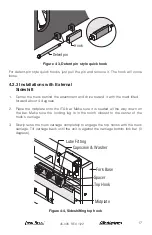
Midplate
Top Hook
Bottom
Bar
Bottom Hook
Spacer
Lower Roller
Assembly
Fork
Base
Capscrew &
Lockwasher
Fork Base
Capscrew & Washer
Spacer
Lube Fitting
Figure 4-5, Lower hooks and rollers for
sideshifter models
3. Gently move the bottom of the attachment out to remove the block. Lower the
attachment down the face of the carriage. Ensure that the rollers remained in the
pockets and are in contact with the carriage.
4. Install the bolt-on lower hooks. Inspect clearance between the carriage and the lower
hooks. Add or subtract shims under the lower hooks so the clearance is no more
than 3/32". On Class II and Class lll units, tighten the 3/8" bolts to
33 ft-lbs
. On Class
lV units tighten the 1/2" bolts to
77 ft-lbs.
On units using 9/16" UNC bolts, tighten the
bolts to
112
ft-lbs
.

