Chapter 5: Installing the Switch on a Wall
82
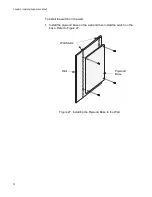
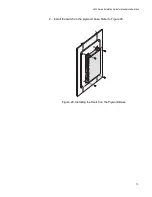
7. Have another person hold the switch at the selected wall location while
you secure it to the wall with the M4x32mm screws provided. Refer to
Figure 34. Installing the Switch on a Concrete Wall
8. Go to Chapter 6, “Powering On the Switch” on page 83.
35
17
9
1
1
1
3
1
5
1
7
1
9
21
23
27/S1
28/S2
25
SFP+
26
AT-x530-28GTXm
16
18
20
14
10G
/
1G
46
8
1
0
1
2
2
22
24
FDX
HDX COL
1G LINK
AC
T
100 LINK
AC
T
5G/2.5G/1G LINK
AC
T
100 LINK
AC
T
POR
TS 21-24
POR
TS 1-20
5G/2.5G/1G/100
CLASS
1
LASER PRODUCT
CONSOLE
4597
Summary of Contents for AlliedWare Plus AT-x530 Series
Page 10: ...Tables 10...
Page 14: ...Preface 14...
Page 58: ...Chapter 3 Installing the Switch on a Table 58...
Page 90: ...Chapter 6 Powering On the Switch 90...

