AT-DC2552XS / L3 Enterprise Core Switch Installation Guide
57
Installing the Switch in an Equipment Rack
Note
To install the switch on a desktop, refer to “Installing the Switch on a
Desktop” on page 56.
When installing the AT-DC2552XS / L3 switch in a 19 inch rack, it must
always be mounted horizontally with the top side up; see Figure 1 on page
19 and Figure 2 on page 22. The switch can be oriented and positioned in
the rack in four different ways. This is determined by where you install the
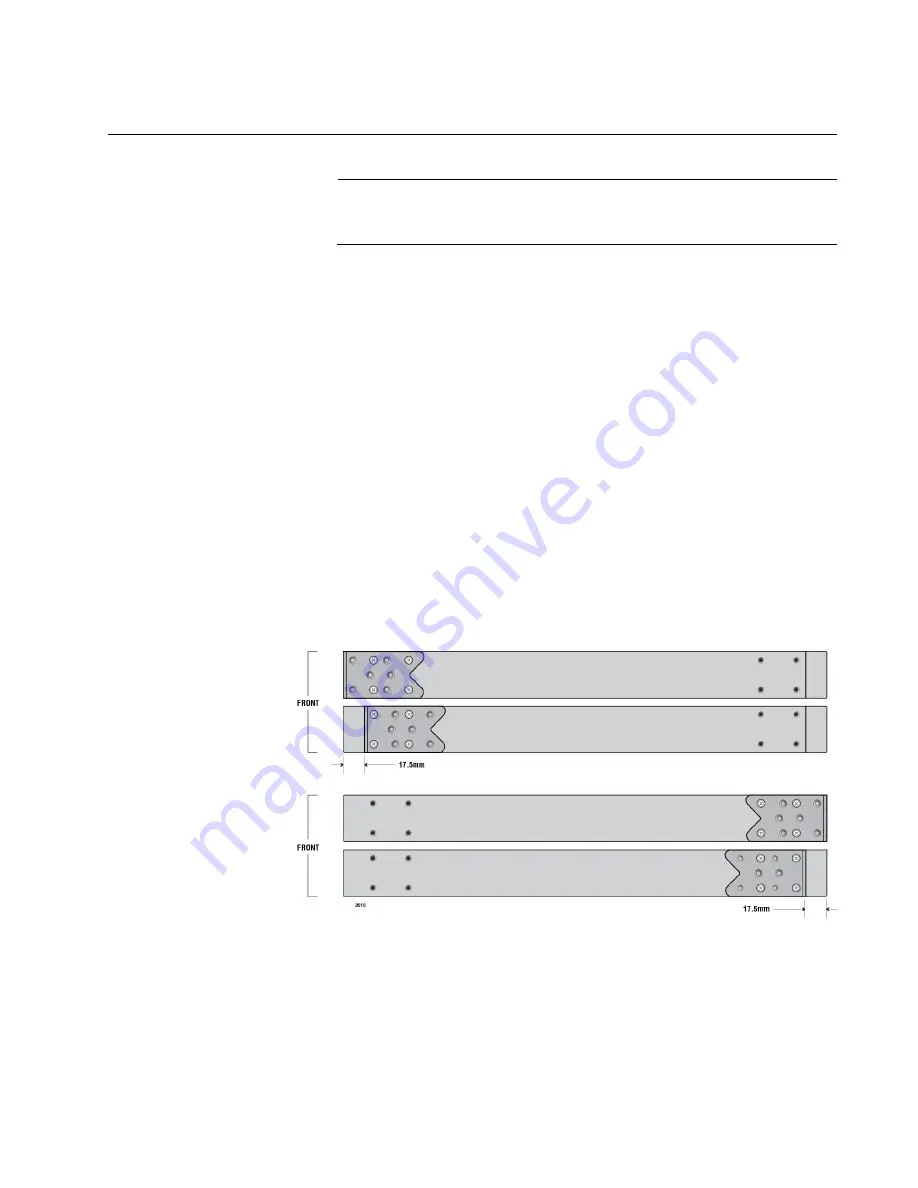
two rack mount brackets that are provided. The four possible positions for
the brackets are:
Flush with the rear of chassis so the rear of the chassis is even
with the vertical rack rails.
Offset by 17.5 cm from the rear of the chassis so that the rear of
the chassis protrudes beyond the vertical rack rails by 17.5 cm.
Flush with the front of chassis so the front of the chassis is even
with the vertical rack rails.
Offset by 17.5 cm from the front of the chassis so that the front of
the chassis protrudes beyond the vertical rack rails by 17.5 cm.
These four possible bracket locations are illustrated in Figure 21.
Figure 21. Possible Bracket Locations
Summary of Contents for AT-DC2552XS
Page 1: ...613 002097 Rev A AT DC2552XS L3 ENTERPRISE CORE SWITCH Installation Guide...
Page 8: ...Figures 8...
Page 10: ...Tables 10...
Page 14: ...Preface 14...
Page 34: ...Chapter 1 Overview 34...
Page 44: ...Chapter 2 VCStack Overview 44...
Page 86: ...Chapter 7 Managing the Switch 86...
Page 90: ...Chapter 8 Troubleshooting 90...

