AT-SBx908 GEN2 Installation Guide for Virtual Chassis Stacking
91
Installing AT-SBxPWRSYS1-80 DC Power Supplies
This section contains the installation procedure for AT-SBxPWRSYS1-80
DC Power Supplies. For a list of the components that come with the power
supply, refer to “Unpacking AT-SBxPWRSYS1-80 DC Power Supplies” on
page 76.
Warning
The power supply is heavy. Use both hands to lift it. You might injure
yourself or damage the equipment if you drop it.
Caution
The device can be damaged by static electricity. Be sure to follow
proper anti-static precautions when installing the device. Allied
Telesis recommends using a properly grounded wrist strap or other
personal anti-static device and an anti-static mat.
To install AT-SBxPWRSYS1-80 DC Power Supplies in the chassis,
perform the following procedure:
1. Choose a slot for the power supply. The power supply slots are labeled
PSU A and PSU B
If you are installing only one power supply, you may install it in either
slot. Allied Telesis recommends PSU A because that slot does not
come with a blank power supply panel.
2. If there is already a power supply in PSU A, lift the handle on the blank
power supply panel in PSU B and slide the panel from the slot. Refer to
Figure 40 on page 88.
3. Verify that the On/Off switch on the power supply is in the Off position.
Refer to Figure 44 on page 92.
Summary of Contents for AT-FAN08
Page 10: ...Figures 10...
Page 12: ...Tables 12...
Page 16: ...Preface 16...
Page 38: ...Chapter 1 Overview 38...
Page 60: ...Chapter 2 Virtual Chassis Stacking 60...
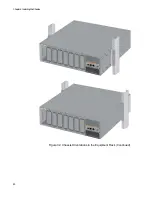
Page 82: ...Chapter 4 Installing the Chassis 82 Figure 34 Example of Adjusting the Equipment Rack Brackets...
Page 104: ...Chapter 4 Installing the Chassis 104...
Page 140: ...Chapter 5 Powering On the Chassis 140...
Page 166: ...Chapter 7 Cabling the AT XEM2 Line Card Ports 166...


