Chapter 5: Powering On the Chassis
106
Verifying the Installation
Please perform the following procedure before powering on the chassis:
1. Verify that the chassis has at least one power supply in slot PSU A or
B.
2. If the chassis has only one power supply, verify that the empty power
supply slot on the front panel is covered with a blank panel. For
instructions, refer to “Installing the Blank Power Supply Slot Cover” on
page 101.
3. Verify that you installed the power cord retaining clips on the AC power
connectors on the rear panel of the chassis. For instructions, refer to
“Installing the Power Cord Retaining Clips” on page 103
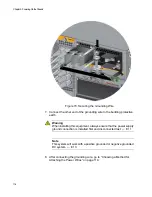
4. Verify that the grounding lug on the back panel of the chassis is
properly grounded. For instructions, refer to “Installing the Chassis
Grounding Wire” on page 84.
5. Verify that all empty line card slots on the front panel of the chassis are
covered with slot covers. If there are open slots, perform the procedure
“Installing Blank Line Card Slot Covers” on page 99.
You may now power on the chassis. For instructions, refer to “Powering
On AT-SBxPWRSYS2 Power Supplies” on page 107 or “Powering On AT-
SBxPWRSYS1-80 DC Power Supplies” on page 110:
Summary of Contents for AT-FAN08
Page 10: ...Figures 10...
Page 12: ...Tables 12...
Page 16: ...Preface 16...
Page 38: ...Chapter 1 Overview 38...
Page 60: ...Chapter 2 Virtual Chassis Stacking 60...
Page 82: ...Chapter 4 Installing the Chassis 82 Figure 34 Example of Adjusting the Equipment Rack Brackets...
Page 104: ...Chapter 4 Installing the Chassis 104...
Page 140: ...Chapter 5 Powering On the Chassis 140...
Page 166: ...Chapter 7 Cabling the AT XEM2 Line Card Ports 166...


