7
Figure 1: AT-FS909M, AT-FS917M, and AT-FS926M Front Panels ................................................................................... 18
Figure 2: AT-FS909M, AT-FS917M, and AT-FS926M Back Panels ................................................................................... 19
Figure 3: STATUS LEDs...................................................................................................................................................... 23
Figure 4: MODE LEDs ......................................................................................................................................................... 24
Figure 5: Port LEDs ............................................................................................................................................................. 25
Figure 6: SFP Slot LEDs ..................................................................................................................................................... 26
Figure 7: Shipping Package Contents ................................................................................................................................. 38
Figure 8: Power Cord Retaining Clip ................................................................................................................................... 39
Figure 9: Power Cord Retaining Plates ............................................................................................................................... 39
Figure 10: Installing Retaining Plates on the Power Connector .......................................................................................... 40
Figure 11: Inserting the Retaining Clip into the Retaining Bracket ...................................................................................... 40
Figure 12: Attaching the Rack-Mount Brackets to the Switch.............................................................................................. 42
Figure 13: Mounting the Switch in an Equipment Rack ....................................................................................................... 42
Figure 14: Removing the Dust Plug from an SFP Slot ........................................................................................................ 44
Figure 15: Inserting the SFP................................................................................................................................................ 45
Figure 16: Positioning the SFP Handle in the Upright Position ........................................................................................... 45
Figure 17: Plugging in the AC Power Cord.......................................................................................................................... 48
Figure 18: RJ-45 Connector and Port Pin Layout................................................................................................................ 55
Figures
Summary of Contents for AT-FS909M
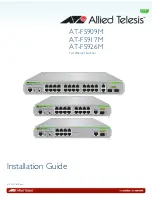
Page 1: ...613 001985 Rev A AT FS909M AT FS917M AT FS926M Fast Ethernet Switches Installation Guide...
Page 6: ...Contents 6...
Page 8: ...List of Figures 8...
Page 10: ...List of Tables 10...
Page 14: ...14...
Page 30: ...Chapter 1 Overview 30...
Page 50: ...Chapter 2 Installation 50...


