Chapter 4: Installing the Switch on a Wall
80
1. Perform steps 1 to 3 in “Installing the Switch in an Equipment Rack” on
page 60 to remove the rubber feet from the bottom of the switch.
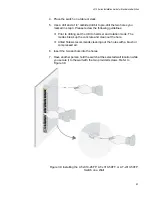
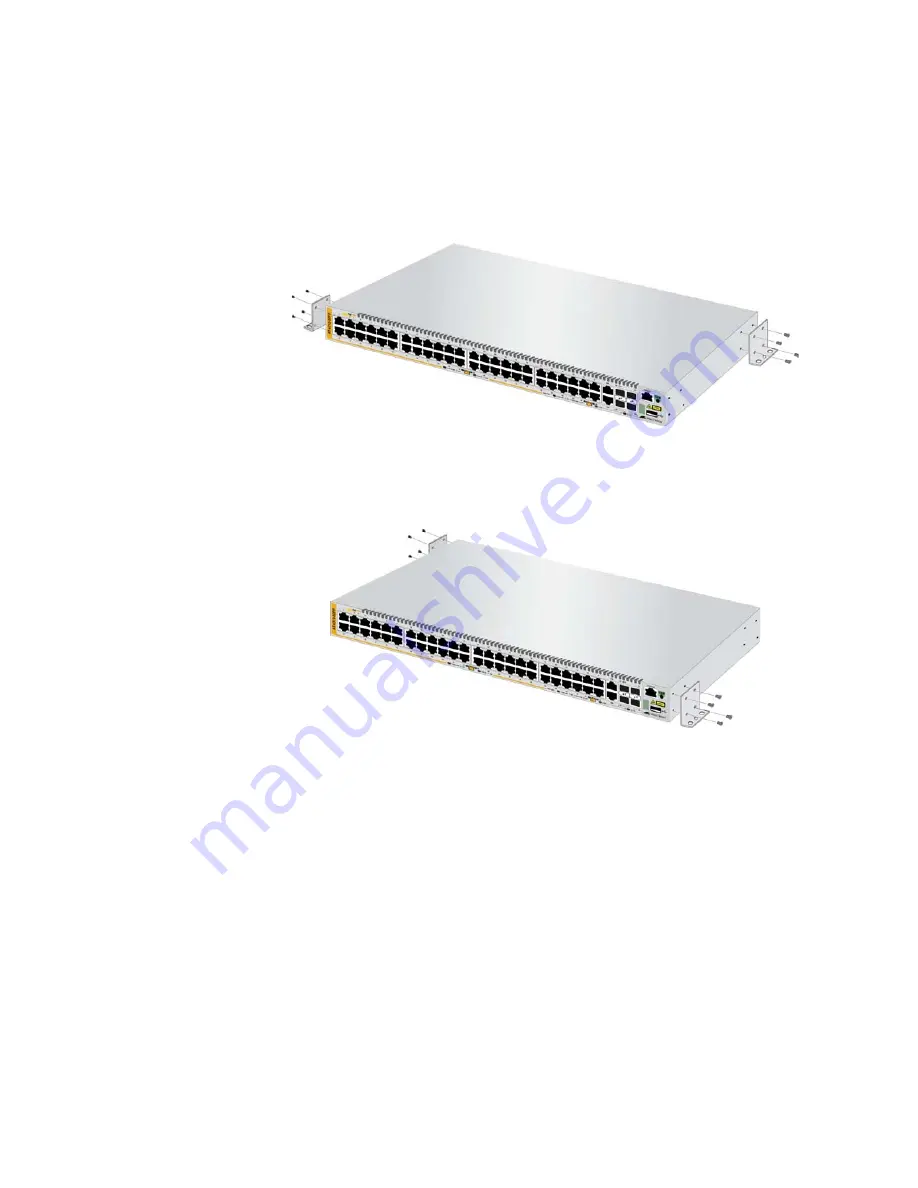
2. Install the two brackets diagonally across from each other on the sides
of the switch, with the eight bracket screws included with the device.
Refer to Figure 36.
Figure 36.
Attaching the Brackets for Wall Installation for All Switches
Except the AT-x310-26FT Switch
3. Have another person hold the switch on the plywood base on the wall
while you secure it with the two provided screws. Refer to Figure 37 on
page 81.
As you position the switch on the wall, be sure to leave sufficient space
from other devices or walls so that you can access the front and back
panels. Refer to “Recommended Minimum Wall Area Dimensions” on
page 73.
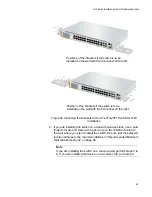
Positions of the brackets if the switch is to be
installed on the wall with the front panel on the left.
Position of the brackets if the switch is to be installed
on the wall with the front panel on the right.
Summary of Contents for AT-x310-26FP
Page 10: ...Tables 10 ...
Page 14: ...Preface 14 ...
Page 46: ...Chapter 1 Overview 46 ...
Page 56: ...Chapter 2 Beginning the Installation 56 ...
Page 92: ...Chapter 5 Cabling the Networking Ports 92 ...

