TQ6000 GEN2 Access Points User’s Guide
24
Starting the First
Management
Session with a
Direct
Connection
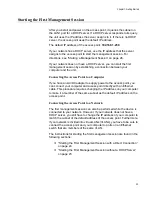
To start the management session with a direct Ethernet connection
between your computer and the LAN1 port on the access point, perform
the following procedure:
Note
If the access point uses PoE as a power source, you cannot perform
this procedure because it requires a direct connection between your
computer and the LAN1 port on the access point. This procedure
works when you have the optional power supply for the access
point. Without the optional power supply, perform “Starting the First
Management Session without a DHCP Server” .
1. Connect one end of a network cable to the LAN1 port on the access
point and the other end to the Ethernet network port on your computer.
2. Change the IP address on your computer to 192.168.1.
n
, where
n
is a
number from 1 to 254, but not 230.
See the documentation that accompanies your computer for
instructions on how to set the IP address.
3. Set the subnet mask on your computer to 255.255.255.0.
4. Power on the access point.
5. Start the web browser on your computer.
6. Enter the IP address 192.168.1.230 in the URL field of the browser
and press the Enter key.
You should now see the login window, shown in Figure 1 on page 26.
7. Enter the user name and password.
User name:
manager
Password:
friend
Note
The user name and password are case-sensitive.
8. Click the Login button.
Summary of Contents for TQ6000 GEN2
Page 4: ......
Page 8: ...TQ6000 GEN2 Access Points User s Guide 8 ...
Page 12: ...TQ6000 GEN2 Access Points User s Guide 12 ...
Page 16: ...TQ6000 GEN2 Access Points User s Guide 16 ...
Page 40: ...TQ6000 GEN2 Access Points User s Guide 40 Figure 6 Log Window for Event Messages ...
Page 68: ...TQ6000 GEN2 Access Points User s Guide 68 ...
Page 92: ...TQ6000 GEN2 Access Poinst User s Guide 92 ...
Page 102: ...TQ6000 GEN2 Access Poinst User s Guide 102 ...
Page 156: ...TQ6000 GEN2 Access Points User s Guide 156 Configuring Passpoint Passpoint is not supported ...
Page 159: ...Chapter 8 Quality of Service 159 Figure 55 QoS Window ...


