x950 Series Installation Guide for VCStack
261
If the trunk is using fiber optic transceivers, verify that they are fully
inserted into the ports.
Verify that the transceivers are from Allied Telesis.
Verify that the fiber optic cables are securely connected to the
ports on the transceivers.
Display the running configurations and confirm the ports of the
stack trunk. They are identified by the STACKPORT command. In
this example from a running configuration, ports 1 to 4 are the
stack trunk:
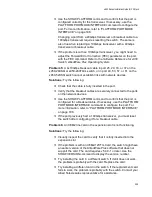
interface port1.0.1-1.0.4
stackport
If necessary, repeat the STACKPORT command. For information,
refer to “STACKPORT” on page 189. Afterwards, save your
changes and reboot the switch.
Problem 10:
You removed a port from a stack trunk with the NO
STACKPORT command, but the port is still not forwarding regular
Ethernet traffic.
Display the running configuration to verify that the port is no longer
part of the stack trunk.
You have to reboot the switch whenever you add or remove ports
from stack trunks with the STACKPORT and NO STACKPORT
commands. Be sure to save the change to the configuration file
with the WRITE command before rebooting the unit.
Problem 11:
The switch overheats and shuts down.
Solutions:
Try the following:
Verify that the location of the switch allows for adequate airflow.
If the switch is operating, use the SHOW SYSTEM
ENVIRONMENT command in the Privileged Exec mode to verify
that the power supplies and fan modules are operating properly.
Problem 12:
The switch functions intermittently.
Solutions:
Try the following:
Use the SHOW SYSTEM ENVIRONMENT command in the
Privileged Exec mode to verify that the input voltage from the
power source to the switch is stable and within the approved
operating range. The unit will shut down if the input voltage
fluctuates above or below the approved operating range.
Use the SHOW SYSTEM ENVIRONMENT command in the
Privileged Exec mode to verify that the fan modules are operating
correctly.
Summary of Contents for x950 Series
Page 12: ...Figures 12 ...
Page 18: ...Preface 18 ...
Page 50: ...Chapter 1 Overview 50 ...
Page 70: ...Chapter 2 XEM2 Ethernet Line Cards 70 ...
Page 134: ...Chapter 5 Installing Power Supplies and Optional XEM2 Line Card 134 ...
Page 146: ...Chapter 7 Installing the Switch in an Equipment Rack 146 ...
Page 162: ...Chapter 8 Installing the Switch on a Wall 162 ...
Page 224: ...Chapter 12 Powering On and Verifying the Stack 224 ...
Page 256: ...Chapter 14 Replacing Modules 256 ...

