70
2.
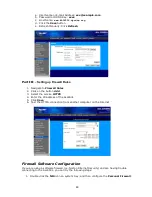
On the
Programs
page, find the
SetupWizard.exe
and change its permission to
"Permit All". If it's not in the program list, use the
Add
or
Program Scan
buttons to
find it.
3.
On the
Networking
page, manually add ALL6501 IP address to the
Trusted
list.
Replacing Damaged Hard Drives
If you are using RAID 1, you can easily replace a damaged hard drive in the ALLNET ALL6501
while keeping your data secure with the system’s automatic data recovery.
Hard Drive Damage
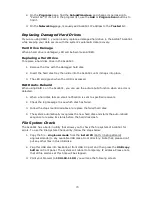
When a hard drive is damaged, LED will be become solid RED.
Replacing a Hard Drive
To replace a hard disk drive in the ALL6501:
1.
Remove the tray with the damaged hard disk.
2.
Insert the hard disk tray then slide into the ALL6501 until it snaps into place.
3.
The LED solid green when the HDD is accessed.
RAID Auto-Rebuild
When using RAID 1 on the ALL6501, you can use the auto-rebuild function when an error is
detected.
1.
When a hard disk fails an email notification is sent to specified receivers.
2.
Check the log message to see which disk has failed.
3.
Follow the steps mentioned above to replace the failed hard disk.
4.
The system automatically recognizes the new hard disk and starts the auto-rebuild
sequence to resume its status before the hard disk crash.
File System Check
The ALL6501 has a built-in utility that allows you to check the file system of ALL6501 for
errors. To use the File System Check utility, follow the steps below:
1.
Copy the file –
singleusermode
from the
install CD
(Path: \\Setup Wizard\
singleusermode) to any available USB disk at root directory. Note that; please don’t
put any other files in this USB disk.
2.
Plug this USB disk into ALL6501 at front USB 2.0 port and then press the
USB copy
button
on front panel. The system will reboot to temporary IP address
.
Please note
that all file services at this time will be stopped.
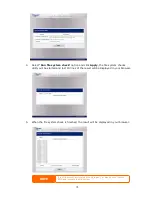
3.
Point your browser to
192.168.1.100
; you will see the following screen.

