


If none of the above resolves your issue, or you require spare parts for your
filter, please contact the supplier of your unit.
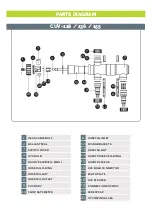
SPECIFICATIONS
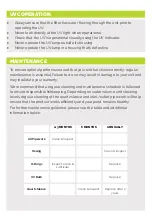
My Pond Water is Cloudy/Brown
1.
Make sure the unit is turned on 24 hours a day. Continuous running is
needed to maintain a clean and healthy pond.
2.
Remove pond waste and leaves and carry out a partial water change. If
sludge is present treat your pond with All Pond Solutions Anti Sludge
treatment.
3.
Reduce feeding. Overfeeding introduces a lot of organic waste and is one of
the main causes for cloudy water problems.
4.
Make sure to perform regular water changes, check your unit is clean and
adequate for your pond size and do not overstock it.
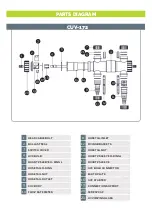
CUV-118
18W
12000
2500 L/H
5m
THROUGH FLOW
STERILISATION AT:
FOR PONDS UP TO (L):
UV POWER (WATTAGE):
CABLE LENGTH:
VOLTAGE:
340
FOR AQUARIUMS UP TO (L):
MODEL:
220-240v
POWER:
20W
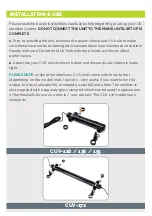
INLET & OUTLET ADAPTER
19, 25, 32 & 38mm
CUV-136
36W
20000
4500 L/H
5m
600
220-240v
40W
19, 25, 32 & 38mm
CUV-155
55W
30000
5000 L/H
5m
800
220-240v
58W
19, 25, 32 & 38mm
CUV-172
72W
35000
6000 L/H
2 x 5m
1000
220-240v
80W
19, 25, 32 & 38mm
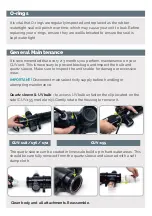
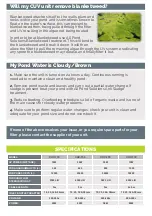
Blanketweed attaches itself to the walls, plant and
rocks within your pond and is sometimes known to
float on the water’s surface, this can prevent to
blanketweed from being pulled through the filter
and UV resulting in the algae not being treated.
In order to treat blanketweed use All Pond
Solutions Blanketweed treatment. This will bind to
the blanketweed and break it down. It will then
allow the filter to pull the remaining algae through the UV system eradicating
any spore the blanketweed may release, and finally filter it out.
My Pond Water is Cloudy/Brown
Will my CUV unit remove blanketweed?


