background image

To ensure your UV Steriliser is set up and running correctly, and to prevent any 

accidental damage or injury, please read and follow the below instructions 

carefully before using your product.


SAFETY

IMPORTANT!


Disconnect the mains electricity supply before attempting any 

installation / maintenance of any kind. Do not attempt to modify this unit in 
any way and only use the recommended parts for replacement.

·    


The CUV steriliser should never be submerged as this will cause  

permanent damage to the unit.

·     

All connections must be earthed.

·     

The power cord of this appliance cannot be replaced; if the cord is 

damaged, the appliance should be discarded. Never cut the cord.

·     

Do not connect to any voltage other than that stated.

·     

Do not use with liquids other than water.

·     

Do not use with water above 90F or 30C.

·     

Do not carry or pull the unit by its electrical cable.

·     

Do not use this unit if it has a damaged cord, if it is malfunctioning or it is 

dropped or damaged in any manner.

·     

Do not attempt to modify this unit in any way and only use attachments and 

the recommended parts for replacement recommended by the 
manufacturer.

·     

Before installing, maintaining or handling your equipment, or before placing 

your hands in your pond, ensure that the unit is disconnected from the 
electricity supply.

·     

Always disconnect any electrical devices when not in use.

·     

Carefully examine your pond system after installation. Do not connect the 

unit to the mains if there is water on any parts not intended to be wet. 

·     

Do not look directly at the UV light when it is operational.

·     

Before operating your CUV system observe that  water is flowing through it 

- the UV requires constant flow to avoid overheating.

Summary of Contents for CUV-118

Page 1: ...POND AQUARIUM UV STERILISER CUV 118 136 155 172 ...

Page 2: ...h liquids other than water Do not use with water above 90F or 30C Do not carry or pull the unit by its electrical cable Do not use this unit if it has a damaged cord if it is malfunctioning or it is dropped or damaged in any manner Do not attempt to modify this unit in any way and only use attachments and the recommended parts for replacement recommended by the manufacturer Before installing maint...

Page 3: ...nit in a sheltered area ensuring all water has been drained from it Do not bury the cord for this unit Ensure it does not cause a trip hazard or it at risk from damage from lawn mowers strimmers or other garden equipment To avoid overheating do not operate when dry PLEASE NOTE this appliance can be used by children aged from 8 years and above and persons with reduced physical sensory or mental cap...

Page 4: ...u regularly inspect the cable for damage and deterioration Do not connect to any voltage other than that stated You consult a qualified electrician if in doubt about any aspects of wiring A residential current device RCD is used for additional safety You have complied with Local Electricity Authority regulations if permanently installing to the mains supply Please Ensure The power supply must be ea...

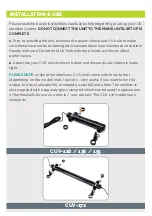
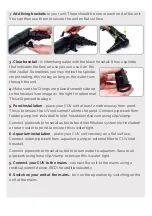
Page 5: ...th bare hands as this can affect performance 2 Assemble your CUV unit as shown below and ensure quartz sleeve is water tight PLEASE NOTE unlike other sterilisers CUV units come with three to four depending on the model inlet outlet s very useful if you want to run the output to a two fall waterfall or indeed a waterfall and a filter The steriliser is also supplied with a separate glass viewport whic...

Page 6: ...d This is to ensure the UV unit cannot fall into the pond Connect pipework from feeder pump not included to inlet hosetail and secure using clip clamp Connect pipework to hosetail outlet to feed into filtration system not included or return water to pond to ensure this is water tight 6 Aquarium installation place your CUV unit securely on a flat surface Connect outlet pipework from aquarium pump or ...

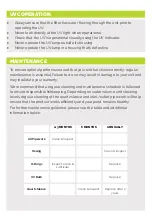
Page 7: ...e to do so may result in damage to your unit and may invalidate your warranty We recommend that a regular cleaning and maintenance schedule is followed to ensure responsible fishkeeping Depending on water volume and stocking levels regular cleaning of the quartz sleeve and inlet outlet pipework will help ensure that the product works efficiently and your pond remains healthy For further maintenance g...

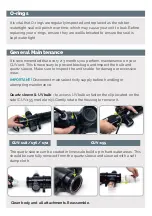
Page 8: ...o prevent blockage and inspect the bulb and quartz sleeve Make sure to inspect the unit s cable for damage or excessive wear IMPORTANT Disconnect mains electricity supply before handling or attempting maintenance Quartz sleeve UV bulb to access UV bulb unfasten the clip located on the side CUV 155 model only Gently rotate the housing to remove it The quartz sleeve can be coated in limescale build ...

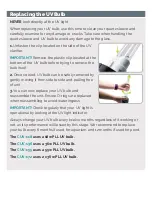
Page 9: ...ely removed by gently moving it from side to side and pulling free of unit 3 You can now replace your UV bulb and reassemble the unit Ensure O rings are replaced when reassembling to avoid water ingress IMPORTANT Check regularly that your UV light is operational by looking at the UV light indicator Always change your UV bulb every twelve months regardless of it working or not as its performance wi...

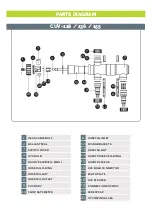
Page 10: ...6 7 HOSETAIL OUTLET 8 5 CUV BODY 9 10 FLOW RATE METER 10 FILTER BOTTOM 11 HOSETAIL INLET 11 12 FIXING BRACKETS 12 QUARTZ SLEEVE HOSETAIL NUT QUARTZ SLEEVE O RING 1 13 14 15 UVC BULB CONNECTOR 16 5 EARTH PLATE 17 10 11 UVC STARTER CONNECTION SUPPORT 18 19 11 SCREW CAP 20 1 2 3 4 5 6 7 9 10 11 12 13 14 15 16 17 18 19 20 8 21 21 UV VIEWING GLASS ...

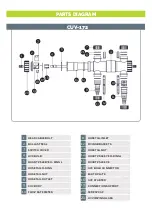
Page 11: ...HOSETAIL OUTLET 8 5 CUV BODY 9 10 FLOW RATE METER 10 FILTER BOTTOM 11 HOSETAIL INLET 11 12 FIXING BRACKETS 12 QUARTZ SLEEVE HOSETAIL NUT QUARTZ SLEEVE O RING 1 13 14 15 UVC BULB CONNECTOR 16 5 EARTH PLATE 17 10 11 UVC STARTER CONNECTION SUPPORT 18 19 11 SCREW CAP 20 1 2 3 4 5 6 7 9 10 11 12 13 14 15 16 17 18 19 20 8 21 21 UV VIEWING GLASS ...

Page 12: ...MPORTANT NEVER look directly at the UV light Press and hold the small thin silver switch when the power is on and the bulb should ignite Please test in a dark shadowed place and do not look directly at the bulb we recommend covering the bulb with kitchen roll or similar You should still be able to see the glow of the bulb through this 5 If the above does not solve the issue replace the UV bulb 6 I...

Page 13: ...d plants such as Lilies are a great way to do this 2 Pump s Flow Rate the flow rate of the pump exceeds the maximum flow rate that the UVC is able to handle Check your unit s specifications and reduce the pump flow rate if needed 3 Filter the pond filter works with the UV steriliser to keep the water clear by removing the dead algae Check if your filter size is adequate to your pond size 4 Quartz Sleeve...

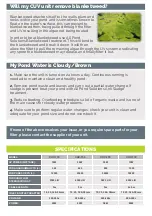
Page 14: ...ISATION AT FOR PONDS UP TO L UV POWER WATTAGE CABLE LENGTH VOLTAGE 340 FOR AQUARIUMS UP TO L MODEL 220 240v POWER 20W INLET OUTLET ADAPTER 19 25 32 38mm CUV 136 36W 20000 4500 L H 5m 600 220 240v 40W 19 25 32 38mm CUV 155 55W 30000 5000 L H 5m 800 220 240v 58W 19 25 32 38mm CUV 172 72W 35000 6000 L H 2 x 5m 1000 220 240v 80W 19 25 32 38mm Blanketweed attaches itself to the walls plant and rocks wi...

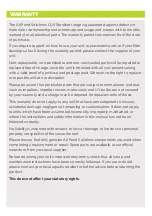
Page 15: ...V bulbs are not covered by your warranty and a charge may be required for replacements of these This warranty does not apply to any unit that has been subjected to misuse accidental damage negligence tampering or customisation It does not apply to units which have been assembled incorrectly improperly maintained or where the instructions and safety information in this manual has not been followed ...

Page 16: ...www allpondsolutions co uk All Pet Solutions Limited Trading as All Pond Solutions Unit 203 Riverside Way Uxbridge Middlesex England UB8 2YF ...

Reviews:

Related manuals for CUV-118