IM1
© 2019 Allstar Innovations. All Rights Reserved. | U.S. Patent 8,307,670 Additional patents pending | Ice Genie is a trademark of Allstar Innovations.
ADDITIONAL BATCHES OF ICE
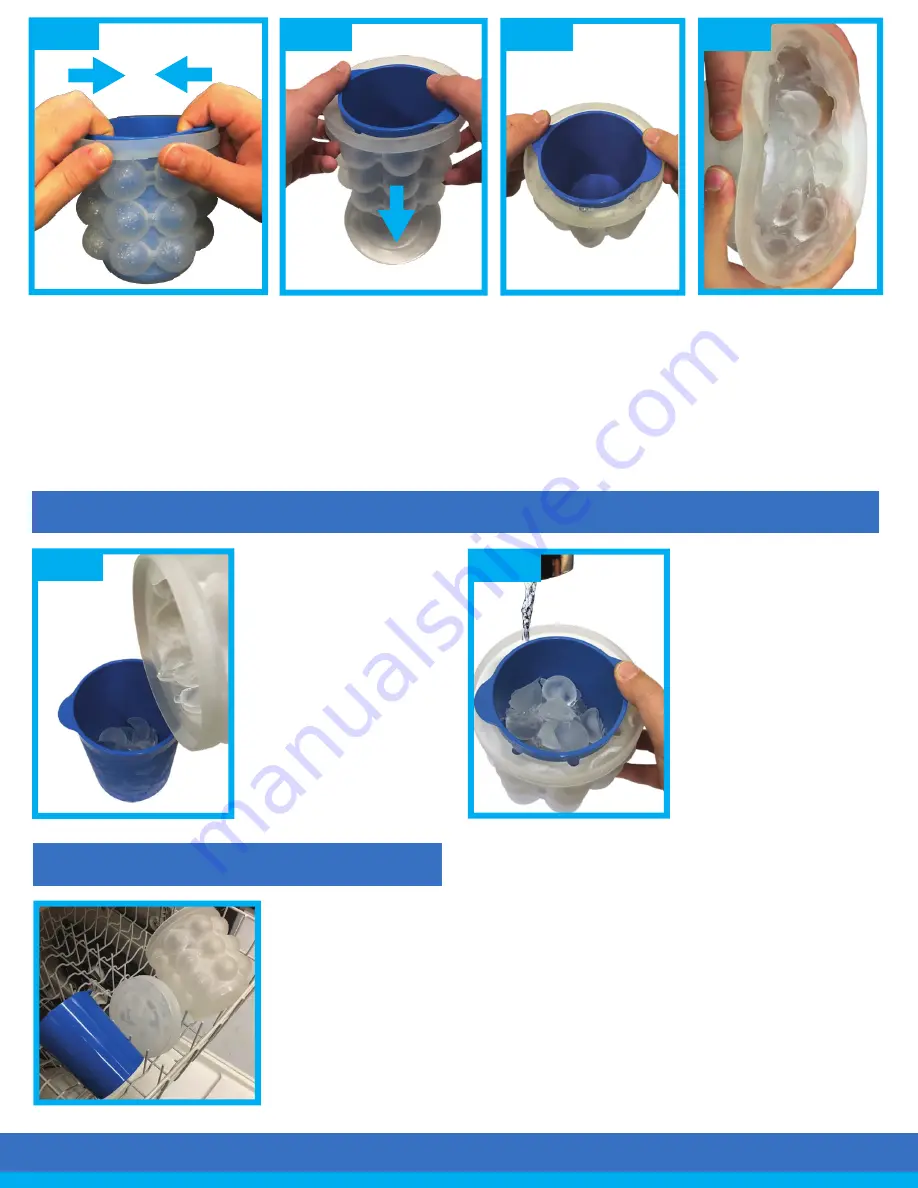
Step 4:
Once frozen, remove Ice Genie™
Ice Cube Maker from the freezer, remove
the Lid, then firmly squeeze the Outer
Chamber from all sides.
Step 4
Step 5:
Place the Lid centered
directly under the Outer Chamber.
Step 5
Step 6:
Grip the edge of the
Outer Chamber, push down with
force, causing the Inner Chamber
to break free.
Note:
Remove any loose ice that
has formed on the upper part of
the channel. Twist the Inner
Chamber left/right until it is free.
Then pull on the plastic handles
upward to remove it from the
Outer Chamber.
Step 6
Step 3:
After the Inner
Chamber is in place, simply
refill the channels, leaving
the already made cubes in
the Inner Chamber of the Ice
Genie™ Ice Cube Maker.
Once the Outer Chamber is
fully filled, repeat steps 2-7.
Ice Genie™ Ice Cube Maker
can store up to three
batches of ice. (72 cubes!)
Ice Genie™ Ice Cube Maker
can be hand washed with
warm soapy water or placed
in the
top rack
of a
dishwasher.
Step 2
CLEANING
Step 1
Step 1:
Remove the ice
cubes from the unit and
place them into the
Chamber. Next, insert the
Inner Chamber back into
the Outer Chamber.
Note:
Users may find that
after emptying the ice
cubes, rinsing the chamber
with water might dispose of
any unwanted ice shavings.
Step 7:
Once Inner Chamber is
removed, squeeze the Outer
Chamber, releasing all the ice
cubes into the middle area. Make
sure all of the ice cubes are
pushed out of the cavities prior
to reinserting the sleeve.
Step 7


