background image

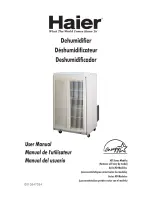
NOTICE D’UTILISATION

DH 12 G

DÉSHUMIDIFICATEUR

DEHUMIDIFIER

 notice DH_12 ML:notice DH_25EC  17/11/09  16:20  Page 1

Summary of Contents for DH 12 G

Page 1: ...NOTICE D UTILISATION DH 12 G DÉSHUMIDIFICATEUR DEHUMIDIFIER notice DH_12 ML notice DH_25EC 17 11 09 16 20 Page 1 ...

Page 2: ...eil à l extérieur Prendre soin de brancher et débrancher la prise correctement pour éviter tout risque de rupture du câble d alimentation Débrancher l appareil avant de le nettoyer ou d effectuer le remplacement d un élément Ne pas introduire d objets dans l appareil pour ne pas l endommager et éviter tout risque de choc électrique Ne jamais utiliser d autres accessoires que ceux livrés et recomma...

Page 3: ...t risque de vibration ou de débordement placer l appareil sur un sol droit et stable Ne pas coucher l appareil sur le côté ou le poser tête en bas Si vous devez le transporter attendre 2 heures avant de le brancher Veiller à toujours éteindre et débrancher l appareil si celui n est pas utilisé pendant une longue période LE FABRICANT NE SAURAIT ÊTRE TENU POUR RESPONSABLE DE LA MAUVAISE UTILISATION ...

Page 4: ...déshumidification à 27 C 60 6 litres jour Température de fonctionnement 15 à 35 C Réglage du taux d humidité 20 à 80 et déshumidification continue Capacité du réservoir 3 6 litres Niveau de bruit 39 dB A Réfrigérant R 134 A 130 g Dimensions 492 x 342 x 245 mm Poids 11 kg Schemas éléctrique 4 notice DH_12 ML notice DH_25EC 17 11 09 16 20 Page 4 ...

Page 5: ... à air interne 9 Cordon d alimentation 4 Bac à eau 10 Sortie pour drainage permanent avec 5 Roulettes de déplacement bouchon caoutchouc 6 Poignée bac à eau TABLEAU DE BORD 5 1 2 4 5 6 7 8 9 10 LED circulaire de fonctionnement Sélection du taux d humidité 3 notice DH_12 ML notice DH_25EC 17 11 09 16 20 Page 5 ...

Page 6: ...amètre 12mm utiliser le tuyau fourni ou un tuyau plus long mais de même diamètre voir Fig 2 Conserver une pente positive pour que l eau puisse s évacuer Attention pour une température ambiante basse s assurer que le tuyau ne se prendra pas en givre Enlever le bac à eau et insérer le bouchon caoutchouc précédemment enlevé de la sortie arrière 10 dans la sortie du bac à eau Fig 3 Remettre le bac à e...

Page 7: ...ac à eau lorsque celui ci est plein les LED circulaires de fonctionnement deviennent rouges et l appareil s arrête de fonctionner 6 Retirer le bac le vider et le repositionner L appareil se remet à fonctionner Si l appareil ne redémarre pas vérifier la position du bac à eau 7 Pour arrêter l appareil tourner le bouton de sélection du taux d humidité dans le sens inverse des aiguilles d une montre j...

Page 8: ...en le tirant vers le bas Fig 4 Utiliser un aspirateur ou bien taper légèrement le filtre S il est particulièrement sale utiliser de l eau tiède légèrement savonneuse rincer et sécher avant de le replacer Il est conseillé de vérifier l état de propreté du filtre régulièrement Si le déshumidificateur n est pas utilisé pendant une longue période l arrêter le débrancher vider complètement et sécher le...

Page 9: ...l à un réparateur agréé merci de contrôler les points suivants Problème Cause possible Solutions Si après ce contrôle votre appareil ne fonctionne toujours pas contacter votre revendeur ou bien un réparateur agréé notice DH_12 ML notice DH_25EC 17 11 09 16 20 Page 9 ...

Page 10: ...10 notice DH_12 ML notice DH_25EC 17 11 09 16 20 Page 10 ...

Page 11: ...ks of electrical shocks Never use accessories that are not recommended or supplied by the manufacturer It could constitute a danger for the user and could damage the appliance Never repair the appliance yourself All interventions made by a non qualified person can be dangerous in this case guarantee conditions would cancel As all electrical products a qualified electrician must repair it as well a...

Page 12: ...in storage or transport If unit has been transported allow to stand for 2 hours before switching the unit on Switch off and unplug the appliance when is not used for a long time THE MANUFACTURER WILL NOT ASSUME ANY RESPONSABILITY IN CASE OF NON ADHERENCE TO THESE INSTRUCTIONS SAVE THIS USER MANUAL CAREFULLY notice DH_12 ML notice DH_25EC 17 11 09 16 20 Page 12 ...

Page 13: ...ture removal 27 C 60 6 litters day Temperature range for use 15 to 35 C Humidity rate adjustment 20 to 80 and continuous Water tank capacity 3 6 litters Noise level 39 dB A Cooling agent R 134 A 130 g Dimensions 492 x 342 x 245 mm Weight 11 kg Electrical diagram 13 notice DH_12 ML notice DH_25EC 17 11 09 16 20 Page 13 ...

Page 14: ...et 8 Air outlet 3 Filter inside the unit 9 Power cord 4 Water tank 10 Drain hole with rubber knob 5 Casters 6 Handle for water tank 14 Operation LED Humidity control switch 1 2 4 5 6 7 8 9 10 3 notice DH_12 ML notice DH_25EC 17 11 09 16 20 Page 14 ...

Page 15: ...he product Fig 1 Insert the supplied pipe diameter 12mm or use a longer pipe same diameter Fig 2 Install the pipe in order to make the water fall easily Caution in cold weather make sure the water pipe will not freeze Remove the water tank and put the rubber knob into the drain hole Fig 3 Put the water tank back to its position 15 1 2 3 3 bis notice DH_12 ML notice DH_25EC 17 11 09 16 20 Page 15 ...

Page 16: ...umidifying 5 When the water tank is full the product stops working Operation LED are red colour 6 Remove the tank empty and replace it The product starts again If the product does not restart control the tank position 7 To stop the product turn the humidity control switch in ARRÊT position When the product is stopped wait for 3 minutes before restarting it compressor protection NOTE for a better d...

Page 17: ...Remove the water tank and extract the filter Fig 4 Use a vacuum cleaner or tap it smoothly If it is very dirty use warm water with soap rinse and dry Replace the filter Check the filter regularly When you do not use the appliance for a long time Stop it Unplug it Empty and dry the water tank Cover and store the product away from the sunlight 17 4 notice DH_12 ML notice DH_25EC 17 11 09 16 20 Page ...

Page 18: ...air service please check the following points PROBLEM POSSIBLE CAUSE SOLUTION If you have not solved the problem stop and unplug the product Contact your dealer or a qualified person 18 notice DH_12 ML notice DH_25EC 17 11 09 16 20 Page 18 ...

Page 19: ...19 notice DH_12 ML notice DH_25EC 17 11 09 16 20 Page 19 ...

Page 20: ... réutilisation des appareils usagés Veuillez vous adresser à votre municipalité pour connaître la déchetterie compétente Instructions on environment protection Do not dispose of this product in the usual household garbage at the end of its life cycle hand it over a collection point for the recycling of electrical and electronic appliances The symbol on the product the instructions for use or the p...

Reviews: