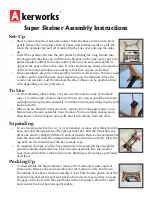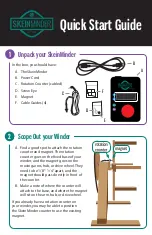


A. Plug the SkeinMinder into a wall outlet with
the power cord provided.
B. Plug the Rotation Counter into the right
side of the SkeinMinder.
C. Manually move your winder arms back and
forth, so the magnet passes in front of the
counter. The count on the SkeinMinder
should increase with each pass, regardless
of direction. If it does not, check the
spacing between the counter and magnet.
5
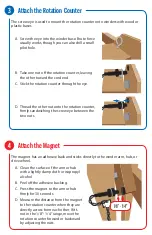
Check the Counter with your Winder
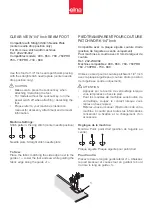
Make sure all cables are routed clear of the winder’s moving
parts. Attach the cable guides to your winder.
A. Clean the surface of your winder with a lightly damp
cloth or isopropyl alcohol.
B. Peel off the adhesive backing.
C. Press each cable guide firmly to your winder for
30 seconds.
D. Gently clip the cable into each guide. The adhesive will
firm up after 24 hours, but the guides can creep or
move before then.
Tidy your Cables
6
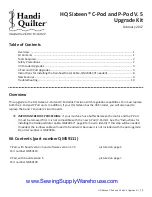
strain
relief
loop
A. With your winder still plugged directly into a wall
outlet, turn it on and adjust it to your preferred
winding speed.
B. With the winder still running, simply unplug it from
the wall.
C. The Big Red Button on the SkeinMinder should not
be lit. If it is blinking, press the Zero button.
D. Plug your winder into the SkeinMinder. As long as the
Big Red Button is off, your winder will not turn on.
Ready your Winder
7
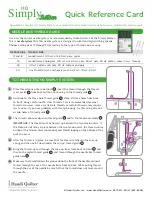
Set:
100