Installation & Systems Manual RUBIDIUM SERIES
Page 76
4.1.4
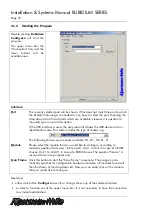
Starting the Program
Double-clicking
Rubidium
Config.exe
will start the
program.
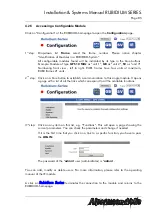
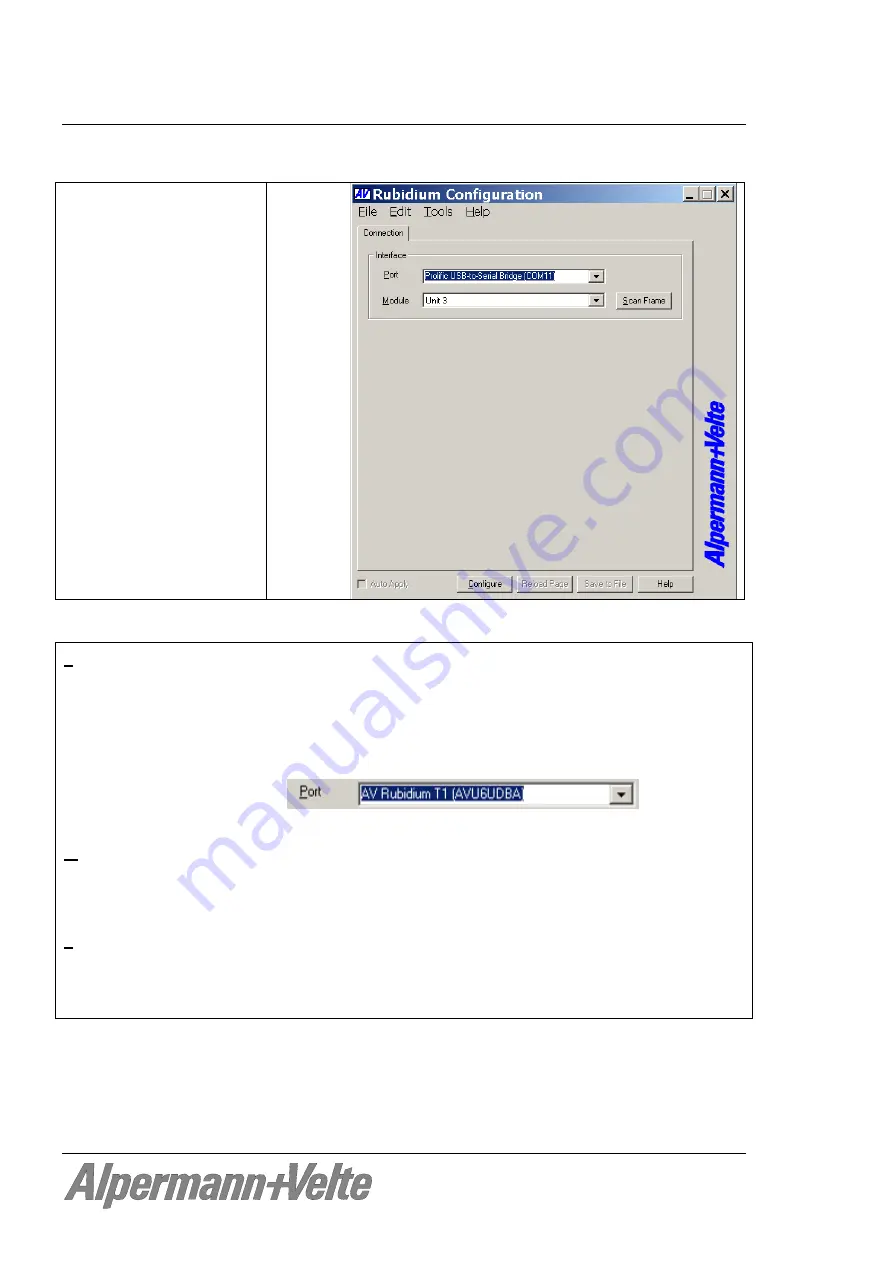
The upper menu bar, the
“Connection” tab, and the
lower buttons will be
available now.
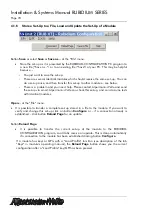
Interface
Port
The recently selected port will be shown. If this does not match the port to which
the Rubidium housing is connected to, you have to select the port. Opening the
drop-down list will list all ports which are available. Likewise it is possible to
manually type in a port description.
If the USB interface is used, the drop-down list shows the USB device with an
identification code. This code includes the type of chassis, e.g.:
The following chassis are presently available: D1, H1, H3, S1, T1.
Module
Please select the module that you would like to configure, according to
module’s position (front view - left to right): Unit 1 to Unit 4 in case of a RUB1
chassis, Unit 1 to Unit 21 in case of a RUB3 chassis. The position “Service“ is
reserved for service purposes only.
Scan Frame
Click this button to start the “Scan Frame” procedure: The program auto-
matically searches for configurable hardware modules; all modules found will
then be shown at the drop-down list. Now you can easily click on the module
that you would like to configure.
Next step:
either click button
Configure
to verify or change the set-up of the selected module;
or select a function out of the upper menu bar. It is not necessary to have the connection
to a module established.

