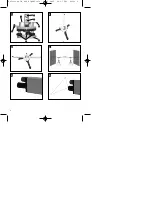
5. Checking accuracy (Fig. 4)
Place the spirit level mounted on the leveling plate in
front of a wall and adjust it as described above.
Mark off laser point 1 on the wall. Turn the spirit level
through to 180° with the leveling plate and mark off
laser point 2 on the approx. 10 meter distant wall.
Now place the spirit level mounted on the leveling
plate directly in front of the approx. 10 meter distant
wall. Set the height of the laser beam such that it
lines up with point 2 and adjust the spirit level as
described above.
Now turn the spirit level through to 180° and mark off
this point on the wall. The deviation to point 1 should
be no more than 5 mm (for a distance of 10 m).
6. Using the attachments
- Using the angle attachment (Fig. 5)
Insert the angle attachment directly into the outlet
hole of the laser module. The emerging laser beam
will now be deflected by 90°, creating a right-angled
reference plane to the spirit level.
- Using the line attachment (Fig. 6)
Insert the line attachment directly into the outlet hole
of the laser module. The line attachment projects a
line on the wall opposite the outlet hole.
With the aid of the laser beam, first mark off two
points on the wall. Insert the line attachment in the
outlet hole and connect the projected line to both
marked points by turning the attachment.
The scattering of the laser beam may cause a
decrease in the light intensity.
Excluded from the guarantee are:
Wearing parts
Damage caused by improper use or
unauthorized intervention.
GB
6
Anleitung LW 400 AlphaTools 20.01.2005 10:17 Uhr Seite 6


