28
Alpha 240XP and 240XE - Component Replacement
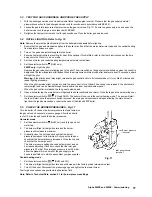
Fig. 29
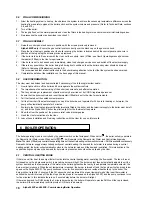
Fig. 30
Rear cover of
control box
Push fit
Suppressor
Mains
Blue
Blue
Green/Yellow
Mains
Brown
Brown
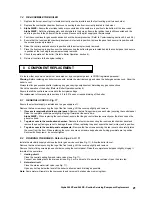
Switch bracket
screw
DHW flow
microswitch assy.
Primary flow
microswitch assy.
Main PCB
Fixing screws
Fixing screws
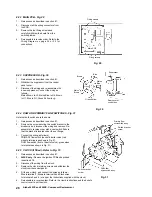
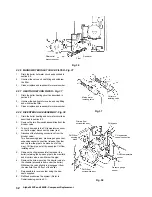
8.22 MAIN PCB - Fig. 29
1.
Gain access as described in section 8.1.
2.
Disconnect all the wiring connectors from
the PCB.
3.
Remove the four fixing screws and
carefully withdraw the board from the
switch spindles.
4.
Re-assemble in reverse order. Refer to the
Wiring Diagram on page 34 or 35 for
connections.
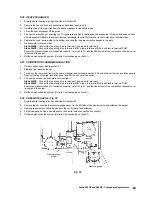
8.23 SUPPRESSOR - Fig. 30
1.
Gain access as described in section 8.1.
2.
Withdraw the suppressor from the control
panel cover.
3.
Disconnect the wiring and re-assemble with
a new suppressor. Connect the wiring as
follows:-
Mains Brown to L2, Mains Blue to N4, Brown
to U1, Blue to 3U, Green/Yellow to
.
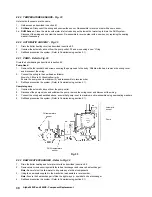
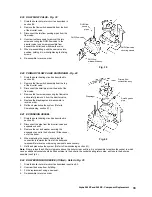
8.24 DHW AND PRIMARY FLOW SWITCHES - Fig. 31
Note that both switches are the same.
1.
Gain access as described in section 8.1.
2.
Remove the screw securing the switch bracket to the
diverter valve, disconnect the wiring and remove. Re-
assemble in reverse order with a new switch. Ensure
that the bracket is located under the nut flange.
3.
Connect the wiring as follows:-
PRIMARY flow switch (back of diverter valve), red
wires to terminals as shown in Fig. 31.
DHW flow switch (front of diverter valve), green wires
to terminals as shown in Fig. 31.
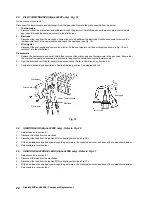
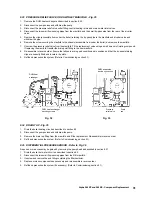
8.25 CLOCK (if fitted) - Refer to Fig. 15
1.
Gain access as described in section 8.1.
2.
240XE only - Remove the ignition PCB as described
in section 8.18.
3.
Disconnect the wiring from the clock.
4.
Remove the clock retaining screws and withdraw the
clock from the control panel.
5.
Fit the new clock, and connect the wires as follows:-
Blue to terminal 1, Brown to terminal 2 and Black wires
to terminals 3 and 4, (or as per the instructions supplied with the clock).
6.
Re-assemble in reverse order. Refer to the User's instructions and the boiler's
control cover to set the clock.
Switch bracket
screw
Fig. 31
Summary of Contents for Alpha 240XE
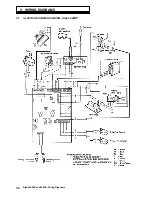
Page 35: ...35 Alpha 240XP and 240XE Wiring Diagrams 9 2 ILLUSTRATED WIRING DIAGRAM Alpha 240XE ...
Page 36: ...36 Alpha 240XP and 240XE Wiring Diagrams 9 3 FUNCTIONAL FLOW WIRING DIAGRAM Alpha 240XP ...
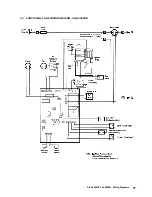
Page 37: ...37 Alpha 240XP and 240XE Wiring Diagrams 9 4 FUNCTIONAL FLOW WIRING DIAGRAM Alpha 240XE ...


