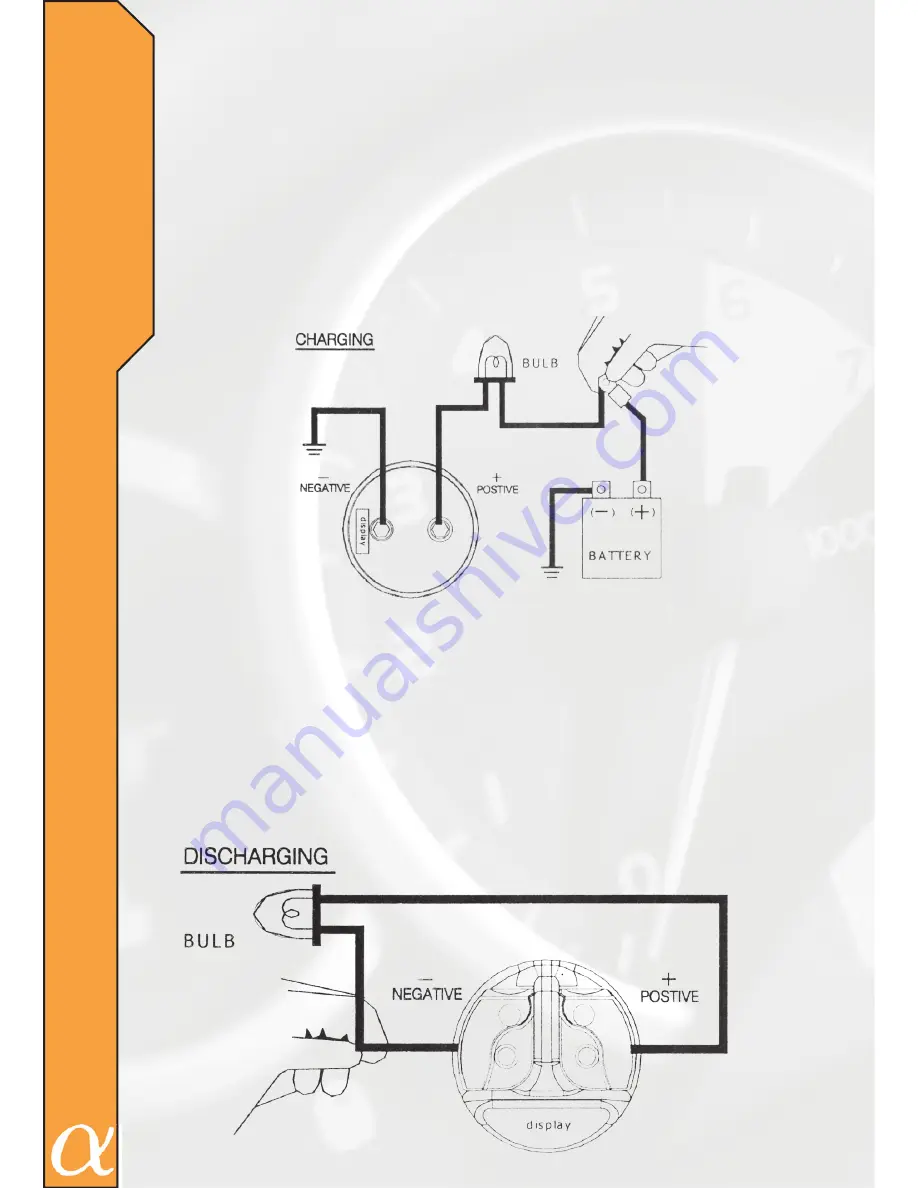
Charging
After mounting the capacitor in its final position, attach the ground to the
capacitor and the chassis grounding location. Next hold the supplied bulb be-
tween the (+) positive battery lead and the (+) positive terminal of the capaci-
tor. If using a bulb, it should light up for a short time (normally 15-30 seconds
or so) and then go out. After waiting for the capacitor to charge, remove the
bulb or resistor and immediately attach the power (+) cable to the capacitor.
The best way to ensure the cap is charged best is to keep the bulb attached
until you touch the main power (+) wire to the capacitor, then remove it.
Discharging
If you plan to store your vehicle or plan on not using the system for a long
period of time, we suggest to remove the capacitor. Anytime you disconnect
the capacitor’s power wire from the battery, you need to properly discharge
the capacitor. This is done by using the same supplied bulb as you used for
charging the capacitor. Take the bulb and place the ends across the negative
(-) and positive (+) terminals of the capacitor. This will cause the capacitor to
safely discharge so it can be stored away.
3
I
N
S
T
A
L
L
A
T
I
O
N


