background image

Summary of Contents for 1980

Page 1: ...snowmobiles 1980 OPERATOR S MANUAL 1 1 ski dna itho d inCanada 414391400 ...

Page 2: ... Department Bombardier Limited Valcourt Quebec Canada JOE2LO First copy free with unit purchased The following are trademarks of Bom bardier Limited BOMBARDIER EVEREST MOTO SKI SKI DOO CITATION FUTURA ALPINE OLYMPIQUE SPIRIT BLIZZARD TNT NUVIK CARRY BOOSE MIRAGE ELAN SUPER SONIC ELITE ULTRA SONIC GRANO PRIX SPECIAL ...

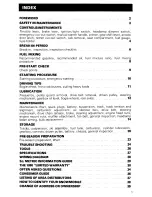
Page 3: ...lley steering mechanism gearbox oil level bogie wheels rear axles 12 MAINTENANCE Maintenance chart spark plugs battery suspension track track tension and alignment carburetor adjustment air silencer box drive belt steering mechanism drive chain tension brake steering adjustment engine head nuts engine mount nuts muffler attachment fan belt general inspection headlamp beam aiming bulb replacement 1...

Page 4: ...stions per taining to the warranty and its applica tion please consult the Often Asked Question section of this manual or your selling dealer This manual emphasizes particular in formation denoted by the following symbols and wording WARNING Identifies and in struction which if not followed could cause personal injury CAUTION Denotes an instruc tion which if not followed could severely damage vehi...

Page 5: ...ion Maintain your vehicle in top mecha nical condition at all times Your snowmobile is not designed to be driven or operated on black top bare earth or other abrasive sur faces On such surfaces abnormal and excessive wear of critical is inevitable Only perform procedures as detailed in this manual Unless otherwise specified engine should be turned OFF for all lubrication and mainte nance procedure...

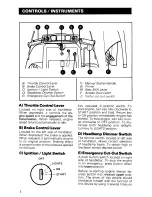
Page 6: ...r Shift Lever I Access Door Latch J Tether cut out switch Key operated 4 position switch To start engine turn key fully clockwise to START position and hold Return key to ON position immediately engine has started To stop engine turn key coun ter clockwise to OFF position To illu minate both headlamp and taillight turn key to LIGHTS position D Headlamp Dimmer Switch The dimmer switch located on le...

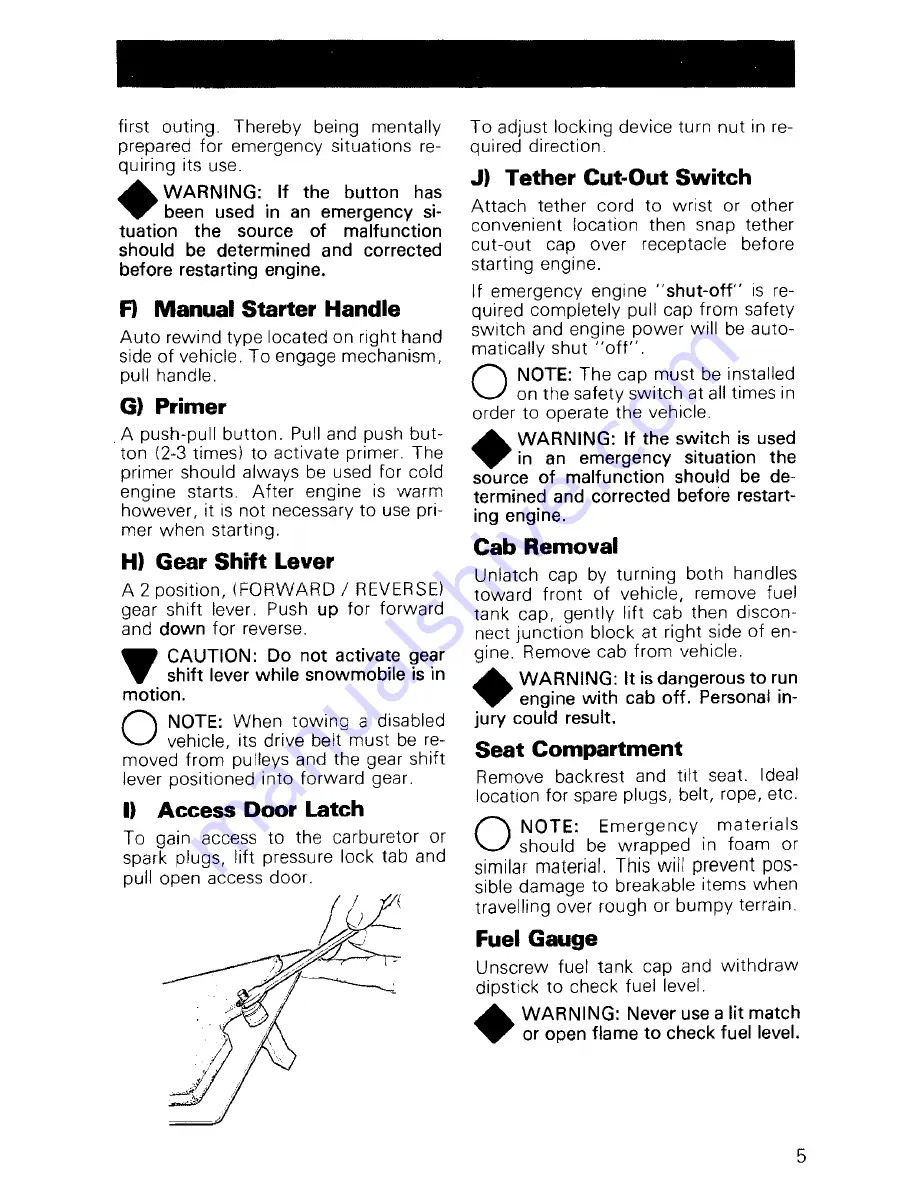
Page 7: ... turn nut in re quired direction J Tether Cut Out Switch Attach tether cord to wrist or other convenient location then snap tether cut out cap over receptacle before starting engine If emergency engine shut off is re quired completely pull cap from safety switch and engine power will be auto matically shut oft O NOTE The cap must be installed on the safety switch at all times in order to operate t...

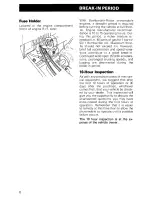
Page 8: ... break in Continued wide open throttle accelera tions prolonged cruising speeds and lugging are detrimental during the break in period 10 Hour Inspection As with any precision piece of mechan ical equipment we suggest that after the first 10 hours of operation or 30 days after the purchase whichever comes first that your vehicle be check ed by your dealer This inspection will give you the opportun...

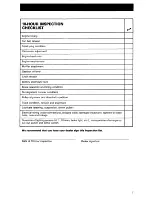
Page 9: ...r condition Pulley alignment and drive belt condition Track condition tension and alignment Lubricate steering suspension driven pulley Electrical wiring loose connections stripped wires damaged insulation tightend alliosse bolts nuts and linkage Operation of lighting system HI LO beam brake light etc l test operation of emergency cut out switch and tether switch We recommend that you have your de...

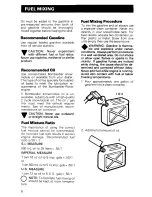
Page 10: ...t be overstressed An incorrect fuel ratio results in serious engine damage Recommended fuel ratio is 50 1 S 1 MEASURE 500 mL oil to 25 liters 50 1 IMPERIAL MEASURE 1 can 16 oz oil to 5 imp gals 50 1 or 1 can 500 mL oil to 51 2 imp gals 50 1 U S MEASURE 1 can 12 oz oil to 5 U S gals 50 1 O NOTE To facilitate fuel mixing oil should be kept at room tempera ture 8 Fuel Mixing Procedure To mix the gaso...

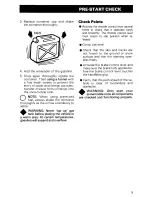
Page 11: ...ain temperatures gasolinewill expand and overflow PRE START CHECK Check Points Activate the throttle control lever several times to check that it operates easily and smoothly The throttle control lever must return to idle position when re leased Check fuel level Check that the skis and tracks are not frozen to the ground or snow surface and that the steering oper ates freely Activate the brake con...

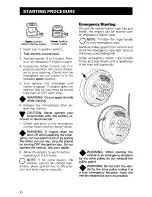
Page 12: ...her cut out cap stop the engine by turning OFF the ignition key Do not operate the vehicle see your dealer 8 Allow the engine to warm before operating at full throttle O NOTE If for some reason the vehicle cannot be started elec tricallyr place ignition key to ON posi tion and start engine manually Upper position before starting engine s Lower position to stop engine Emergency Starting Should the ...

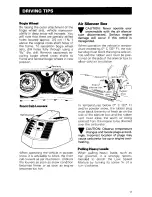
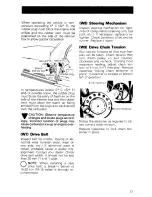
Page 13: ...able to block the front cab louvers as per illustration Unblock the louvers as soon as snow condition becomes firmer or as soon as engine becomes too hot In temperatures below 00 C 320 F and or powder snow the rubber plug must block the entry of fresh air on the side of the silencer box and the rubber vent must allow the warm air being emitted from the engine to be directed over the carburetor tIP...

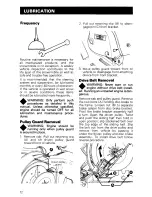
Page 14: ...it under the driven pulley and disc brake assembly To install drive belt follow reverse procedure Frequency Pulley Guard Removal WARNING Engine should be running only when pulley guard is secured in place 1 Remove cab Pull out retaining clip A and tilt driven pulley guard toward front of vehicle Routine maintenance is necessary for all mechanized products and the snowmobile is no exception A weekl...

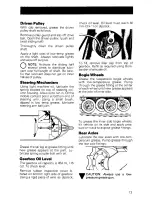
Page 15: ...all joint Greasethe ski leg at grease fitting until new grease appears at the joint Lu bricate spring coupler bolt with oil Gearbox Oil Level The gearbox oil capacity is 454 mL 16 oz To check level Remove rubber inspection cover lo cated on bottom right side of gearbox Using a rigid piece of wire as dipstick check oil level Oil level must reach 82 mm 314 on dipstick To fill remove filler cap from ...

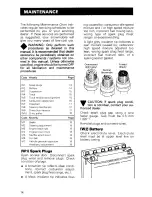
Page 16: ...Drive belt 17 W8 Steering mechanism 17 W9 Drive chain tension 17 WlO Drive pulley 18 Code Monthly Page M1 Brake 18 M2 Steering adjustment 18 M3 Engine head nuts 18 M4 Engine mount nuts 18 M5 Muffler attachment 18 M6 Fan belt 18 M7 Vehicle general inspection 19 Headlamp adjustment 19 W1 Spark Plugs Open access door Disconnect spark plug wires and remove plugs Check condition of plugs A brownish tip...

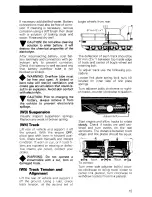
Page 17: ...cessary remove corrosion using a stiff brush then clean with a solution of baking soda and water Rinse and dry well CAUTION Do not allow cleaning solution to enter battery It will destroy the chemical properties of the electrolyte After reconnecting battery coat bat tery terminals and connectors with pe troleum jelly to prevent corrosion Check that battery is well secured and that battery overflow...

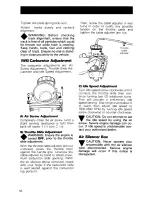
Page 18: ...e adjuster by hand to obtain maxi mum carburetor slide opening With the air silencer elbow removed check with your finger if the carburetor slide is well seated against the carburetor top portion 16 Then screw the cable adjuster in two turns in order to nullify any possible tension on the throttle cable and tighten the cable adjuster jam nut A Throttle cable adjuster C Idle Speed Adjustment Turn i...

Page 19: ...al wear is noted probable cause is pulley mis alignment Contact your dealer Check drive belt width it should not be less than 30 mm 1 3 16 wide O NOTE When installing a new drive belt a break in period of 15 25 km 10 15 miles is strongly re commended WS Steering Mechanism Inspect steering mechanism for tight ness of components steering arm ball joint etc I If necessary replace or re tighten Check ...

Page 20: ...n Remove steering padding Remove bolt securing handlebar to steering column Remove handlebar to expose splined end of steering column 18 Reposition handlebar on so that it is perpendicular with Install and tighten bolt to 40 47 N m 30 35 ft lbs O NOTE If correct spline alignment is unobtainable at handlebar move lower steering bracket located on top of gearbox to obtain proper lo cation Lower brac...

Page 21: ...n TOP VIEW Bulb Replacement If headlamp is burnt remove cab Un plug connector from headlamp Re move rubber boot and unfasten bulb retainer clips Detach bulb and replace If taillight bulb is burnt expose bulb by removing red plastic lens To remove unscrew the two 2 Phillips head screws Verify all lights after reotaca ment SIDE VIEW Ground With the rider seated on the vehicle and the high beam ON ch...

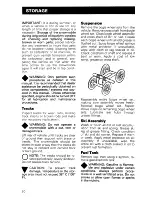
Page 22: ... stay in contact with cement floor or bare ground O NOTE The tracks should be ro tated periodically every 40 days Do not release track tension CAUTION To prevent track damage temperature in the stor age area must not exceed 38 C 100 F 20 Suspension Remove the bogie wheel sets from the vehicle Remove cross shaft from bogie wheel set Clean bogie wheel assembly and cross shaft of dirt or rust Grease ...

Page 23: ...ark plugs CAUTION To prevent ignition system damage make sure that the cut out button is in the lower posi tion Gearbox Drain gearbox and refill with 454 mL 16 oz of fresh Bombardier chaincase oil Drain plug is located beneath frame Controls Lubricate steering mechanism Inspect components for tightness spring cou pler bolt steering arm locking bolt ball joint etc l Tighten if necessary Oil moving ...

Page 24: ...assis Clean the vehicle thoroughly removing all dirt and grease accumulation CAUTION Plastic alloy compo nents such as windshield con sole etc can be cleaned using mild detergents or isopropyl alcohol Do not use strong soaps degreasing solvents abrasive cleaners paint thinners etc Inspect cab and repair damage Repair kits are available at your authorized Bombardier dealer Touch up all metal spots ...

Page 25: ...iming if necessary replace breaker points Check electrical wiring broken wire damaged insulation 0 Inspect condition of starting rope 0 Check tightness of all bolts nuts and f linkage Refill gas tank Adjust carburetor Check fan belt condition and tension To simplify the pre season preparation PRE SEASON PREPARATION CHART we have drawn up a small chart The chart indicates servicing points to be per...

Page 26: ...low engine starting procedure and check for spark If no sparks appear replace spark plug If trouble persists contact your dealer 4 Clogged fuel line water or Remove and clean the fuel filter Change filter dirt cartridge if necessary Check condition and connections offuel lines Check the cleanliness of fuel tank 5 Faulty carburetor First make primary adjustments on carburetor ISee Maintenance Secti...

Page 27: ...with difficulty It the ignition system still seems faulty contact your dealer 5 Engine If unable to locate specific symptoms contact your dealer Engine continually 1 Faulty spark plug Check item 3of Engine turns over but fails to backfires start or starts with difficulty 2 Overheated Carburetor set too lean Contact your dealer 3 Engine timing incorrectly set Contact your dealer Snowmobilecannot 1 ...

Page 28: ...ied with a basic tool kit such as screwdriver wrenches emergency starter rope etc Standard Tools D G c OH A Screwdriver E Starter rope B Socket 10 13 mm F Socket 17 21 mm c Open end wrench 10 13 mm G Extension bar D Socket wrench handle H Socket 11 13 mm 26 ...

Page 29: ...lebar 40 47 N m 30 35 ft Ibsl 281 2 kg 620 lbs 13936 3 cm 2 2160 in 2 1 98 kPa 287 Ibs in 2 2 x 38 1 cm l15 in x 353 cm 139 in A deflection of 57 mm 2 1 4 in 1 8 in should exist bet ween the top inside edge of the track and the bolt of the second bogie wheel set from the rear of the Equal distance between edges of tracks and link plates 17 38 454 mL 16 oz 6 mm 1 4 in 30 mm 1 3 16 in 12 volts 140 w...

Page 30: ...SEI15AMPSl HEADLAMP 14545 WI T AILLAMP 521 WI CD LIGHTING Call 1110 WI VI VI RD ADI GY Vl WH vr WH RD GN lI a l s GY s RD il i Yl BK GN RD GN RDi GY RDI GY RD WH BK W H j g 2 3 BK SR BRAKE UGHT SWITCH MAG SIDE 1980 ALPINE 640 ER P T O SIDE N co ...

Page 31: ...perature celsius C pressure kilopascal kPa torque Newton meter N m speed kilometer per hour krn h PREFIXES PREFIX SYMBOL MEANING VALUE kilo k one thousand 1 000 centi c one hundredth of a 0 01 milIi m one thousandth of a 0 001 THE INTERNATIONAL SYSTEM OF UNITS SYSTEME INTERNATIONAL ABREVIATES SI IN ALL LANGUAGES 29 ...

Page 32: ...t to the fol lowing 1 When a sale is made after MARCH 31ST of a given year but I before THE 15T DAY OF DECEMBER of the same year the war I I ranty will start on DECEMBER 1ST following the date of sale and terminate 90 days later 12 When a sale is made on or after JANUARY 2ND of a given year the unused portion of the 90 days warranty as of MARCH 31ST of that year will be carried over to the next se...

Page 33: ...st of all maintenance services including tune ups and adjustments will be charged to the owner Damage resulting from improper servicing or adjustment of the drive pulley assembly The drive pulley assembly is factory sealed and can only be serviced by an authorized SKI DOO dealer Vehicles used for racing purposes Vehicle used for rental purpose or other business purposes All optional accessories in...

Page 34: ...ose otherwise the implied warranty is limited to the duration of this warranty However some states or provinces do not allow limitations on how long an implied warranty lasts so the above limitation may not apply Neither the distributor the selling dealer nor any other person has been authorized to make any affirmation representation or warranty other than those contained in this warranty and if m...

Page 35: ...eing understood that such modification will not alter the warranty conditions applicable to vehicles sold while the above warranty is in effect November 1978 Bombardier Limited Valcourt Quebec Canada JOE 2LO Trademark of Bombardier Limited Registered Trademark Bombardier Limited 33 ...

Page 36: ...ard is presented Q Where can I find information on the lubrication and maintenance of my snow mobile A In this Operator Manual provided with the vehicle at the time of first sale Q Will the entire warranty be void or cancelled if I do not operate or maintain my new snowmobile exactly as specified in the Operator s Manual A The warranty of the snowmobile cannot be Voided or Cancelled However if a p...

Page 37: ...it adequate use of the machine to allow for concealed manufacturing defects to occur Q Manufacturer does not accept warranty work on seized scored or melted pistons why A From testing and we know that such piston failures can only be caused by detonation or pre ignition which are directly related to the follow ing factors and therefore are beyond the manufacturer s control incorrect oil gas mixtur...

Page 38: ...not solve the situation 2 nd Write to your nearest area distributor TELLHIM THE FACTS Vehicle identification number Dateof purchase Nameandaddress of yourselling dealer Yourname address andphone number Thespecific problem The matter will receive immediate attention from the distributor s service de partment If at this point your grievance still remains unresolved contact d Bombardier Limited 3 r_ ...

Page 39: ...non British Columbia V1T 6M2 6041545 1314 British Columbia BOMBARDIER LIMITED EASTERN CANADA DISTRIBUTION DIVISiON Atlantic Branch P O Box 670 Shediac New Brunswick EOA 3GO 506 532 4454 Magdalen Island Nova Scotia New Brunswick Prince Edward Island 1350 Nobel Boulevard Boucherville Quebec J4B 1A1 15141 527 2469 or 655 6121 Province of Quebec BROOKS EQUIPMENT LJMlTED 1616 King Edward Street P O Box...

Page 40: ...ay sometimes become necessary to locate these numbers for 1 purposes or to trace your in the event of theft VEHICLE IDENTIFICATION NUMBER 3323000000 MODEL NUMBER O NOTE We strongly recommend that you take note of all the serial numbers on your vehicle and supply them to your insurance company It will surely help in the event a snowmobile is stolen 38 ...

Page 41: ...ill help us to maintain our files up to date CHANGE OF ADDRESS VEHICLE IDENTIFICATION NUMBER OLD ADDRESS NAME NO STREET APT STATE NEW ADDRESS NAME NO STREET APT CITY STATE ZIP POSTAL CODE CHANGE OF OWNERSHIP VEHICLE IDENTIFICATION NUMBER The ownership of this vehicle is transferred FROM _ TO NO CITY NO CITY STREET STATE NAME STREET STATE APT ZIP POSTAL CODE APT ZIP I POSTAL CODE 39 ...

Page 42: ... BOMBARDIER LIMITED ATT WARRANTY DEPARTMENT VALCOURT QUEBEC CANADA JOE 2LO BOMBARDIER LIMITED ATT WARRANTY DEPARTMENT VALCOURT QUEBEC CANADA JOE 2LO 40 ...

Reviews: