background image

33

-EN

01GB05IVA106E.fm

ALPINE IVA-D106E 68-12118Z27-A (EN)

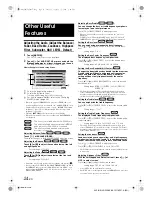
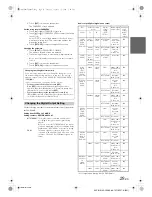
The unit can display the icon of an external device, such as a telephone, 
whenever a phone call comes in to tell you there is a phone call.

Setting item: IN INT. ICON
Setting content: INT / TEL

For remote control operation, the remote sensor of the external device 
(monitor, etc.) can be switched, as you prefer.

Setting item: REMOTE SENSOR
Setting contents: FRONT / REAR

The touch panel rear monitor sensor has priority over the remote 
control sensor. If the rear monitor (connected to the Alpine rear 
monitor output via the Monitor control lead) is touched, the 
command is executed regardless of the remote control sensor switch 
setting. Note, however, that the remote control sensor that has been 
set takes priority if it has been 5 seconds since last touching the 
panel.

When an optional DVD changer or DVD player is connected, and the 
remote control sensor is set to REAR, some onscreen button 
operations ( 

[

]

 STOP, etc.) cannot be performed.

In this case, set the remote control sensor to FRONT.

When you connect an optional navigation equipment, set it to ON.

Setting item: NAV. IN
Setting contents: OFF / ON

With an Alpine navigation system connected to the IVA-D106E, the 
voice guidance of the navigation system will be mixed with the radio or 
CD play. 

Setting item: NAV. MIX
Setting content: OFF / ON

To adjust the navigation interruption volume level, the adjustment 
for NAV. LEVEL can be performed in “Adjusting the Audio 
(Adjust the Balance/Fader, Bass/Treble, Loudness, Highpass 
Filter, Subwoofer, NAV. LEVEL, Defeat)” on page 25 after setting 
to ON.

The volume level for voice prompts during navigation guidance is set 
by adjusting its volume while the prompts are announced. When the 
announcement finishes, the normal audio volume and the previous 
audio screen are restored. The voice prompt volume is always at or 
below the current listening volume. If a navigation announcement 
cuts in while adjusting the audio level, it always resets to the current 
level regardless of the audio level setting.

This setting is effective when NAV.IN of SYSTEM list screen is ON.

Set when an optional iPod or an external input device is to be connected.

Setting item: iPod
Setting contents: AUDIO / VIDEO / AUX+

With a rear camera connected, rear view video is output to the monitor.

Setting item: CAMERA IN
Setting contents: OFF / ON

By shifting to reverse (R), the rear pictures are output.
This function is effective when the reverse wire is properly connected.

To apply the setting, set to VISUAL in “Setting the VISUAL Button” 
(page 34).

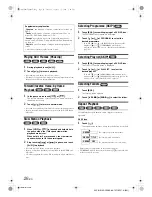
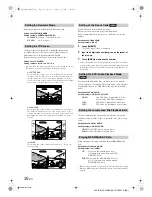
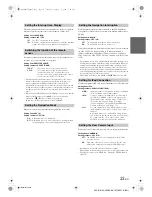
Setting the Interrupt Icon Display

INT:

The INT icon appears on the display.

TEL:

When the external device (telephone) sends the interrupt 
signal, the telephone icon appears on the display.

Switching the function of the remote 
sensor

FRONT:

The remote sensor of this unit is effective.

REAR:

The remote sensor of the external monitor 
connected to AUX OUT of this unit becomes 
effective. The remote control operates the source 
connected to the AUX OUT terminals.

Setting the Navigation Mode

ON:

Navigation source is displayed.

OFF:

Navigation source is not displayed. The settings related 
to the navigation can not be changed from this unit.

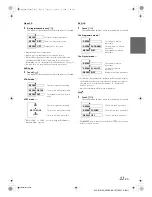
Setting the Navigation Interruption

OFF:

The navigation interruption mode is turned off.

ON:

The navigation interruption mode is on.

Setting for iPod Connection

AUDIO:

Input is available for iPod audio (a video compatible 
iPod is available only for audio input).

VIDEO:

Set when a video compatible iPod is connected to 
the iPod (V)/CAMERA connector. Image from the 
iPod is input. If this setting is made, connect the 
iPod to the Back-up camera by referring to 
“Connecting Video compatible iPod and Back-up 
Camera at the same time” (page 71).

AUX+: 

Set if an optional iPod Direct/RCA Interface cable 
(KCE-236B) is connected to the iPod direct cable of 
this unit.
A portable player, etc., with an RCA audio output 
can be input to the unit. In this case, an iPod cannot 
be connected. The “iPod” source name on the 
SOURCE selection screen will not be displayed.

Setting the Rear Camera Input

OFF:

The CAMERA source is not displayed on the VISUAL 
selection screen.

ON:

Even if the shift lever is not set to reverse (R), the rear 
pictures are output by selecting the CAMERA source.

01GB00IVAD106E.book  Page 33  Tuesday, January 15, 2008  2:48 PM

Summary of Contents for IVA-D106E

Page 1: ...STRALIA PTY LTD 161 165 Princes Highway Hallam Victoria 3803 Australia Phone 03 8787 1200 ALPINE ELECTRONICS GmbH Frankfurter Ring 117 80807 München Germany Phone 089 32 42 640 ALPINE ELECTRONICS OF U K LTD Alpine House Fletchamstead Highway Coventry CV4 9TW U K Phone 0870 33 33 763 ALPINE ELECTRONICS FRANCE S A R L RCS PONTOISE B 338 101 280 98 Rue de la Belle Etoile Z I Paris Nord Il B P 50016 9...

Page 2: ...01GB02IVAD106E fm ALPINE IVA D106E 68 12118Z27 A EN 01GB00IVAD106E book Page 1 Tuesday January 15 2008 2 48 PM ...

Page 3: ...rs 18 Displaying the Top Menu Screen 18 Displaying the Menu Screen 18 Displaying the Menu Operation Mode Screen 19 Searching by Programme 19 Searching by Playlist 19 Stopping Playback PRE STOP 19 Stopping Playback 19 Fast forwarding Fast reversing 19 Finding the Beginnings of Chapters Tracks Files 19 Playing Still Frames Pausing 20 Forward reverse frame by frame Playback 20 Slow Motion Playback 20...

Page 4: ...nput 33 Setting the AUX Mode 34 Adjusting the External Input Audio Level 34 Setting the Picture Sound Output 34 Setting the Bluetooth Connection Bluetooth IN 34 Setting the USB Adapter to ON OFF 34 Setting the VISUAL Button 34 Setting the Digital Output 34 Setting the AUX Level 34 DISPLAY Setup Display Setup Operation 35 Adjusting the Monitor Angle 35 Setting Automatic Opening Closing of the Monit...

Page 5: ...D Level 49 Storing Settings in the Memory 49 Recalling the Preset Memory 49 Using the Pro Logic II Mode 50 Linear PCM Setting 50 Navigation System Optional Switching the Navigation Screen Optional 51 Auxiliary Device Optional Operating Auxiliary Devices Optional 51 Changer Optional Controlling CD Changer Optional 52 Multi Changer Selection Optional 52 TUE T200DVB Operation Optional Operating the T...

Page 6: ...iver from looking ahead of the vehicle and cause an accident DO NOT DISASSEMBLE OR ALTER Doing so may result in an accident fire or electric shock USE ONLY IN CARS WITH A 12 VOLT NEGATIVE GROUND Check with your dealer if you are not sure Failure to do so may result in fire etc KEEP SMALL OBJECTS SUCH AS BOLTS OR SCREWS OUT OF THE REACH OF CHILDREN Swallowing them may result in serious injury If sw...

Page 7: ...oint pen Playing a disc while driving on a very bumpy road may result in skips but this will not scratch the disc or damage the player Irregular Shaped Discs Be sure to use round shaped discs only for this unit and never use any special shaped discs Use of special shaped discs may cause damage to the mechanism New Discs To prevent the CD from jamming DISC ERROR is displayed if discs with irregular...

Page 8: ...e car must be parked and the parking brake must be engaged for the procedure described in the Owner s Manual to be valid The warning CAN T OPERATE WHILE DRIVING will be displayed if any attempts are made to perform these operations while driving The IVA D106E draws minimal current even when its power switch is turned off If the switched power ignition lead of the IVA D106E is connected directly to...

Page 9: ...The IVA D106E can read either sector on the disc Choose CD DA to play the CD audio section or MP3 WMA AAC to play the MP3 WMA AAC section Multi session CD R RW Once a recording has been stopped this is considered one session If the disc is not closed finalized additional data may be added Once this additional data has been recorded this becomes a multi session CD The IVA D106E can only read multi ...

Page 10: ...tents issued pending DTS and DTS 2 0 Digital Out are registered trademarks and the DTS logos and Symbol are trademarks of DTS Inc 1996 2007 DTS Inc All Rights Reserved Windows Media and the Windows logo are trademarks or registered trademarks of Microsoft Corporation in the United States and or other countries iPod is a trademark of Apple Inc registered in the U S and other countries MPEG Layer 3 ...

Page 11: ...n button Ejects a disc button Use this button to remove the front panel DISC IN Indicator Lights up when a disc is inserted in the unit Power Indicator This indicator is lit when power is on Detaching and Attaching the Front Panel Detaching 1 Turn off the unit power 2 Press Release at the lower right side until the front panel pops out 3 Grasp the right side of the front panel and pull it out The ...

Page 12: ...page 35 Even when the vehicle s battery power is removed the adjusted monitor angle remains stored in memory The IVA D106E is a precision device With gentle handling its unique capabilities can be enjoyed for a long time If the monitor touches anything while it is being opened or closed the unit will stop opening or closing the monitor immediately Should this occur remove the obstacle and press an...

Page 13: ...ch RADIO The screen changes to the Radio mode main display Main screen example for FM Radio mode Changes to the source selection screen to step 1 screen Working state indicator Displays volume level Function Guide The function guide display varies depending on each source The contents of the function guide change by touching P1 2 or P1 3 on the function guide and many other operations can be perfo...

Page 14: ...istening to the Radio 1 Touch SOURCE on the main source screen The source selection screen is displayed 2 Touch RADIO The radio mode is activated and the display changes to the Radio Mode screen 3 Touch BAND to select the desired radio band Each press changes the bands as follows 4 Touch TUNE to choose the tuning mode Each touch changes the tuning mode display There are two modes you can select fo...

Page 15: ...o the station stored in P SET 1 If no stations are stored the tuner will return to the original station you were listening to before the automatic storing procedure began Tuning to Preset Stations You can tune in the preset stations in memory on each band using the preset number 1 After selecting the desired band touch P1 2 to change the function guide 2 Touch any one of the preset buttons P SET 1...

Page 16: ...f the disc is left in the unit after pressing the disc is automatically pulled back into the unit and paused In this case start playback by touching or eject again and remove the disc within 15 seconds Repeat Play Touch to play back repeatedly the track currently being played The track file will be played repeatedly Touch again and select OFF to deactivate Repeat play 1 Touch P1 2 3 to change the ...

Page 17: ...yback is possible ID3 tags WMA tags This device supports ID3 tag v1 and v2 and WMA tag If tag data is in an MP3 WMA AAC file this device can display the title track title artist name and album name ID3 tag WMA tag data maximum 128 characters This device can only display single byte alphanumeric characters and the underscore For non supported characters NO SUPPORT is displayed The number of charact...

Page 18: ...ROGRAM PLAYLIST DVD VR VIDEO CD being played back Displays tag information for DivX Displays the title number chapter number elapsed playback time for a DVD Video Displays the group number track number elapsed playback time for a DVD Audio Displays the programme or playlist number chapter number elapsed playback time for a DVD VR Displays the track number elapsed playback time for a Video CD When ...

Page 19: ... of the function guide However the function may vary depending on the disc If the disc is left in the unit after pressing the disc is automatically pulled back into the unit and stopped In this case start playback by touching or eject again and remove the disc within 15 seconds While INDEX READING is displayed by DivX the fast forwarding fast reversing and repeat functions etc cannot be used WARNI...

Page 20: ...e Video CD mode to change the function guide 2 Touch 10KEY The numeric keypad is displayed 3 Touch and input a desired number 4 Touch ENT to confirm When a DVD contains two or more titles the top menu screen appears Touch TOP MENU on the DVD mode main screen The top menu screen appears To perform necessary operations see If a menu screen appears on page 18 To playback a DVD Audio disc set VCAP in ...

Page 21: ... hold for at least 2 seconds during playback STOP is displayed and playback stops Playback starts from the beginning when is touched while playback is stopped Fast forwarding Fast reversing DVD Video DVD VR Video CD DVD Audio VCAP mode DivX 1 During playback touch and hold Fast reverse or fast forward When touched and held for more than 1 second the disc is forwarded reversed at double speed When ...

Page 22: ...of PLAYLIST in the function guide display to or of PROGRAM playback the programme For details refer to Searching by Programme page 19 Selecting Playlist SKIP 1 Touch P1 3 twice while playing of a DVD VR disc The PLAYLIST function guide is displayed 2 Touch or of PLAYLIST to select the desired playlist To switch or of PROGRAM in the function guide display to or of PLAYLIST playback the playlist For...

Page 23: ...ist search Refer to Searching by Programme or Searching by Playlist page 19 Only discs containing a Playlist can be displayed DivX 1 Touch The repeat mode switches every time the button is touched The REPEAT mode is always turned off when is touched and held for at least 2 seconds The track is played repeatedly The disc is played repeatedly Playback does not repeat REPEAT REPEAT DISC REPEAT OFF Th...

Page 24: ... Play Mode on page 31 Switching the Angle On DVDs in which scenes have been filmed from multiple angles the angle can be switched during playback 1 During playback touch P1 2 The function guide changes The display differs depending on the disc mode 2 Touch ANGLE The angle switches between the angles recorded on the disc every time the button is touched Some time may be required for the angle to ch...

Page 25: ...em to confirm it See If a menu screen appears on page 18 To playback a DVD Audio disc set VCAP in Setting the DVD Audio Playback Mode page 30 Displaying the Disc Status for DVD Video CD Use the procedure described below to display the status title number chapter number etc of the currently playing DVD or of the currently playing Video CD track number etc on the monitor 1 During playback touch the ...

Page 26: ...e list is not displayed Setting the Bass level You can emphasize or weaken the bass frequency Touch or of BASS LEVEL to select the desired bass level Setting range 7 to 7 Setting the Bass Center Frequency The displayed bass frequency is emphasized Touch or of BASS FREQ to select the desired bass center frequency Setting range 60 Hz 80 Hz 100 Hz 200 Hz Setting the Bass Bandwidth Q Factor Changes th...

Page 27: ...terruption Setting range 0 to 15 This adjustment becomes available when NAV MIX is turned on in Setting the Navigation Interruption page 33 The setting navigation interruption is not displayed if an external audio processor not compatible with NAV MIX is connected Turning Defeat ON or OFF Touch or of DEFEAT to set to ON or OFF If you set defeat to ON adjusted bass treble values return to their ini...

Page 28: ...the monitor displays a normal picture by stretching out the picture horizontally and vertically This mode is good for displaying a cinema type picture at the 16 9 ratio In Mode 3 Normal the monitor displays a normal picture at the centre of the screen with a vertical black band at each side To playback a DVD Audio disc set VCAP in Setting the DVD Audio Playback Mode page 30 Switching the Visual So...

Page 29: ...ting to reverse R the rear pictures are output This function is effective when the reverse wire is properly connected DVD Setup Operation The DVD Setup operation can be carried out after removing the disc from the unit 1 Touch SETUP on the main source screen The SETUP selection screen is displayed 2 Touch of SOURCE SETUP The SOURCE SETUP screen appears 3 Touch of DVD SETUP The DVD setup screen app...

Page 30: ...s displayed 2 Touch the 4 digit numeral of the language number As for the language number refer to List of Language Codes page 57 3 Touch ENT to memorize the number Set the country number of which you want to set the rating level Parental lock Setting item COUNTRY CODE Setting content AUTO OTHER When the settings are changed the old settings are overwritten Make a note of the current settings befo...

Page 31: ...tting BITSTREAM The digital output is switched automatically according to the type of audio signals being played Be sure to select BITSTREAM when you want to connect a digital audio processor and play Dolby Digital audio BITSTREAM is the factory setting PCM The audio signals recorded on the disc are converted to 48 kHz 16 bit for DVDs or 44 1 kHz for Video CDs and CDs PCM audio signals for output ...

Page 32: ... the 4 digit code number given on the jacket of the disc etc 3 Touch ENT to memorize the number If the code number of the bonus group differs from the code number you set in this section the 10 key input screen automatically appears in the display If a new code number is input this code number will be replaced To playback the DVD Audio Disc you have a choice of 3 different settings If the disc con...

Page 33: ...ings may not be changed The clock indication on the monitor display is turned on or off respectively Setting item CLOCK Setting content OFF ON Setting item CLOCK ADJUST Further setting items HOUR MINUTE TIME ADJUST Setting content 1 12 0 59 RESET The clock adjusting mode is cancelled when the power is turned off when RETURN is touched Displaying DivX Disc Information Setting the Video CD Play Mode...

Page 34: ...Touch RETURN to return to the previous screen Immediately after changing the settings of System Mode While the system is writing data automatically do not turn the ignition key engine key to OFF Otherwise the settings may not be changed If an Alpine Ai NET Interrupt Box NVE K200 is connected to the IVA D106E an Auxiliary Source will be allowed to interrupt the current audio source For example use ...

Page 35: ... is effective when NAV IN of SYSTEM list screen is ON Set when an optional iPod or an external input device is to be connected Setting item iPod Setting contents AUDIO VIDEO AUX With a rear camera connected rear view video is output to the monitor Setting item CAMERA IN Setting contents OFF ON By shifting to reverse R the rear pictures are output This function is effective when the reverse wire is...

Page 36: ...VISUAL KEY Setting content VISUAL NAV To connect an audio processor using the optical digital output set to ON by the following procedure Setting item OPTICAL OUT Setting contents OFF ON Afterwards set ACC to OFF once then turn it ON again The setting of Digital Output is decided The setting is made if AUX is selected in Setting for iPod Connection page 33 Setting item AUX LEVEL Setting contents L...

Page 37: ...tting item BACKGROUND Setting content MODE1 MODE2 This operation can be carried out after removing the disc from the unit or when playback of the disc has stopped Wallpapers downloaded from Downloading the BACKGROUND data page 37 are recalled When you select a source other than the built in disc on this unit and the built in disc is selected on the rear monitor connected to the unit background tex...

Page 38: ...MORY The setting is available in the visual source mode except navigation screen 3 Change the setting on the selected item by touching its or 4 Touch RETURN to return to the previous screen You can select a mode suitable for the subject image Setting item VISUAL EQ Setting contents OFF FLAT NIGHT M SOFT SHARP CONTRAST P 1 P 2 To return to the initial setting after selecting any one of the setting ...

Page 39: ...an store the settings made for Adjusting Image Brightness Tint Depth Picture Quality and Contrast Setting item USER MEMORY Setting content P 1 P 2 1 After completing Adjusting Brightness Tint Depth Picture Quality and Contrast page 37 touch or of USER MEMORY and then select preset No P 1 or P 2 to which the settings are to be stored 2 After selecting a preset No touch MEMORY The adjusted VISUAL EQ...

Page 40: ... connected Switching the Subwoofer Phase Setting the Subwoofer System or Setting the Subwoofer Channel operations are available For details refer to page 25 Setting the MX Level MX Media Xpander makes vocals or instruments sound distinct regardless of the music source The FM radio CD DVD and iPod will be able to reproduce the music clearly even in cars with a lot of road noise Setting item MEDIA X...

Page 41: ...24 dB oct FLAT can be set for the HIGH slope only when USER is selected in Setting the Response Slope for the High Range Speaker TW Setup page 41 Depending on the response characteristics of the speaker care should be taken when setting the response slope to FLAT as speaker damage may result With this unit a message is displayed when the response slope for the high range speaker is set to FLAT Che...

Page 42: ...rs 3 Adjust the P EQ to your preference Selecting the Band Setting contents BAND 1 to 5 Touch or of BAND Select the desired band Adjusting the Frequency Setting contents BAND 1 20 Hz 80 Hz BAND 2 50 Hz 200 Hz BAND 3 125 Hz 3 2 kHz BAND 4 315 Hz 8 kHz BAND 5 800 Hz 20 kHz Touch or of FREQ then adjust the frequency of the selected band Adjusting the Level Setting contents 6 dB to 6 dB Touch or of LE...

Page 43: ...ft and right speakers for optimum staging The adjustment will be made for each speaker in 3 4cm steps Adjust the time correction level of the front left speaker to a high value and the rear right to zero or a low value The sound is not balanced because the distance between the listening position and the various speakers is different The difference in distance between the front left speaker and the...

Page 44: ... 6 224 4 88 4 18 1 7 57 8 22 8 68 6 7 27 8 89 8 19 1 8 61 2 24 1 69 6 8 231 2 91 1 20 1 9 64 6 25 5 70 6 9 234 6 92 5 21 2 0 68 0 26 8 71 7 0 238 0 93 8 22 2 1 71 4 28 1 72 7 1 241 4 95 1 23 2 2 74 8 29 5 73 7 2 244 8 96 5 24 2 3 78 2 30 8 74 7 3 248 2 97 8 25 2 4 81 6 32 2 75 7 4 251 6 99 2 26 2 5 85 0 33 5 76 7 5 255 0 100 5 27 2 6 88 4 34 8 77 7 6 258 4 101 8 28 2 7 91 8 36 2 78 7 7 261 8 103 2...

Page 45: ...lect high frequencies Seat and dashboard coverings change certain frequencies Carpets absorb and suppress mid frequencies Graphic and parametric EQs are only partial remedies for these problems In addition the speakers are not located at equal distances from listeners creating an unbalanced uncentred sound stage Time correction can help fix this but only for one listening position These acoustical...

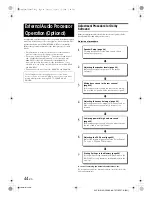
Page 46: ...to make the Automatic adjustments before the Dolby Surround adjustments ExternalAudioProcessor Operation Optional The Parking Brake must be engaged to access the Audio Processor mode screen Attempting to access this screen while driving will display the warning CAN T OPERATE WHILE DRIVING 1 2 3 4 5 6 7 Speaker Setup page 48 Turning the speakers to be used on and off and setting their response Adju...

Page 47: ...cluding AM radio level can be set MX CD OFF CD MX 1 to 3 CD mode processes a large quantity of data This data is used to reproduce the sound cleanly by making use of the data quantity MX CMPM OFF CMPM MX 1 to 3 This corrects information that was omitted at the time of compression This reproduces a well balanced sound close to the original MX FM OFF FM MX 1 to 3 The medium to high frequencies becom...

Page 48: ...5 2 Sit in the listening position the driver s seat for example and measure the distance in meters between your head and the various speakers 3 Calculate the difference in distance between the farthest speaker and the other speakers 4 Divide the distances calculated for the different speakers by the speed of sound 343 m s temperature 20 C This value is the time correction value for the various spe...

Page 49: ...layable frequency ranges of the connected speakers before making the equalizer adjustments If the speaker s playable frequency range is 55 Hz to 30 kHz for example adjusting the 40 Hz or 20 Hz band has no effect Additionally you may overload and damage the speakers When graphic EQ is adjusted the adjustment for parametric EQ becomes ineffective Parametric Equalizer Adjustments The frequency bands ...

Page 50: ... Touch RETURN to return to the previous screen Speaker Setup Check the playable frequency range of the speakers not including the subwoofer before performing this operation to verify whether the speakers can play low frequencies of about 80 Hz or less Avoid stopping pausing switching the disc cueing fast forwarding or switching the audio channel of this unit while making this adjustment The settin...

Page 51: ...e volume to a level at which sounds outside the vehicle can still be heard The test tones help to make the volume adjustments of the different speakers When levels are equal a strong sense of presence can be heard from the different speakers at the listening position Avoid stopping pausing switching the disc cueing fast forwarding or switching the audio channel of this unit while making this adjus...

Page 52: ...ls from the rear speakers as well If REAR FILL is set 192kHz 96kHz etc contents are down sampled to 48kHz Avoid stopping pausing switching the disc cueing fast forwarding or switching the audio channel of this unit while making this adjustment The setting is cancelled if the Decode mode is switched This adjustment is ineffective when the speaker is set to CENTER OFF in Setting the Speakers page 45...

Page 53: ...ETY 1 While your vehicle is parked touch SOURCE on the main source screen The source screen appears on the display 2 Touch AUX The external input screen is displayed The name which is given as the source name in Setting the AUX Mode on page 34 is displayed If the AUX mode is not displayed on the main menu set AUX IN to ON by following Setting the AUX Mode page 34 The display mode changes by touchi...

Page 54: ...t disc to 6th disc When an MP3 compatible CD changer is connected 1 Touch P1 3 twice to change the Function Guide display 2 Touch any one of the select buttons DISC 1 through DISC 6 DISC 1 through DISC 6 select the discs from the first disc to 6th disc When a 12 Disc CD Changer is connected You can select the disc numbers 1 to 6 in the same manner as for 6 disc Changer Touch P1 3 twice to select d...

Page 55: ...iew the video file of a video compatible iPod Stop the vehicle in a safe location iPods usable with this unit The unit can be used with the fourth generation and above iPod iPod photo iPod mini or iPod nano iPod Shuffle cannot be used however Touch wheel or scroll wheel type iPods without the dock connector cannot be connected to the unit The unit can be used with the following iPod Fourth generat...

Page 56: ...or the album of an artist in step 2 The SONG search screen of the selected album is displayed 2 Touch next to the desired song s name The selected song is played back Touching of ALL will play back all songs in the list when you are in a hierarchy with an asterisk see table on left Touching of ALL will display the search list in the next hierarchy In search mode you can jump to an assigned positio...

Page 57: ...o cancel repeat play touch During repeat playback no other songs are selectable by touching or About DVDs Music CDs and DVDs have grooves tracks in which the digital data is recorded The data is represented as microscopic pits recorded into the track these pits are read by a laser beam to play the disc On DVDs the density of the tracks and pits is twice that of CDs so DVDs can contain more data in...

Page 58: ...decoder Analogue audio outputs are available Dolby Pro Logic II Dolby Pro Logic II plays 2 channel sources in 5 channels over the entire frequency range This is done with an advance high sound quality matrix surround decoder which draws out the spatial properties of the original recording without adding any sounds to or changing the sound of the source The separately sold digital audio processor P...

Page 59: ...6983 6984 6985 7065 7073 7074 7079 7082 7089 7165 7168 7176 7178 7185 7265 7273 7282 7285 7289 7365 Abbreviation IE IK IN IS IT IW JA JI JW KA KK KL KM KN KO KS KU KY LA LN LO LT LV MG MI MK ML MN MO MR MS MT MY NA NE NL NO OC OM OR PA PL PS PT QU RM Code 7369 7375 7378 7383 7384 7387 7465 7473 7487 7565 7575 7576 7577 7578 7579 7583 7585 7589 7665 7678 7679 7684 7686 7771 7773 7775 7776 7778 7779...

Page 60: ...IT JM JO JP KE KG KH 6877 6879 6890 6967 6969 6971 6972 6982 6983 6984 7073 7074 7075 7077 7079 7082 7165 7166 7168 7169 7170 7172 7173 7176 7177 7178 7180 7181 7182 7183 7184 7185 7187 7189 7275 7277 7278 7282 7284 7285 7368 7369 7376 7378 7379 7381 7382 7383 7384 7477 7479 7480 7569 7571 7572 Dominica Dominican Republic Algeria Ecuador Estonia Egypt Western Sahara Eritrea Spain Ethiopia Finland ...

Page 61: ... 8372 8373 8374 8375 8376 8377 8378 8379 8382 8384 8386 8389 8390 8467 8468 8470 8471 8472 8474 8475 8477 8478 8479 8480 8482 8484 8486 8487 8490 8565 8571 8577 8583 8589 8590 8665 8667 8669 8671 8673 8678 8685 8770 8783 8969 8984 8985 9065 9077 9087 PE PF PG PH PK PL PM PN PR PT PW PY QA RE RO RU RW SA SB SC SD SE SG SH SI SJ SK SL SM SN SO SR ST SV SY SZ TC TD TF TG TH TJ TK TM TN TO TP TR TT TV...

Page 62: ...is in DX mode If the area you are in is a primary signal area the antenna may not be grounded and connected properly Check your antenna connections make sure the antenna is properly grounded at its mounting location The antenna may not be the proper length Make sure the antenna is fully extended if broken replace the antenna with a new one Broadcast is noisy The antenna is not the proper length Ex...

Page 63: ... Error This player is not authorized to play this video If an unauthorized DRM protected DivX file is played back the following message is displayed for 2 seconds Authorization Error This player is not authorized to play this video This means the file s registration code does not match the player s and cannot be played back After the message has been displayed the beginning of the next file will a...

Page 64: ...hat matches the regional code number The DVD setup operation was attempted when a disc is inserted in the unit Eject the disc before the DVD setup operation A sampling rate bit rate not supported by the unit is used Use a sampling rate bit rate that is supported by the unit Indication for CD changer Protective circuit is activated due to high temperature The indicator will disappear when the tempe...

Page 65: ...106E Communication error Turn the ignition key off and then set to ON again Check the display by reconnecting between the iPod and the unit using the iPod cable Caused by the iPod Software Version not being compatible with this unit Update the iPod Software Version to be compatible with this unit The iPod is not verified Remove the iPod and try to connect it again Try connecting another video comp...

Page 66: ...eting Sensitivity 13 5 dBf 1 3 µV 75 ohms Alternate Channel Selectivity 80 dB Signal to Noise Ratio 65 dB Stereo Separation 35 dB Capture Ratio 2 0 dB Tuning Range 531 1 602 kHz Usable Sensitivity 22 5 µV 27 0 dBf Frequency Response 5 20 000 Hz Wow Flutter WRMS Below measurable limits Total Harmonic Distortion 0 008 at 1 kHz Dynamic Range 95 dB at 1 kHz Channel Separation 85 dB at 1 kHz Signal sys...

Page 67: ... INSTALL THEM SECURELY Be sure to use only the specified accessory parts Use of other than designated parts may damage this unit internally or may not securely install the unit in place This may cause parts to become loose resulting in hazards or product failure ARRANGE THE WIRING SO IT IS NOT CRIMPED OR PINCHED BY A SHARP METAL EDGE Route the cables and wiring away from moving parts like the seat...

Page 68: ...ution Do not block the unit s fan or heat sink thus preventing air circulation If blocked heat will accumulate inside the unit and may cause a fire Rear of the Unit Mounting Sleeve Included Mounting Bracket Included IVA D106E Flush head Screws M4 3 Included Dashboard Bracket Hex Bolt Included Rubber Cap Included Pressure Plates 2 When your vehicle has the Bracket mount the long hex bolt onto the r...

Page 69: ...the IVA D106E is connected directly to the positive post of the vehicle s battery the IVA D106E draws some current several hundred milliamperes even when its switch is placed in the OFF position and the battery may be discharged Connection Diagram of SPST Switch Sold Separately If the ACC power supply is not available To prevent external noise from entering the audio system Locate the unit and rou...

Page 70: ... power antenna To vehicle phone To the parking brake signal lead Ignition key BATTERY Yellow GND Black ACC Red REMOTE TURN ON Blue White POWER ANT Blue AUDIO INTERRUPT IN Pink Black PARKING BRAKE Yellow Blue To iPod CD Changer Sold Separately Amplifier Amplifier Amplifier Rear Left Rear Right Front Left Front Right Subwoofers To Audio output terminals R L To Audio input terminals R L To Video outp...

Page 71: ...Connect this to an iPod or an optional Bluetooth Box To use a hands free mobile phone an optional Bluetooth Box connection is required For details on connection refer to the Owner s Manual of the Bluetooth Box RGB Input Terminal Connect this to the RGB output terminal of the Navigation System Video Connector Use this when a video compatible iPod is connected Connect this to the iPod V CAMERA Conne...

Page 72: ...the Fiber optic Cable Be careful not to bend the Fiber optic Cable at a sharp angle EQ DIV NORM Navigation system Sold Separately Fiber optic cable Fiber optic digital Input terminal for head unit Audio Processor Ai NET Fiber optic digital compatible Sold Separately Fiber optic digital Input terminal for DVD Player Ai NET cable Fiber optic digital Input terminal for Changer Fiber optic cable Ai NE...

Page 73: ...o Ai NET Connector Grey Remote Control Output Lead White Brown Connect this lead to the remote control input lead This lead outputs the controlling signals from the remote control To Ai NET Connector Black Ai NET Cable Included with Audio Processor Connecting Video compatible iPod and Back up Camera at the same time System Switch When connecting an equalizer or divider using Ai NET feature place t...

Page 74: ...ch panel compatible rear monitor Remote Control Output Lead White Brown Connect this lead to the remote control input lead This lead outputs the controlling signals from the remote control Remote Control Input Lead White Brown Reverse Lead Orange White Use only when a back up camera is connected Connect to the plus side of the car s reverse lamp This lamp illuminates when the transmission is shift...

Page 75: ...P3 WMA AAC 15 DVD VCD 播放光碟 17 顯示 DVD 模式畫面 17 如果出現選單畫面 18 顯示頂部選單畫面 18 顯示選單畫面 18 顯示選單操作模式畫面 19 按節目搜尋 19 按播放清單搜尋 19 停止播放 PRE STOP 19 停止播放 19 快轉 快退 19 搜尋章 曲目 檔案的開頭 19 播放靜態影像 暫停 20 向前 向後逐幀播放 20 慢動作播放 20 選擇節目 SKIP 20 選擇播放清單 SKIP 20 選擇資料夾 20 重複播放 20 按標題 群組 節目 播放清單 資料夾編號 搜尋 22 按章 曲目或檔案編號直接搜尋 22 切換角度 22 向前或向後捲動頁面 22 切換音軌 22 切換字幕 字幕語言 23 從光碟選單中切換 23 顯示 DVD VCD 的光碟狀態 23 關於 DivX 23 其他實用功能 調整音訊 調整平衡 衰減器 低音 高音 ...

Page 76: ... Bluetooth IN 34 將 USB 轉接器設定為 ON OFF 34 設定 VISUAL 按鈕 34 設定數位輸出 34 設定 AUX 電平 34 顯示幕設定 顯示幕設定操作 35 調整監視器角度 35 設定自動開關監視器 35 設定背光亮度 35 調整背光的最小值 35 切換背景 35 設定自動背景 35 切換字體背景色彩 36 調整觸摸式面板 36 VISUAL EQ Visual EQ 設定操作 36 選擇 VISUAL EQ 模式 廠商設定 36 調整亮度 37 調整圖像色調 37 調整影像對比度 37 調整畫質 37 調整圖像色彩 37 儲存 VISUAL EQ 37 資料下載 下載 BACKGROUND 資料 37 IMPRINT 操作方式 選購 切換 MultEQ 模式 38 在手動模式中調節聲音設定 38 設定 MX 等級 38 X OVER 調節 39 調節時間...

Page 77: ...整 DVD 音量 49 在記憶體中儲存設定 49 調用預設記憶體 49 使用 Pro Logic II 模式 50 線性 PCM 設定 50 導航系統 選購 切換導航畫面 選購 51 輔助設備 選購 操作輔助設備 選購 51 換碟機 選購 控制 CD 換碟機 選購 52 多碟機選擇 選購 52 TUE T200DVB 操作 選購 操作 TUE T200DVB 選購 53 iPod 選購 播放 53 搜尋想要的歌曲 54 按歌手姓名搜尋 54 直接搜尋功能 54 選擇播放清單 歌手 專輯 類別 作曲人 插曲 54 隨機播放 M I X 55 重複播放 55 資訊 有關 DVD 55 術語 56 語言代碼清單 57 地區代碼清單 58 出現問題時 60 規格 64 安裝和連接 警告 65 注意 65 使用須知 65 安裝 66 連接 68 系統示例 70 01CT00IVAD106E book...

Page 78: ...在汽車里用大音量收聽還可能導致聽力遭受傷害 駕駛中盡可能少看顯示器 看顯示器 可能分散駕駛員注視汽車前方的注意力而導致意 外事故 不要分解或改造 否則 可能導致意外事故 火災或觸電 僅用於 12 伏負極 接地的汽車 如果您無法確定 請向您的代理商確認 否則可能會造成 火災或電擊 請將螺栓或螺絲等小物體放在幼兒無法取及的地方 吞下小物體會引起嚴重的傷害 如果誤吞 請立即請醫生診 治 更換保險絲時須選用規定安培值的保險絲 否則可能引起火災或觸電 不要堵塞住通風孔或散熱板 否則 可能導致內部積熱並可能導致火災 本產品請應用於 12V 型式的汽車 應用在別型汽車 可能導致火災 觸電或其它傷害 別把手 手指或雜物放到插縫或間隙中 否則 可能使個人遭受傷害或損壞了產品 發生問題時 請立即停止使用 否則 可能使個人受傷害或損壞了產品 請將本產品送回到 指定的 Alpine 代銷店或附近的 Alpine ...

Page 79: ...放器會顯示 DISC ERROR 如果正確裝入了光碟仍繼續 顯示 DISC ERROR 請用原子筆等尖頭物體按 RESET 開 關 當您行駛在十分顛簸的路段上時 播放光碟會有跳音現象 但這不會劃傷光碟或損壞播放器 形狀不規則的光碟 請在本機上僅使用圓形光碟 切勿使用任何特殊形狀的光碟 使用特殊形狀的光碟可能會損壞機械裝置 新光碟 為防止 CD 卡住 如果裝入了表面不平整的光碟或未正確裝入 光碟 則會顯示 DISC ERROR 新光碟裝入播放器後立即 彈出時 請用手指在中心孔內和光碟外緣感覺一下 如果您 感到有小的凸起部份或不平整 這是阻礙光碟正確裝載的原 因 若要消除這些小的凸起部分 請用原子筆或類似器具摩 擦圓孔內緣和光碟的外緣 然後再裝入光碟 安裝位置 IVA D106E 不可安裝於下列任何場所 陽光直射和熱源附近 濕度很高的地方或水源附近 多塵場所 劇烈振動的場所 正確使用 使用時請...

Page 80: ...的方法才會 有效 如果駕車時企圖執行這些操作 則將顯示 CAN T OPERATE WHILE DRIVING 駕車時無法操作 警告 即使電源關閉 IVA D106E 也會消耗微量電能 如果 IVA D106E 的切換電源 點火 線與車輛電瓶正 極直接 相連 電瓶可能會放電 可以添加一個 SPST 單極單投 開關 另售 來簡化此 步驟 這樣當您離開車輛時 只需將其置於 OFF 位置即 可 使用 IVA D106E 以前 請將 SPST 開關置回 ON 有關 連接 SPST 開關 請參閱 SPST 開關 另售 的連接圖 第 67 頁 如果此電源 點火 線未經切換且車輛長期 閑置 則必須將其從電瓶極點取下 本機可播放的光碟 可播放光碟 以下列出的光碟可以在本機上播放 與雙層 DVD 光碟相容 以下列出的已格式化的光碟可在本機上播放 未經最終化處理的光碟無法播放 透明紙 光碟穩定器 標誌 圖標 ...

Page 81: ...io Coding 是一種採用壓 縮技術來縮小音樂檔案尺寸的資料檔案 混合音訊 CD 和資料 MP3 WMA AAC CD R RW 光碟 IVA D106E 可以讀取光碟上的任何部分 請選擇 CD DA 播放 CD 音訊部分或選擇 MP3 WMA AAC 播放 MP3 WMA AAC 部 分 多區段 CD R RW 如果一段錄製停止 則該段錄製視為一個區段 若光碟未完 成 最終化 則可以新增資料 一旦錄製了其他資料 就 變成了 多區段 CD IVA D106E 僅可讀取多區段資料格式 的光碟 MP3 WMA AAC 檔案 非音訊 CD 檔案 正確格式化的 MP3 WMA AAC 光碟 採用 ISO9660 格式化以確保正確播放 您可使用標準 ISO 命 名 Level 1 8 3 DOS 標準 Level 2 32 字元 或 Joliet Windows 或 Macintosh 長檔案名...

Page 82: ...78762 6487535 及其他美國和全球已核發或申請中的專利授權製 造 DTS 和 DTS 2 0 Digital Out 為 DTS Inc 的註冊商標 DTS 標誌和圖示為 DTS Inc 的商標 1996 2007 DTS Inc 保留所有權利 Windows Media和Windows標誌是Microsoft Corporation在美 國和 或其他國家的商標或註冊商標 iPod 是 Apple Inc 在美國和其他國家註冊的商標 MPEG Layer 3音訊編碼技術經Fraunhofer IIS和Thomson 授權 本產品僅供個人和非商業性使用 未經授權 不得用於任 何商業性 即收益性 的即時廣播 如全球 衛星 有線 和 或其他任何媒體 在互聯網 局域網和 或其他網路 上進行的廣播 串流 或者付費音訊 音訊點播等電子內容 傳播系統中的廣播 串流 該領域的使用需單獨得到授權 ...

Page 83: ... 按鈕 第 34 頁 中設定為 VISUAL 短按可調用 VISUAL 選擇畫面 如果設定為 NAV 短按可調用 導航畫面 OPEN CLOSE FLAT 按鈕 打開監視器 按住 2 秒以上可關閉監視器 按此按鈕可將打開的監視器設定為平放位置 按鈕 彈出光碟 按鈕 使用此按鈕取下前面板 DISC IN 指示燈 光碟裝入本機時亮起 電源指示燈 電源開啟時指示燈會亮起 拆卸和安裝前面板 拆卸 1 關閉本機電源 2 按右下側的 釋放 直到前面板彈出 3 抓住前面板右側 將其拉出 前面板在正常使用中可能變燙 特別是前面板背部的連接器端 子 這並不是故障 若要保護前面板 請將其放在附帶的攜帶包中 安裝 1 將前面板的左側插入主機 將前面板上的凹槽對準主機 上的突出部分 2 推入前面板的右側 直至其牢固地裝入主機 安裝前面板以前 請確保連接器端子上無污垢或灰塵 以及前 面板和主機之間無異物 安裝前面板...

Page 84: ...設定為 90 度 根據車輛 監視器打開時可 能會碰到儀表板 監視器的角度可以調整並儲存在記憶體中 以便打開時不會碰到儀表板 有關調節監視器 請參閱第 35 頁 的 調整監視器角度 即使車輛電瓶停止供電 調整的監視器角度也會保留在記憶體 中 IVA D106E 為精密設備 小心使用的話 可以長期享受其獨特 的功能 如果監視器打開 或關閉 時碰到任何物體 本機會立即停止 打開 或關閉 監視器 此時 請移除障礙物並再次按住 OPEN 2 秒以上降低監視器 當移動式監視器打開時 請勿在監視器上放置任何物體 注意 當其打開時切勿碰撞監視器或對其使用蠻力 否則可能損壞機 械裝置 在低溫環境中 電源打開時短期內顯示幕可能會黑屏 一旦液 晶螢幕回暖 顯示幕將恢復正常 為了您的安全 車輛移動時 本機有些操作無法執行 此時 請先停車並拉起停車制動器 然後再執行操作 平放監視器 當您要操作被升起的監視器擋住的車...

Page 85: ...返回上一頁 2 輕觸 RADIO 畫面變為無線電模式的主畫面 FM 無線電模式的主畫面示例 切換至訊號源選擇畫面 至步驟 1 的畫面 工作狀態指示燈 顯示音量電平 功能指南 功能指南顯示因訊號源而異 輕觸功能指南上的 P1 2 或 P1 3 進行內容變更 並可執 行許多其他功能 顯示時間 切換至 SETUP 選擇畫面 切換至 VISUAL 選擇畫面 顯示訊號源名稱 例如所選的無線電波段等 顯示可能因所連設備而異 當連接選購的 DVD 播放器或相容 Ai NET 的 DVD 換碟機時 AUX 會在顯示幕上顯示為 EXT DVD 或 DVD CHG 當同時連接選購 DVD 播放器和相容 Ai NET 的 DVD 換碟機時 AUX 在顯示幕上顯示為 EXT DVD DVD 換碟機顯示為 DVD CHG 3 輕觸主訊號源畫面的 SOURCE 以變更為另一個訊號源 畫面 並從 SOURCE 選擇畫面...

Page 86: ...數字鍵盤輸入畫面 3 輕觸 ENT 確認您的輸入 FM 無線電主畫面的示例 顯示預設號碼 頻率 收聽無線電 1 輕觸主訊號源畫面上的 SOURCE 顯示訊號源選擇畫面 2 輕觸 RADIO 啟動無線電模式 畫面變為無線電模式 3 輕觸 BAND 選擇想要的無線電波段 每按一次 波段如下改變 4 輕觸 TUNE 選擇調諧模式 每次輕觸均會改變調諧模式畫面 自動調諧有兩種模式可以選擇 DX 和本地 DX 遠地 模式 DX SEEK 指示燈為 ON 訊號強和弱的電台均會調入 本地模式 SEEK 指示燈為 ON 僅調入訊號強的電台 初始設定為 DX 5 輕觸 或 分別向上或向下改 變無線電頻率 在手動模式中 按住可連續改變頻率 顯示數字鍵盤輸入畫面 無線電 FM 1 FM 2 AM FM 1 遠地 本地 手動 遠地 01CT00IVAD106E book Page 12 Tuesday Janua...

Page 87: ...按訊號強度將 6 個訊號強的電台存入 P SET 1 到 P SET 6 自動儲存完成時 調諧器將轉到儲存在 P SET 1 的電台 如果未儲存電台 調諧器將返回自動儲存開始前您正在收聽的 原電台 調諧至預設電台 您可以用預設號碼調入各波段在記憶體中的預設電台 1 選擇想要的波段後 輕觸 P1 2 改變功能指南 2 輕觸存有電台的預設按鈕 P SET 1 到 P SET 6 之一 收到預設電台 MP3 WMA 主畫面的示例 CD 上一行顯示曲目文字 1 下一行顯示光碟文字 歌手 1 如果沒有曲目和光碟名稱資訊 將顯示 NO SUPPORT MP3 WMA AAC 在上一行顯示檔案名稱後 如果有 ID3 標記資訊 將顯示曲 目名稱 在下一行顯示資料夾名稱後 如果有 ID3 標記資訊 將顯示 專輯名稱 歌手姓名 CD 顯示光碟編號 2 曲目編號 已播放時間 MP3 WMA AAC 顯示光碟編號...

Page 88: ...式功能在 CD 換碟機模式中無法使用 播放 VBR 可變位元率 錄製的檔案時 播放時間可能無法正 確顯示 如果按 之後將光碟留在裝置中 則光碟將被自動拖回到裝置 中並處於暫停 此時 觸碰 開始播放 或重新退出並 在 15 秒鐘內取出光碟 重複播放 輕觸 重複播放當前播放的曲目 曲目 檔案 將重複播放 再次輕觸 並選擇 OFF 可關閉重複播放 1 輕觸 P1 2 3 改變功能指南 2 輕觸 選擇想要的重複播放 1 如果連接了 CD 換碟機或與 MP3 相容的 CD 換碟機並選擇了 RPT DISC 模式 本機將重複播放所選光碟上的全部曲目 檔 案 2 僅重複播放一個資料夾中的檔案 3 顯示可能因所連設備而異 M I X 隨機播放 播放時輕觸 以隨機順序播放光碟里的曲目 檔案 若要取消 M I X 播放 輕觸 1 輕觸 P1 2 4 改變功能指南 2 輕觸 選擇想要的 M I X 播放 1 如...

Page 89: ...範圍內 建議儘可能使用高採樣率或位 元率製作光碟 ID3 標記 WMA 標記 本機支援 ID3 標記 v1 和 v2 以及 WMA 標記 如果 MP3 WMA AAC 檔案中有標記資料 本機可以顯示標題 曲目標題 歌手姓名和專輯名稱等 ID3 標記 WMA 標記資料 最多 128 個字元 本機只能顯示單位元組的字母數字字元以及下劃線 對於不支援 的字元 則顯示 NO SUPPORT 根據標記資訊 字元的數目可能有限制或無法正確顯示 製作 MP3 WMA AAC 光碟 準備好 MP3 WMA AAC 檔案後 用 CD R 寫入軟體將其寫入 CD R 或 CD RW DVD R DVD RW 一張光碟最多能容納 4096 個檔案 256 個資料夾 包括根目錄 根據光碟的資料夾 檔案結構 讀取光碟可能需要數分鐘 此時 建議減少所用資料夾的數目 支援的媒體 本機能夠播放的媒體是 CD ROM CD...

Page 90: ... VIDEO DVD AUDIO PROGRAM PLAYLIST DVD VR VIDEO CD 顯示 DivX 的標記資訊 顯示 DVD 視訊的標題編號 章編號 已播放時間 顯示 DVD 音訊的群組編號 曲目編號 已播放時間 顯示 DVD VR 的節目或播放清單編號 章編號 已播放時間 顯示 VCD 的曲目編號 已播放時間 當 PBC 關閉時 顯示 DivX 的資料夾編號 檔案編號 已播放時間 如果輕觸 DivX 模式畫面上的 會顯示搜尋清單畫面 請參閱 搜尋功能 第 25 頁 根據光碟或播放畫面 有些操作無法執行 P1 2 等功能指南顯示可能會因所連設備而異 適用於每個標題的光碟類型由以下標記表示 術語 根目錄 資料夾 MP3 WMA AAC 檔案 DVD VCD 可以使用 DVD 市售視訊光碟 用於電影等分 發 或以視訊模式錄製的 DVD R DVD RW DVD R DVD RW...

Page 91: ...能會造成損壞 另請參閱 DVD 設定 第 27 到 31 頁 當連接 DVD 換碟機或 DVD 播放器時 務必將遙控輸入導線與本 機 的遙控輸出導線相連 如果連接錯誤 將無法進行觸控操 作 若要在 VCD 播放時返回先前的畫面 請在輕觸功能指南的 P1 2 後輕觸 RETURN 不過 功能可能因光碟而異 如果按 之後將光碟留在裝置中 則光碟將被自動拖回到裝置 中並處於停止 此時 請觸碰 開始播放 或重新排出 並在 15 秒鐘內取出光碟 用 DivX 顯示 INDEX READING 時 無法使用快轉 快退和 重播等功能 警告 駕車時 駕駛員觀看電視 DVD 錄像是危險的 駕駛 員可能會分散向前看的注意力 從而發生事故 正確安裝 IVA D106E 以便駕駛員無法觀看電視 DVD 錄像 除非停車並拉好緊急製動器 如果未正確安裝 IVA D106E 駕駛員能在開車時觀看電 視 DVD 視訊 則...

Page 92: ...盤輸入操作 PBC 關閉時 選單畫面不會顯示 將其打開可顯示畫面 請參閱 第 31 頁上的 設定 VCD 播放模式 1 輕觸 VCD 模式中的 P1 2 改變功能指南 2 輕觸 10KEY 顯示數字鍵盤 3 輕觸並輸入所需數字 4 輕觸 ENT 確認 當 DVD 包含兩個或以上的標題時 將出現頂部選單畫面 輕觸 DVD 模式主畫面中的 TOP MENU 出現頂部選單畫面 若要進行必需的操作 請參閱第 18 頁的 如果出現選單畫 面 若要播放 DVD 音訊光碟 請在 設定 DVD 音訊播放模式 第 30 頁 中設定 VCAP 當 DVD 有兩個或以上的選單時 將出現主節目和其他節目的選單 畫面 輕觸 DVD 模式主畫面中的 MENU 出現選單畫面 若要進行必需的操作 請參閱第 18 頁的 如果出現選單畫 面 如果出現選單畫面 根據光碟 有些操作無法執行 輕觸 RETURN 返回先前的畫面 根...

Page 93: ...STOP 模式中輕觸 從停止播放處開始播放 對於某些光碟 停止播放的位置可能不很精確 若要播放 DVD 音訊光碟 請在 設定 DVD 音訊播放模式 第 30 頁 中設定 VCAP 停止播放 播放時輕觸兩次 或按住 至少 2 秒 顯示 STOP 播放停止 播放停止時若輕觸 將從頭開始播放 快轉 快退 DVD 視訊 DVD VR VCD DVD 音訊 VCAP 模式 DivX 1 播放時 按住 快退 或 快轉 當按住超過 1 秒時 光碟將以兩倍速快轉或快退 當再按住 5 秒或更長時 光碟以 8 倍速快轉或快退 當按住 10 秒或更 長時 光碟以 21 倍速快轉或快退 DVD 音訊 VOFF 模式 1 播放時 按住 快退 或 快轉 2 停止輕觸 或 恢復正常播放 當在 設定 DVD 音訊播放模式 第 30 頁 中設定 VCAP 或 VOFF 時 快轉 快退時不播放聲音 對於帶有播放控制 PBC ...

Page 94: ...AM 功能指南 2 輕觸 PROGRAM 的 或 選擇所需節目 若要將功能指南畫面中 PLAYLIST 的 或 切換為 PROGRAM 的 或 請播放節目 詳見 按節目 搜尋 第 19 頁 選擇播放清單 SKIP 1 播放 DVD VR 光碟時 輕觸兩次 P1 3 顯示 PLAYLIST 功能指南 2 輕觸 PLAYLIST 的 或 選擇所需播放清單 若要將功能指南畫面中 PROGRAM 的 或 切換為 PLAYLIST 的 或 請播放播放清單 詳見 按播 放清單搜尋 第 19 頁 選擇資料夾 1 輕觸 P1 2 出現功能指南 2 輕觸 FLDR 或 FLDR 選擇資料夾 重複播放 使用此功能重複播放光碟標題 章或曲目等 DVD 視訊 1 輕觸 每次輕觸此按鈕可切換重複模式 顯示可能因所連設備而異 按住 2 秒以上可一直關閉 REPEAT 模式 補充說明 章 是 DVD 上的電影段落或音樂...

Page 95: ...清單模式 2 2 若要在 DVD 模式主畫面中將節目模式畫面切換為播放清單模式 畫 面 請經由節目或播放清單搜尋進行播放 請參閱 按節目 搜尋 或 按播放清單搜尋 第 19 頁 只能顯示含有播放清單的光碟 DivX 1 輕觸 每次輕觸此按鈕可切換重複模式 按住 2 秒以上可一直關閉 REPEAT 模式 重複播放曲目 重複播放光碟 不重複播放 REPEAT REPEAT DISC REPEAT OFF 重複播放曲目 重複播放群組 播放返回標準模式 REPEAT REPEAT GROUP REPEAT OFF 重複播放曲目 重複播放群組 重複播放光碟 RPT RPT GROUP OFF 重複播放章 重複播放所有節目 REPEAT REPEAT PROGRAM 重複播放節目 REPEAT DISC 重複播放章 重複播放所有播放清單 REPEAT REPEAT PLAYLIST 重複播放播放清單 ...

Page 96: ...選擇 從所選的章或曲目開始播放 未儲存章或曲目的光碟無法使用此功能 開始搜尋前 務必關閉 PBC 請參閱第 31 頁上的 設定 VCD 播 放模式 切換角度 對於一些場景是從多個角度拍攝的 DVD 在播放過程中可切換角 度 1 播放時 輕觸 P1 2 功能指南改變 畫面因光碟 模式 而異 2 輕觸 ANGLE 每次輕觸此按鈕 角度會在光碟上錄製的多個角度之間切 換 有些時候可能需要改變角度 根據光碟 角度可能會以兩種方式之一切換 連續 角度平滑切換 非連續 切換角度時 首先會顯示一幅靜態影像 然後切 換角度 若要播放 DVD 音訊光碟 請在 設定 DVD 音訊播放模式 第 30 頁 中設定 VCAP 向前或向後捲動頁面 頁面 是 DVD 音訊光碟中儲存的靜像 1 在 VCAP 模式 中播放 DVD 音訊光碟時 輕觸兩次 P1 3 當在 設定 DVD 音訊播放模式 第 30 頁 中設定 VC...

Page 97: ...模式 第 30 頁 中設定 VCAP 顯示 DVD VCD 的光碟狀態 採用以下步驟在監視器上顯示正在播放的 DVD 狀態 標題編號 章編號等 或 VCD 狀態 曲目編號等 1 播放時 輕觸顯示幕 顯示操作選單畫面 2 5 秒內輕觸 CONTROL 顯示狀態顯示 5 秒 在 5 秒內輕觸畫面上非功能指南的區域可關閉光碟狀態顯示 若要播放 DVD 音訊光碟 請在 設定 DVD 音訊播放模式 第 30 頁 中設定 VCAP 關於 DivX DivX 為一使用高壓縮速率和處理速度來壓縮動態影像並可保留 影像品質的編譯碼 軟體 程式 Official DivX Certified 產品 可播放標準 DivX 媒體檔案的所有 DivX 視訊版本 包括 DivX 5 DivX DivX Certified 和相關標誌均為 DivX Inc 商標 並經 授權使用 本機可播放以 DivX 模式錄製且副檔名...

Page 98: ... 音調 輕觸 BASS TREBLE 的 至調整畫面 連接外接音訊處理器時 不會顯示清單 如果在連接了 IMPRINT 音訊處理器時 切換 MultEQ 模式 第 38 頁 設為關閉 便不會顯示此清單 設定低音等級 您可以增強或減弱低音頻率 輕觸 BASS LEVEL 的 或 選擇所需低音等級 設定範圍 7 到 7 設定低音中心頻率 顯示的低音頻率得到增強 輕觸 BASS FREQ 的 或 選擇所需的低音中心頻率 設定範圍 60Hz 80Hz 100Hz 200Hz 設定低音頻寬 Q Factor 將增強的低音頻寬改為較寬或較窄 較寬設定將使中心頻率 上下寬廣範圍內的頻率得到增強 較窄設定只對中心頻率附 近的頻率進行增強 輕觸 BASS BANDWIDTH 的 或 選擇所需低音頻寬 設定範圍 WIDE1 1 WIDE2 1 25 WIDE3 1 5 WIDE4 2 將對各訊號源 FM AM...

Page 99: ...連接選購的 IMPRINT 音訊處理器時 就會顯示設定範圍 切換 MultEQ 模式 第 38 頁 設為 OFF 且 重低音揚聲器開和關 會在汽車熄火時設為 ON 1 輕觸 SUBWOOFER 的 顯示變為 SUBWOOFER 調整畫面 2 輕觸 CHANNEL 的 或 以選擇 STEREO 或 MONO 單聲道 STEREO 重低音揚聲器立體聲 L R 輸出 MONO 重低音揚聲器單聲道輸出 調整重低音揚聲器等級 當連接了外接音訊處理器時顯示清單 輕觸 SUBW LV 的 或 以調整重低音揚聲器輸出 設定範圍 0 到 15 調整 NAV LEVEL 輕觸 NAV MIX 的 或 以調整導航介入的音量 設定範圍 0 到 15 在 設定導航介入 第 33 頁 中打開 NAV MIX 時 可以進行 此調整 如果連接的外接音訊處理器與 NAV MIX 不相容 設定導航介入 不會顯示 打開或關閉清...

Page 100: ...拉寬 以便正常 圖像拉寬後可以充滿寬螢幕監視器 在模式 2 劇院 中 監視器透過將圖像沿水平和垂直方向拉伸 來顯示正常圖像 此模式適用於以 16 9 顯示影片類圖像 在模式 3 正常 中 監視器在畫面中央顯示正常圖像 兩邊有 垂直黑帶 若要播放 DVD 音訊光碟 請在 設定 DVD 音訊播放模式 第 30 頁 中設定 VCAP 僅切換視訊訊號源 同步功能 您可以在聆聽當前訊號源的同時觀看其他訊號源的視訊部分 1 輕觸音訊訊號源畫面上的 VISUAL 出現 VISUAL 選擇畫面 2 輕觸想要的視訊訊號源 切換到所選的視訊訊號源 1 按 VISUAL 2 輕觸 NORMAL 同步功能取消 若要執行此設定 請在 設定 VISUAL 按鈕 第 34 頁 中設定 為 VISUAL 如果連接了 DVD 播放器 您可以接收 DVD 圖像 連接了 DVD 換碟機 DHA S680E 按住 DVD 播放器...

Page 101: ...透過切換到倒車檔 R 可以輸出車後圖像 此功能在倒車線 正確連接時有效 DVD 設定操作 從本機取出光碟後可以進行 DVD 設定 1 輕觸主訊號源畫面上的 SETUP 顯示 SETUP 選擇畫面 2 輕觸 SOURCE SETUP 的 出現 SOURCE SETUP 畫面 3 輕觸 DVD SETUP 的 出現 DVD 設定畫面 4 輕觸想要項目的 或 等改變其設定 設定項目 MENU LANGUAGE AUDIO LANGUAGE SUBT LANGUAGE COUNTRY CODE PARENTAL DIGITAL OUT MODE DOWNMIX MODE TV SCREEN BONUS CODE DVD A SETUP DVD PLAY MODE FILE PLAY MODE DivX INFO PBC DVD 設定畫面的示例 輕觸 CODE 顯示數字鍵盤畫面 輕觸 或 設定想要的...

Page 102: ...語言中的首種字幕語言 以顯示語言以外的語言播放 1 輕觸 CODE 顯示數字鍵盤畫面 2 輕觸 4 位數語言編號 有關語言編號 請參閱 語言代碼清單 第 57 頁 3 輕觸 ENT 儲存此編號 設定您想設定限制等級 親子保護鎖定 的國家編號 設定項目 COUNTRY CODE 設定內容 AUTO OTHER 改變設定時 以前的設定將被覆寫 改變以前請記下當前的設 定 斷開與車輛電瓶的連接時 設定將被清除 1 輕觸 COUNTRY CODE 的 CODE 2 輕觸 ALL DEL 或 BS 刪除顯示的國家編號 3 輕觸 4 位數國家代碼 有關國家編號 請參閱 地區代碼清單 第 58 和 59 頁 4 輕觸 ENT 儲存此代碼 使用此功能限制僅年齡適當的兒童可以觀看影片 設定項目 PARENTAL 設定內容 INPUT 改變設定時 以前的設定將被覆寫 改變以前請記下當前的設 定 當斷開與車輛電...

Page 103: ...1 176 4kHz 16 20 24 位元 BITSTREAM 或 PCM 44 1kHz 16 位元 PCM 2ch 2ch 下行 混音 OK 48 96 192kHz 16 20 24 位元 BITSTREAM 或 PCM 48kHz 16 位元 PCM 2ch 2ch 下行 混音 OK PPCM DVD A 44 1 88 2 176 4kHz 16 20 24 位元 BITSTREAM 或 PCM 無輸出 OK 48 96 192kHz 16 20 24 位元 杜比數位 EX DVD V DVD A DVD VR 48kHz 16 18 20 位元 PCM 48kHz 16 位元 2ch 解碼 2ch 下行 混音 OK BITSTREAM 位元流 最 多 7 1ch OK DTS ES CD DA DVD V DVD A 44 1kHz 16 20 24 位元 PCM 44 1k...

Page 104: ... 2 輸入光碟套等上列出的 4 位代碼編號 3 輕觸 ENT 儲存此編號 如果花絮群組的代碼編號與您在此節設定的不同 顯示幕中將 自動出現數字鍵輸入畫面 如果輸入新的代碼編號 則將取代 此代碼編號 若要播放 DVD 音訊光碟 您有 3 種不同設定可供選擇 如果光碟 含有 DVD 視訊和音訊 請設定 VCAP 可視訊的音訊播放機 或 VOFF 視訊關閉 播放 DVD 音訊 設定項目 DVD A SETUP 設定內容 VIDEO VCAP VOFF 如果使用同時含有壓縮視訊檔案和壓縮的音訊檔案的光碟 您可 以選擇只播放其中一種 設定項目 DVD PLAY MODE 設定內容 VIDEO AUDIO 當使用包含音訊資料和 MP3 WMA AAC 資料的光碟時 設定項目 FILE PLAY MODE 設定內容 CD CMPM 當插入光碟時 請在設定前從本機中取出光碟 當使用 MP3 相容的 CD ...

Page 105: ...MER LEVEL 4 輕觸 RETURN 返回先前的畫面 變更一般模式設定以後 請勿立即將點火鑰匙 引擎鑰匙 置 於 OFF 此時系統正在自動寫入資料 否則設定可能沒有改變 分別開啟或關閉監視器顯示的時鐘指示畫面 設定項目 CLOCK 設定內容 OFF ON 設定項目 CLOCK ADJUST 詳細設定項目 HOUR MINUTE TIME ADJUST 設定內容 1 12 0 59 RESET 當關閉電源 輕觸 RETURN 時 會取消時鐘調整模式 顯示 DivX 光碟資訊 設定 VCD 播放模式 OFF 不顯示 PBC 選單 ON 顯示 PBC 選單 一般設定 只有拉起停車制動器才能進入一般模式畫面 駕車時若試圖進入此 畫面將會顯示警告 CAN T OPERATE WHILE DRIVING 開車時 無法進行此操作 以下步驟 1 至 4 是一般設定中各項 設定項目 的基本操作 詳見各...

Page 106: ... 時 此項 目會顯示 3 當在 設定 AUX 模式 第 34 頁 中設定了 ON 時 這些 項目會顯示 4 當在 設定 iPod 連接 第 33 頁 中設定為 AUX 此項 目會顯示 5 當在 設定藍芽連接 Bluetooth IN 第 34 頁 中設定了 OFF 時 此項目會顯示 4 輕觸 RETURN 返回先前的畫面 變更系統模式設定以後 請勿立即將點火鑰匙 引擎鑰匙 置 於 OFF 此時系統正在自動寫入資料 否則設定可能沒有改變 如果 IVA D106E 連接了 Alpine Ai NET 中斷盒 NVE K200 將 可讓另一輔助來源中斷當前的音訊來源 例如 當其出現時可使 用此功能讓電視的聲音中斷 CD 或 DVD 的播放 當語音指導出現 時 CD DVD 播放器會自動變為靜音 更多詳情 請參閱 NVE K200 手冊 設定項目 IN INT MUTE 設定內容 OFF ON 要...

Page 107: ...告介入 無論音量如何設定 一定會重 設當前的音量等級 當 SYSTEM 清單畫面的 NAV IN 為 ON 時 此設定有效 當連接選購的 iPod 或外接輸入裝置時進行設定 設定項目 iPod 設定內容 AUDIO VIDEO AUX 與後置攝像頭連接時 後視視訊會輸出至監視器 設定項目 CAMERA IN 設定內容 OFF ON 透過切換到倒車檔 R 可以輸出車後圖像 此功能在倒車線正確連接時有效 若要執行此設定 在 設定 VISUAL 按鈕 第 34 頁 設為 VISUAL 設定中斷圖示顯示 INT 顯示幕上出現 INT 圖示 TEL 當外接裝備 電話 傳送中斷訊號時 顯示幕上會出現電 話圖示 切換遙控感應器的功能 FRONT 本機的遙控感應器可使用 REAR 連接至本機 AUX OUT 的外接監視器遙控感應器已 可使用 遙控器可操作連接至 AUX OUT 端子的訊 號源 設定導航模式...

Page 108: ...DAPTER 設定內容 OFF ON 如果設為 ON 則即使與 CD 換碟機連接 SOURCE 選擇畫面上 的來源名稱也會從 CD CHG 變為 USB 設定項目 VISUAL KEY 設定內容 VISUAL NAV 若要連接使用光學數位輸出的音訊處理器 請按照以下順序設定 為 ON 設定項目 OPTICAL OUT 設定內容 OFF ON 隨後 將 ACC 設定為 OFF 然後再將其設定為 ON 數位輸出的 設定被確定 如果 設定 iPod 連接 第 33 頁 中選擇 AUX 便需進行此 設定 設定項目 AUX LEVEL 設定內容 LOW HIGH 設定 AUX 模式 OFF 不顯示 AUX 源 ON 顯示 AUX 源 調整外部輸入音訊音量 LOW 減小外接輸入音訊音量 HIGH 增大外接輸入音訊音量 設定圖像 聲音輸出 ON REAR 項目顯示在 SOURCE 選擇畫面 按下 REA...

Page 109: ...UTO 時 此設定也適用於 用調光器調整按鈕夜 間亮度 第 32 頁 中的按鈕照明 您可調整背光的亮度 LOW 例如 可使用此功能改變夜間駕 駛時的螢幕亮度 設定項目 DIMMER LOW LEVEL 設定內容 15 15 您可將最小值調整在 15 和 15 之間 您可選擇背景 設定項目 BACKGROUND 設定內容 MODE1 MODE2 將光碟從本機取出後或光碟停止播放時可執行此操作 調出在 下載 BACKGROUND 資料 第 37 頁 下載的壁紙 當您選擇了本機的內建光碟以外的訊號源時 與本機相連的後 置監視器上選擇內建光碟 在本機上將無法顯示背景 當顯示出錯訊息 ERROR 等 時 本機上無法顯示此設定所選 擇的背景 每次點火鑰匙關閉然後再打開時 背景將自動改變 設定項目 AUTO BACKGROUND 設定內容 OFF ON 調出在 下載 BACKGROUND 資料 第 37...

Page 110: ...BRIGHT TINT CONTRAST SHARP COLOR USER MEMORY 在視訊訊號源中具有此設定 不包括導航畫面 3 通過輕觸 或 更改所選項目的設定 4 輕觸 RETURN 返回先前的畫面 您可選擇適合對象圖像的模式 設定項目 VISUAL EQ 設定內容 OFF FLAT NIGHT M SOFT SHARP CONTRAST P 1 P 2 若要在選擇任何設定內容 NIGHT M 到 CONTRAST 和調整 想要的亮度 圖像色調等項目後返回初始設定 請將此功能設 定為 OFF 在選擇任何設定內容 NIGHT M 至 CONTRAST 後 如果調 整您想要的亮度 圖像色調等項目 則螢幕上將顯示 CUSTOM 切換字體背景色彩 調整觸摸式面板 VISUAL EQ 下列 1 至 4 的順序為 VISUAL EQ 設定的各 設定項目 的 基本操作 詳見各章節 選擇 VIS...

Page 111: ...則無法進行色彩調整 您可儲存在 調整圖像亮度 色調 深度 畫質和對比度 中的 設定 設定項目 USER MEMORY 設定內容 P 1 P 2 1 完成 調整亮度 色調 深度 畫質和對比度 第 37 頁 後 輕觸 USER MEMORY 的 或 然後選擇 要儲存設定的預設號碼 P 1 或 P 2 2 選擇預設號碼後 輕觸 MEMORY 通過以上操作可儲存調整後的 VISUAL EQ 模式 您可通過 選擇 VISUAL EQ 模式 廠商設定 第 36 頁 中 所述的 P 1 或 P 2 調用此處儲存的 VISUAL EQ 模式 下載 BACKGROUND 資料 您可將資料 從 Alpine 的網站 下載到 CD R CD RW 資料被 寫入根資料夾 然後將資料儲存到 IVA D106E 若要開始 BACKGROUND 下載 請訪問以下 URL 然後遵照畫面 上的提示操作 http www a...

Page 112: ...Q TW SETUP USER PRESET 只有在連接 PXA H100 另售 且被設為 2 2ch 3WAY 模式時 才能使用此功能 詳情請參閱 PXA H100 的使用手冊 5 輕觸 RETURN 返回先前的畫面 如果連接了 IMPRINT 音訊處理器 可以進行 切換重低音揚聲器 相位 設定重低音揚聲器系統 或 設定重低音揚聲器聲 道 操作 詳情請參閱第 25 頁 設定 MX 等級 不管音源為何 MX Media Xpander 能讓歌聲或樂器聲音更清 晰 即使在伴隨著馬路上嘈雜聲的車內 FM 無線電 CD DVD 和 iPod 還是能夠清楚地重現音樂 設定項目 MEDIA XPANDER 1 輕觸MEDIA XPANDER的 或 選擇MX ON或OFF 2 設定為 ON 之後輕觸 出現 Media Xpander 設定畫面 3 輕觸想要的 MX 模式的 或 音源 例如無線電廣播和 ...

Page 113: ...第 41 頁 2 選擇 USER 時 請參閱 設定高頻範圍揚聲器的響應斜率 TW Setup 第 41 頁 調節電平 輕觸 LEVEL 的 或 調節電平 可調節的輸出電平 12 至 0 dB 調節斜率 輕觸 SLOPE 的 或 調節斜率 可調節的斜率 FLAT 6 dB oct 12 dB oct 18 dB oct 24 dB oct 僅當在 設定高頻範圍揚聲器的響應斜率 TW Setup 第 41 頁 中選擇了 USER 時 HIGH 斜率才可設定為 FLAT 視揚聲器的響應特性而定 將響應斜率設定為 FLAT 時必須小 心 因為可能造成揚聲器的損壞 使用本機 當高頻範圍揚聲 器的響應斜率設定為 FLAT 時 會顯示訊息 調節之前確認所連接揚聲器的播放頻率 調節 X Over 時 您必須考慮所連接揚聲器的頻率響應 設定 2 2ch 3WAY 4 2ch FRONT REAR SUBW ...

Page 114: ... EQ 清單畫面 3 視個人的喜好調節 P EQ 選擇波段 設定內容 BAND 1 至 5 輕觸 BAND 的 或 選擇想要的波段 調節頻率 設定內容 BAND 1 20 Hz 80 Hz BAND 2 50 Hz 200 Hz BAND 3 125 Hz 3 2 kHz BAND 4 315 Hz 8 kHz BAND 5 800 Hz 20 kHz 輕觸 FREQ 的 或 然後調節所選波段的頻率 調節電平 設定內容 6 dB 至 6 dB 輕觸 LEVEL 的 或 然後調節所選波段的電平 設定頻寬 設定內容 1 1 5 3 輕觸 Q 的 或 選擇頻寬 當調節了參數式 EQ 時 對圖形式 EQ 的調整將無效 鄰近波段的頻率無法在 4 個單位內調節 調節 Parametric EQ 時 您必須考慮所連接揚聲器的頻率響應 均衡器預設 Factory s EQ 出廠時會預設 10 種典型均衡器...

Page 115: ...移 這是由聲音傳達到聆聽者的右耳與左 耳之間所產生的時間滯延而引起的 為了校正該問題 本機能夠延遲傳達至最接近聆聽者的揚聲器的 音訊 這會使聆聽者感到與揚聲器之間的距離增加 聆聽者可坐 在左右揚聲器的正中央 以獲得最佳音域 以 3 4 cm 為單位 為每個揚聲器進行調節 將左前揚聲器的時間校正等級調高 將右後揚聲器的時間校正等 級調為零或調低 聲音不平衡 因為聆聽位置與多個揚聲器之間的距離不同 左前揚聲器和右後揚聲器的距離差為 1 75 m 我們計算在上方圖示中左前揚聲器的時間校正值 條件 最遠的揚聲器 聆聽位置 2 25 m 左前揚聲器 聆聽位置 0 5 m 計算 L 2 25 m 0 5 m 1 75 m 時間校正 1 75 343 1 1000 5 1 ms 1 聲音速度 20 C 時 343 m s 765 mph 換句話說 將左前揚聲器的時間校正值設定為 5 1 ms 能讓其與聆...

Page 116: ...99 2 26 2 5 85 0 33 5 76 7 5 255 0 100 5 27 2 6 88 4 34 8 77 7 6 258 4 101 8 28 2 7 91 8 36 2 78 7 7 261 8 103 2 29 2 8 95 2 37 5 79 7 8 265 2 104 5 30 2 9 98 6 38 9 80 7 9 268 6 105 9 31 3 0 102 0 40 2 81 8 0 272 0 107 2 32 3 1 105 4 41 5 82 8 1 275 4 108 5 33 3 2 108 8 42 9 83 8 2 278 8 109 9 34 3 3 112 2 44 2 84 8 3 282 2 111 2 35 3 4 115 6 45 6 85 8 4 285 6 112 6 36 3 5 119 0 46 9 86 8 5 289 0...

Page 117: ... 實際上 我們幾乎不曾精確地欣賞到藝術家的原創 特 別是當我們在車內聆聽時 汽車內部充滿會阻擾並劣化音質的零件 例如 車窗會放大並反 射高頻 座椅和儀表板蓋會改變某些頻率 地毯會吸收並抑制中 頻 圖形式和參數式 EQ 只是這些問題的部分解決方法 另外 各揚聲器與聆聽者之間的距離並不相等 造成不平衡 不集中的 音域 時間校正有助於解決此問題 但僅限於一個聆聽位置 這些音響問題過於嚴重 以致於沒有任何校正系統能夠克服 直 到現在 由於引進 IMPRINT Alpine 提供的硬體 軟體組合不但 能解決這些問題 事實上 它還能改善音域 音調平衡和清晰度 並在幾分鐘內自動完成 基於五項理由 使用 MultEQ 的 IMPRINT 比其他均衡系統更優 秀 它是唯一能完整測量聆聽區域 從每個聆聽位置擷取時域資 訊 以及利用一種專利方法處理時域資訊使其可代表所有座椅 位置的系統 這能給予每個座位的聽眾最...

Page 118: ...行調整以便更精確地再現杜比數位和 DTS 音效 調整方法 當與自動調整等功能配合使用時 建議您在進行杜比環繞調整以前先進行自動調整 外接音訊處理器操作 選購 必須拉起停車制動器才能進入音訊處理器模式畫面 駕車時若試圖 進入此畫面將會顯示警告 CAN T OPERATE WHILE DRIVING 開車時無法進行此操作 1 2 3 4 5 6 7 揚聲器設定 第 48 頁 打開和關閉所用的揚聲器 設定其響應 調整揚聲器音量 第 49 頁 調整各揚聲器的訊號輸出電平 向後聲道混入低音 第 49 頁 經由將前音訊訊號與後揚聲器訊號混合 在後座實現 平滑流暢的音效 調整聲像 第 49 頁 調整聲像使聲音聽起來彷彿中置揚聲器就在聽者面 前 實現強有力的高音量音效 第 49 頁 實現更加強勁的動感音效 彷彿影院中的音效 調整 DVD 音量 第 49 頁 調整杜比數位 Pro Logic II DTS ...

Page 119: ...PANDER 1 通過輕觸MEDIA XPANDER的 或 選擇MX的ON 或 OFF 2 設定為 ON 後 輕觸 出現 Media Xpander 設定畫面 3 輕觸所需的 MX 模式的 或 可以設定音源 例如無線電廣播和 CD 不包括 AM 無線電 音 量 MX CD OFF CD MX 1 到 3 CD 模式處理大量資料 經由利用資料數量 用此資料清晰地重 現聲音 MX CMPM OFF CMPM MX 1 到 3 用於修正壓縮時省略的資訊 可以重現接近原聲的平衡聲音 MX FM OFF FM MX 1 到 3 中頻到高頻變得更加清晰 在所有波段產生平衡良好的聲音 MX DVD OFF MOVIE MX 1 到 2 可以更加清晰再現視訊的對話部分 MX AUX OFF CMPM MX MOVIE MX MUSIC MX 選擇與所連媒體對應的 MX 模式 CMPM MUSIC 或 MO...

Page 120: ...EREO 則只有 重低音揚聲器可以調整 手動執行時間校正 TCR 因為車輛內部的具體情況不同 各揚聲器和聆聽位置之間的距離 可能有較大差異 利用此功能可以計算最優的校正值和消除到聆 聽位置的時間誤差 設定項目 T CORR 1 確認清除模式為關閉 第 25 頁 2 坐在聆聽位置 例如 司機座 測量各揚聲器到頭部 的距離 以米為單位 3 計算至最遠的揚聲器和至其他揚聲器之間的距離差 4 將不同揚聲器計算出來的距離除以音速 343 m s 溫度 20 C 此值即為各揚聲器的時間校正值 示例 計算下文圖中左前揚聲器的時間校正值 換言之 將左前揚聲器的時間校正值設定為 5 1 ms 可以設成與 最遠揚聲器的距離匹配的虛擬距離 L R 可以對左右聲道設定不同的調整值 L R 對左右聲道設定相同的調整值 L 至最遠揚聲器的距離 至其他揚聲器的距離 條件 最遠揚聲器和聆聽位置之間的距離 2 25 m 左...

Page 121: ...調整畫面 4 根據您的喜好調整 G EQ 調整電平 輕觸想要頻率的 或 以調整電平 當揚聲器設定為 OFF 模式時 無法對此揚聲器設定圖形式 均衡器 請參閱 設定揚聲器 第 45 頁 和 揚聲器設定 第 48 頁 在進行均衡器調整以前 請確認所連揚聲器可以播放的頻率範 圍 例如 如果揚聲器可以播放的頻率範圍為 55 Hz 到 30 kHz 則調整 40 Hz 或 20 Hz 波段沒有效果 另外 您還可能會使揚聲 器超載而受損 當調整圖形式 EQ 時 對參數式 EQ 的調整將無效 參數式均衡器調整 圖形式均衡器的頻率段被固定 因此難以在特定頻率修正不理想 的峰值和谷值 參數式均衡器的中央頻率可以調到這些特定的頻 率 從而頻寬 Q 和電平可以分別精確調諧 以便進行必需的 修正 對於熱愛音樂的愛好者來說 參數式均衡器功能是一個強 大的工具 設定項目 P EQ 1 輕觸 P EQ 的 或 選擇 L...

Page 122: ...鈕 設定想要的揚聲器的前後左右 的滯延數 低音聚焦的任何設定也會套用於時間校正 輕觸 RETURN 返回先前的畫面 揚聲器設定 請在進行此操作前先確認揚聲器 重低音揚聲器除外 可以播放 的頻率範圍 以確定揚聲器是否可以播放 80 Hz 左右或更低的 低頻 進行此調整時 切勿停止 暫停 換碟 插入 快進或切換本 機聲道 如果切換解碼模式 此設定將被取消 輕觸想要的揚聲器設定的 或 選擇揚聲器特性 只可將重低音揚聲器設定為 ON OFF 如果中置揚聲器設定為 OFF 則中央聲道的音訊訊號將被 添加到前置揚聲器輸出的音訊訊號 如果您將揚聲器響應設定為 OFF 則請將揚聲器設定也設 定為 OFF 第 45 頁 請對所有揚聲器 前置 中置 後置 重低音揚聲 器 進行設定 若不設定 則聲音可能會失去平衡 當中置揚聲器設定為 OFF 時 即使中置揚聲器用此功能進 行設定 此設定也無效 經由改變各揚聲器的...

Page 123: ... 感音效 彷彿影院中的音效 此功能僅在杜比數位模式中可用 輕觸 LISTENING MODE 的 或 選擇 STD 或 MAX 請將音量保持在仍然可以聽到車輛外聲音的電平 測試音用於對各揚聲器進行音量調整 當電平相等時 在聆聽位 置可以聽到各揚聲器的強烈現場感 進行此調整時 切勿停止 暫停 換碟 插入 快進或切換本 機聲道 如果切換解碼模式 此設定將被取消 1 輕觸 OUTPUT LEVEL 的 ON 測試音輸出在各揚聲器聲道上重播 重播的順序如下所 示 如果2秒內未執行操作 聲道將切換至下個聲道 2 當測試音從揚聲器中發出時 輕觸 OUTPUT LEVEL 的 或 對所有揚聲器的輸出進行平衡 如果揚聲器設定為關閉模式 則無法調整該揚聲器的電平 請參閱 揚聲器設定 第 48 頁 調整 DVD 音量 可以為杜比數位 Dolby PL II DTS 和 PCM 模式設定音量 訊 號電平 進行此...

Page 124: ...輸出 此時 可用 REAR FILL 功能從後置揚聲器也輸出訊號 如果設定為 REAR FILL 且採樣率為 192kHz 96kHz 等 則內容的 採樣率會降至 48kHz 進行此調整時 切勿停止 暫停 換碟 插入 快進或切換本 機聲道 如果切換解碼模式 此設定將被取消 當在 設定揚聲器 第 45 頁 中將揚聲器設定為 CENTER OFF 時 此調整無效 本功能僅對雙聲道訊號有效 當輸入 5 1 聲道 DTS 或杜比數位訊 號時 此操作無效 如果當 REAR MIX 為 ON 時進行 REAR FILL 設定 因為在線性 PCM 以外的雙聲道解碼器中 REAR MIX 享有優先權 所以後置 填充設定中的音效保持不變 對於線性 PCM 訊號 不管 REAR FILL 和 REAR MIX 設定如何 聲 音均會從後置揚聲器輸出 輕觸 RETURN 將返回先前的畫面 線性 PCM 設定 當播...

Page 125: ...啟動輔助設備 顯示幕上將顯示警告訊息 PICTURE OFF FOR YOUR SAFETY 為了您的安全 請關閉 圖像 1 當車輛停止時 輕觸主訊號源畫面上的 SOURCE 顯示幕上出現訊號源畫面 2 輕觸 AUX 顯示外接輸入畫面 顯示第 34 頁上的 設定 AUX 模式 中作為源名稱的名稱 如果主選單上未顯示 AUX 模式 請按照 設定 AUX 模式 第 34 頁 上的說明將 AUX IN 設定為 ON 輕觸 WIDE 顯示模式改變 有關操作方法 請參閱第 26 頁上的 切換顯示模式 當連接 KCA 410C 時 僅可在 INTERRUPT MODE 中使用 KCA 410C 的 AUX 輸入 有關詳細說明 請參閱 KCA 410C 的 用戶手冊 導航系統 選購 輔助設備 選購 警告 駕駛員在開車時觀看電視 視訊是相當危險的 駕駛員可能會 分散向前看的注意力 從而發生事故 請正確安裝...

Page 126: ...連續輕觸 直到顯示光碟編號 2 輕觸 DISC 1 至 DISC 6 按鈕中的任意一個 輕觸 DISC 1 至 DISC 6 可選擇從第一張光碟到第 6 張光 碟 當連接相容 MP3 的 CD 換碟機時 1 輕觸 P1 3 兩次以改變功能指南畫面 2 輕觸 DISC 1 至 DISC 6 按鈕中的任意一個 輕觸 DISC 1 至 DISC 6 可選擇從第一張光碟到第 6 張光 碟 當連接 12 碟 CD 換碟機時 您可使用與 6 碟換碟機相同的方式選擇光碟編號 1 至 6 輕觸 P1 3 兩次選擇光碟編號 7 至 12 功能指南畫面改變 使 DISC 7 至 DISC 12 代表光碟編號 7 至 12 在選擇想要的光碟以後 您可以按與 CD 播放器相同的方法進行 操作 詳見 CD MP3 WMA 章節 當連接了相容 MP3 的 CD 換碟機時 本機可播放包含音訊資料和 MP3 資料的光碟 ...

Page 127: ...Pod 連接 第 33 頁 中設定為 AUX 以外的模式 如果同時連接藍芽盒與 iPod 請確定在將 ACC 轉為 OFF 時中斷 iPod 與藍芽盒的連接 駕駛時 您無法觀看視訊相容 iPod 的視訊檔案 請將汽車停靠 在安全地點 關於本機可用的 iPod 本機可以與第四代及更新的 iPod iPod photo iPod mini 或 iPod nano 配合使用 不過 無法使用 iPod Shuffle 不帶底座接口的觸控輪或滾輪型 iPod 無法與本機連接 本機可以與以下 iPod 配合使用 第四代 iPod 第五代 iPod iPod photo iPod mini 第一代 iPod nano 第二代 iPod nano 如果本機使用 7 1 0 59 版本之前的 iPod 軟體 iTunes 我們無法保 證能正常運作 播放 1 輕觸主訊號源畫面上的 SOURCE 顯示音訊號源選...

Page 128: ...要的歌曲名稱旁邊的 播放所選的歌曲 當您在有星號 的等級時 輕觸 ALL 的 則會播放所有清單中 的歌曲 請參見左邊表格 觸碰 ALL 的 將會顯示下一等級的搜尋清單 在搜尋模式中 您可通過輕觸直接搜尋條跳至指定位置以進行 快速搜尋 詳情 請參閱 直接搜尋功能 第 54 頁 在 M I X 播放中進行搜尋時 便會取消 M I X 播放模式 直接搜尋功能 本機的直接搜尋功能可以更加高效地搜尋專輯 歌曲等 在 PLAYLISTS ARTISTS ALBUMS SONGS GENRES COMPOSERS PODCASTS AUDIOBOOKS 模式中 您可以快速搜尋任何歌曲 直接搜尋條 動點 顯示當前選項位置 返回先前的畫面 輕觸 或 將會以每次 1 6 的距離移動動點 1 在搜尋模式中 輕觸直接搜尋條上的任意地方可跳至該處 搜尋清單畫面也根據選擇的歌曲位置變化 歌曲搜尋示例 如果您的 iPo...

Page 129: ...2 輕觸 將重複播放該檔案 3 若要取消重複播放 請碰觸 在重複播放時 無法經由按 或 選擇其他歌曲 有關 DVD 音樂 CD 和 DVD 中帶有槽 音軌 槽中錄有數位資料 資料在 音軌中記錄為極小的坑 這些坑由雷射光束讀取 用於播放光 碟 在 DVD 上 音軌和坑的密度是 CD 的兩倍 因此 DVD 可在 更少的空間中記錄更多的資料 一張 12 cm 的光碟可包含一部電影或約 4 小時的音樂 此外 由於水平解析度達到 500 線以上 VHS 磁帶的解析度為 300 以下 DVD 可產生清晰的畫質和生動的色彩 此外 DVD 還提供眾多功能 多重音訊 第 22 頁 一部影片最多可加入 8 種語言 可使用本機選擇所需的語言 字幕功能 第 23 頁 一部影片最多可加入 32 種語言字幕 可使用本機選擇想要的字幕 語言 多角度播放功能 第 22 頁 當 DVD 中包含的電影通過多角度拍攝 可使用本...

Page 130: ...軌 IVA D106E 具有內建 DTS 雙聲道音訊解碼器 另外還具有類比音 訊輸出端 Dolby Pro Logic II Dolby Pro Logic II 在 5 個聲道的整個頻率範圍內 5 聲道播放 2 聲 道音源 這一效果是通過先進的高音質矩陣環繞解碼器來實現的 該解碼 器將原始錄音的空間屬性提取出來 未對音源添加任何聲音或改 變音源的聲音 若要享受真正的 Dolby Pro Logic II 環繞聲 您需要購買另售的 數位音訊處理器 PXA H700 等 線性 PCM 音訊 LPCM LPCM 是一種用於音樂 CD 的訊號記錄格式 音樂 CD 按照 44 1 kHz 16 位元的標準製作 而 DVD 按照 48 kHz 16 位元至 96 kHz 24 位元的標準製作 因此音質比音樂 CD 更高 限制等級 親子保護鎖定 該 DVD 功能可根據不同國家審查法的規定對收看年齡進行...

Page 131: ...83 6984 6985 7065 7073 7074 7079 7082 7089 7165 7168 7176 7178 7185 7265 7273 7282 7285 7289 7365 IE IK IN IS IT IW JA JI JW KA KK KL KM KN KO KS KU KY LA LN LO LT LV MG MI MK ML MN MO MR MS MT MY NA NE NL NO OC OM OR PA PL PS PT QU RM 7369 7375 7378 7383 7384 7387 7465 7473 7487 7565 7575 7576 7577 7578 7579 7583 7585 7589 7665 7678 7679 7684 7686 7771 7773 7775 7776 7778 7779 7782 7783 7784 7789...

Page 132: ... JP KE KG KH 6877 6879 6890 6967 6969 6971 6972 6982 6983 6984 7073 7074 7075 7077 7079 7082 7165 7166 7168 7169 7170 7172 7173 7176 7177 7178 7180 7181 7182 7183 7184 7185 7187 7189 7275 7277 7278 7282 7284 7285 7368 7369 7376 7378 7379 7381 7382 7383 7384 7477 7479 7480 7569 7571 7572 Dominica Dominican Republic Algeria Ecuador Estonia Egypt Western Sahara Eritrea Spain Ethiopia Finland Fiji Fal...

Page 133: ...87 8365 8366 8367 8368 8369 8371 8372 8373 8374 8375 8376 8377 8378 8379 8382 8384 8386 8389 8390 8467 8468 8470 8471 8472 8474 8475 8477 8478 8479 8480 8482 8484 8486 8487 8490 8565 8571 8577 8583 8589 8590 8665 8667 8669 8671 8673 8678 8685 8770 8783 8969 8984 8985 9065 9077 9087 PE PF PG PH PK PL PM PN PR PT PW PY QA RE RO RU RW SA SB SC SD SE SG SH SI SJ SK SL SM SN SO SR ST SV SY SZ TC TD TF ...

Page 134: ...在搜尋模式中調電台 您處在訊號較弱的地區 確保調諧器處在 DX 模式中 如果您處在主要訊號區 天線可能沒有正確接地和連接 檢查天線連接 請確保天線在安裝位置正確接地 天線可能長度不合適 確保天線完全展開 如果斷裂 請更換新的天線 廣播出現噪音 天線可能長度不合適 完全展開天線 如果斷裂 請進行更換 天線接地不良 確保在安裝位置將天線正確接地 電台信號太弱或出現噪音 如果以上措施無效 請轉到其他電台 CD MP3 WMA AAC DVD VCD 光碟播放聲音顫抖 濕氣凝結在光碟模塊中 請留出充分的時間讓冷凝液體蒸發 約 1 小時 無法插入光碟 DVD 播放機中已經有了一張光碟 彈出光碟 然後將其取出 未正確插入光碟 確保按照 CD MP3 WMA AAC DVD VCD 播放機操作章 節中的說明插入光碟 無法對光碟進行快進或快退 光碟已損壞 彈出並丟棄光碟 在機器中使用損壞的光碟可能會造成內...

Page 135: ... not authorized to play this video 如果未經授權播放受 DRM 保護的 DivX 檔案 以下訊息會 顯示 2 秒鐘 Authorization Error This player is not authorized to play this video 這表示檔案的註冊碼不符合播放器而無法播放 顯 示此訊息後 會自動從下一個檔案的開頭開始播放 Rental Expired DivX 租賃系統中設定固定的欣賞次數 如果欣賞次數倒計 至 0 Rental Expired 會顯示 2 秒鐘 這表示無法再播放 該檔案 顯示此訊息後 會自動從下一個檔案的開頭開始播 放 Rental countdown OK 播放租賃型檔案時 如果在檔案選擇選單中選擇了 B SKIP 或 ENTER 會顯示 Rental countdown OK 租賃型檔案 播放中斷 欣賞次數減 1...

Page 136: ...出錯顯示仍未消失 請諮詢您的 Alpine 經銷商 刮花的光碟 不潔的光碟 不良錄製 光碟與本機不相容 按 更換光碟 光碟與地區代碼不匹配 裝入匹配地區代碼的光碟 當光碟插入本機時 執行了 DVD 設定操作 請在 DVD 設定操作前彈出光碟 使用本機不支援的採樣率 位元率 使用本機支援的採樣率 位元率 CD 換碟機的顯示 保護電路由於高溫而啟動 當溫度返回至工作溫度時 顯示將消失 CD 換碟機的故障 請諮詢您的 Alpine 經銷商 按光碟匣彈出按鈕 然後拉出 光碟匣 檢查顯示 再次插入光碟匣 如果無法拉出光碟匣 請諮詢您的 Alpine 經銷商 無法彈出光碟匣 按光碟匣彈出按鈕 如果無法彈出光碟匣 請諮詢您的 Alpine 經銷商 CD 換碟機中遺留有光碟 按彈出按鈕啟動彈出功能 當 CD 換碟機完成彈出功能時 請將空的 CD 光碟匣插入 CD 換碟機以存放 CD 換碟機內 遺留的光碟 ...

Page 137: ...d 確保正確連接 iPod 參閱 連接 請勿將電纜彎折過度 iPod 中無歌曲 將歌曲下載至 iPod 然後與 IVA D106E 相連 通信錯誤 關閉點火開關 然後再次設定為 ON 使用 iPod 電纜重新連接 iPod 和本機 檢查螢幕 故障原因在於 iPod 軟體版本與本機不相容 更新 iPod 軟體版本 使其與本機相容 未確認 iPod 移除 iPod 然後重新嘗試連接 嘗試連接其他視訊相容 iPod 僅限視訊相容 iPod 01CT00IVAD106E book Page 63 Tuesday January 15 2008 2 14 PM ...

Page 138: ...訊噪比 65 dB 立體聲分離度 35 dB 俘獲比 2 0 dB 調諧範圍 531 1602 kHz 可用靈敏度 22 5 µV 27 0 dBf 頻率響應 5 20000 Hz 抖晃度 WRMS 在可測限制以下 總諧波失真 0 008 在 1 kHz 情況下 動態範圍 95 dB 在 1 kHz 情況下 聲道分離 85 dB 在 1 kHz 情況下 訊號系統 NTSC PAL 水平解析度 500 線或以上 視訊輸出水平 1Vp p 75 歐姆 視訊訊噪比 DVD 60 dB 音訊訊噪比 大於 105 dB 電源要求 14 4 V DC 容許電壓 11 16 V 工作溫度 32 F 至 113 F 0 C 至 45 C 最大功率輸出 50 W 4 輸出電壓 2 000 mV 10 千歐 低音 14 dB 在 100 Hz 情況下 高音 14 dB 在 10 kHz 情況下 重量 2 6 ...

Page 139: ...要專門的技術和經驗 為了確保安全 請與您購買的經銷商聯絡以便安全地進行安裝 使用專用配件並進行安全安裝 注意限使用指定的附件 使用其它設計零件 可能損壞本機 內部 或不能牢固地安裝到位 導致零件鬆脫發生危險或使 機器故障 安排配線使不至於被銳利金屬邊鉗夾傷 電纜 電線須適當迂回避開移動性部件 例如座位滑動軌 道 或銳利金屬邊緣以防鉗傷電線 電線須穿過金屬板孔時 請用橡皮墊圈套住以防電線的絕緣層被金屬孔邊緣割傷 不要安裝在極潮濕或多塵埃的位置 避免把機器安裝在極潮濕 多塵的位置 濕氣或塵埃侵入機 器裡 可能導致機器故障 使用須知 在安裝 IVA D106E 之前 請務必將電纜從電瓶的負極 上斷開 這樣做可以在出現短路時降低對本機造成損壞的 機率 請根據圖示連接彩色編碼的電線 連接不正確可能會造成 本機故障或汽車電氣系統損壞 當與汽車電氣系統相連時 請注意出廠安裝的部件 如板 載電腦 請勿搭接...

Page 140: ...絲安裝監視器 則可能會造成故障 如果儀表板內安裝的安裝殼套鬆動 施壓板可以稍微彎曲加以 固定 通風孔 注意 請勿擋住本機的風扇或散熱槽 以免影響通風 如果擋 住 熱氣將會滯留本機內部 並可能引起火災 本機背面 安裝殼套 附帶 安裝托架 附帶 IVA D106E 埋頭螺絲 M4 3 附帶 儀表板 托架 六角螺栓 附帶 橡皮蓋 附帶 施壓板 2 當您的汽車備有托架時 將長六角螺栓安裝在 IVA D106E 的 後面板上並將橡皮蓋置於六角螺栓上 如果您的汽車沒有安 裝支架 請用金屬安裝帶 未附帶 加固監視器 用已安裝 到汽車底盤上的螺絲 將本機的接地線固定到清潔的金 屬觸點上 對於標有 的螺絲 請在選定的安裝位置使用合適的 螺絲 將放大器或均衡器的各輸入線連接至來自 IVA D106E 左後部 的相應輸出線 根據連接一章中所述的詳細說明 連接所有 IVA D106E 的其他導線 3 將 IVA ...

Page 141: ...獨的使用 IVA D106E 時所提供的資料 若 IVA D106E 的開關電源 點火 線為直接連接到汽車電瓶的正極 即使開關是在 OFF 位置 IVA D106E 仍會消耗掉一些電量 數百毫安 同時電瓶亦可能會放電 接地線 IVA D106E 埋頭螺絲 M4 3 附帶 安裝托架 IVA D106E 紅色 黃色 SPST SW 選購 保險絲 5A 選購 保險絲 20A 選購 電瓶 ACC 電瓶 為了防止外接噪音進入音訊系統 固定本機位置 然後將導線排布在離開汽車線束至少 10cm 的距離 儘量使電瓶電源線遠離其他導線 將接地線牢固連接至汽車底盤的裸金屬觸點 如有必要 除去任何油漆 髒物或油脂 如果您要附加一個噪音抑制器 連接時請儘量使其遠離本機 您的 Alpine 經銷商處備有各種類型的噪音抑制器 有關詳情請與其 聯繫 您的 Alpine 經銷商最熟悉防止噪音的方法 詳情請諮詢您的經銷商 ...

Page 142: ...色 黑色 左前 白色 黑色 揚聲器 紅色 電瓶 左後 右後 右前 綠色 紫色 黑色 灰色 至放大器或均衡器 至電動天線 至汽車電話 至停車製動信號線 點火鑰匙 電池 黃色 接地 黑色 ACC 紅色 遙控開機 藍色 白色 電動天線 藍色 音訊中斷輸入 粉紅色 黑色 停車製動 黃色 藍色 至 iPod CD 換碟機 另售 放大器 放大器 放大器 左後 右後 左前 右前 重低音 揚聲器 至音訊輸出端子 R L 至音訊輸入端子 R L 至視訊輸出端子 至視訊輸入端子 白色 黃色 紅色 白色 黃色 M CONT 白色 粉紅色 倒車 橙色 白色 遙控輸入 白色 褐色 遙控輸出 白色 褐色 至監視器控制線 至汽車後燈信號線的 正極 至遙控輸出線 至遙控輸入線 至倒車攝像頭或 至轉向遙控介面盒 天線 黃色 至 01CT00IVAD106E book Page 68 Tuesday January 15 2...

Page 143: ...帶 RCA 延長電纜 另售 數位輸出端子 光學 組合光纖數位輸入相容產品時使用 AV 連接器 電源連接器 iPod 直連連接器 iPod 控制訊號 將此連接器連接至 iPod 或選購的 Bluetooth Box 若要使用免持手機 必須連接至選購的 Bluetooth Box 有關 連接的詳情 請參閱 Bluetooth Box 的用戶手冊 RGB 輸入端子 將此端子連接至導航系統的 RGB 輸出端子 視訊連接器 連接視訊相容 iPod 時使用 將其連接至 iPod V CAMERA 連接器 iPod 視訊 FULL SPEED 連接電纜 KCE 430iV 另售 如果您僅播放 iPod 音訊 亦可使用選購的 FULL SPEED 連接電纜 KCE 422i 遙控開機導線 藍色 白色 將此導線連接至放大器或訊號處理器的遙控開機導線 電動天線導線 藍色 如果適用的話 將此導線連接至電動天線的...

Page 144: ...用光纖電纜時 請遵循下列事項 卷繞光纖電纜時 半徑不得小於 30mm 請勿在光纖電纜上放置任何物件 注意不要將光纖電纜彎曲成銳角 EQ DIV NORM 導航系統 另售 光纖電纜 光纖數位輸入端子 用於主機 音訊處理器 Ai NET 光纖數位相容 另售 光纖數位輸入端子 用於 DVD 播放 器 Ai NET 電纜 光纖數位輸入端 子 用於換碟機 光纖電纜 Ai NET 電纜 CD 換碟機 Ai NET 另售 僅連接光纖數位相容的 CD 換碟機 DVD 影音播放器 Ai NET DVA 5210 等 另售 光纖電纜 遙控輸入 遙控輸出 白色 褐色 白色 褐色 黃色 Ai NET 電纜 黃色 01CT00IVAD106E book Page 70 Tuesday January 15 2008 2 14 PM ...

Page 145: ...器附帶 Ai NET 電纜 DVD 影音播放器附帶 Ai NET 電纜 CD 換碟機附帶 至 Ai NET 連接器 灰色 遙控輸出線 白色 褐色 將此導線連接至遙控輸入線 此導線從遙控器輸出控制訊 號 至 Ai NET 連接器 黑色 Ai NET 電纜 音訊處理器附帶 同時連接視訊相容 iPod 和倒車攝像頭 系統開關 使用 Ai NET 功能連接均衡器或分割器時 請將兩個開關置於 EQ DIV 位置 沒有連接裝置時 請將開關置於 NORM 位置 將兩個開關向左切換 以設定為 NORM 位置 將兩個開關向右切換 以設定為 EQ DIV 位置 如果從前面板正面觀看 請勿將兩個開關切換為不同的設定 在改變開關位置前 請務必關閉機器的電源 iPod 直連連接器 音訊輸入連接器 AUX CAMERA IN iPod V CAMERA 連接器 視訊連接器 RCA 延長電纜 另售 iPod 視訊 FU...

Page 146: ...等時使用 iPod V CAMERA 連接器 當連接倒車攝像頭時使用 音訊輸入連接器 AUX CAMERA IN 監視器控制線 白色 粉紅色 連接至與觸摸式面板相容的後置監視器監控制線 遙控輸出線 白色 褐色 將此導線連接至遙控輸入線 此導線從遙控器輸出控制訊 號 遙控輸入線 白色 褐色 倒車線 橙色 白色 僅當連接倒車攝像頭時使用 接至汽車倒車燈的正極 當傳 輸轉換成倒車 R 時此燈會亮起 正確接線時 當汽車倒車時 R 視訊影像便會自動切換 至倒車攝像頭的畫面 RCA 延長電纜 另售 至視訊輸入端子 至視訊輸出端子 至視訊輸出端子 至音訊輸出端子 後置監視器 另售 倒車攝像頭 另售 電視調諧器或 VCR 另售 白色 粉紅色 M CONT M CONT 白色 粉紅色 白色 褐色 遙控輸出 遙控輸入 白色 褐色 白色 褐色 遙控輸入 遙控輸出 白色 褐色 橙色 白色 倒車 僅當連接倒車攝像頭...

Page 147: ...01CT07IVA106E fm ALPINE IVA D106E 68 12118Z27 A CT 01CT00IVAD106E book Page 73 Tuesday January 15 2008 2 14 PM ...

Page 148: ...01CT07IVA106E fm ALPINE IVA D106E 68 12118Z27 A CT 01CT00IVAD106E book Page 74 Tuesday January 15 2008 2 14 PM ...

Reviews: