background image

10

-EN

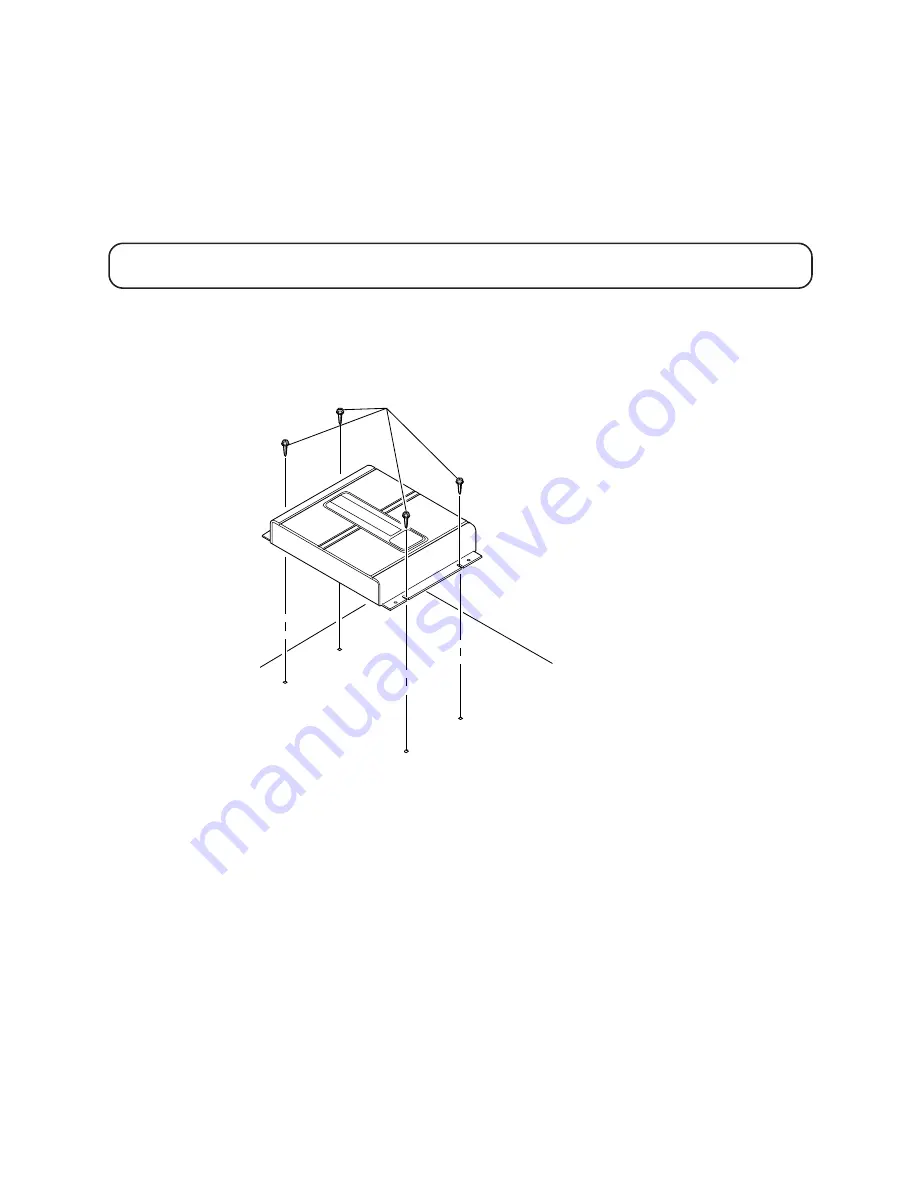
Flanged self-tapping screw (M4 x 14)

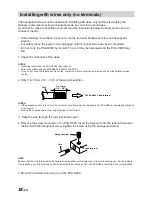
• Mounting Microphone

Mounting Location
Mount the microphone on the rear-view mirror, headrest, sun visor, or other appropriate location.

1. Peel off the protective papers from the adhesive side of the Velcro fasteners. Attach 2 pieces

of the Velcro fasteners on to the microphone holder base and the other side of the Velcro
fastener on the spot where the microphone holder base is located.

2. Insert the microphone into the Y-shaped holder on the holder base.

• Mounting the base unit

1. Decide on the installation location.

• The trunk, etc., is the best place.

2. Mark the positions of the mounting screws at the chosen location.

3. Drill 3mm (1/8”) holes or smaller.

WARNING: When making holes, be careful not to damage pipes, tanks, electric wires, etc.

Doing so could lead to accidents or fire.

4. Securely mount the unit using the four included flanged self-tapping screws (M4 x 14).

Summary of Contents for Multimedia Manager PXA-H900

Page 1: ...r Installation and Connections PXA H900 Multimedia ManagerTM Hinweise über die Installation und Anschlüsse Guide d installation et de connexions Guía de instalación y conexiones Guida all installazione ed ai collegamenti Vägledning för montering och anslutningar ...

Page 2: ...E RATING WHEN REPLACING FUSES Failure to do so may result in fire or electric shock MAKE THE CORRECT CONNECTIONS Failure to make the proper connections may result in fire or product damage USE ONLY IN CARS WITH A 12 VOLT NEGATIVE GROUND Check with your dealer if you are not sure Failure to do so may result in fire etc BEFORE WIRING DISCONNECT THE CABLE FROM THE NEGATIVE BATTERY TERMINAL Failure to...

Page 3: ...or hamper movement etc and results in serious accident Caution HAVE THE WIRING AND INSTALLATION DONE BY EXPERTS The wiring and installation of this unit requires special technical skill and experience To ensure safety always contact the dealer where you purchased this product to have the work done USE SPECIFIED ACCESSORY PARTS AND INSTALL THEM SECURELY Be sure to use only the specified accessory p...

Page 4: ...u may need an adaptor to connect other units If so please contact your authorized ALPINE dealer for assistance Wiring Connections Improper wiring connections could cause serious damage to your audio system Be sure you 1 DO NOT connect wires from left and right speakers together 2 DO NOT ground any speaker wires 3 DO NOT run wires where they may be pinched or cut 4 DO NOT leave bare speaker termina...

Page 5: ... remove any paint dirt or grease if necessary of the car chassis If you add an optional noise suppressor connect it as far away from the unit as possible Your Alpine dealer carries various noise suppressors Contact them for further information Your Alpine dealer knows best about noise prevention measures so consult your dealer for further information IMPORTANT Please record the serial number of yo...

Page 6: ...ro tape for mounting stand Battery AAA Flanged self tapping screw M4 x 14 Hexagon screw M4 x 10 Pan head screw M3 x 5 Flat head screw M5 x 8 Remote control Remote control unit holder Screw for mounting remote control unit holder M2 9 x 20 Side bracket Inner case Flush mount Pan head screw M2 6 x 6 Self tapping screw M2 6 x 8 Face plate x 2 x 4 x 4 x 2 x 4 x 4 One on each side x 2 x 2 x 4 Accessori...

Page 7: ...t Inner case Face plate Dashboard Mounting the display 1 Remove the face plate 2 Use a screwdriver etc to slide the locking pin then take out the inner case 3 Mount the display using the included screws 4 Mount the previously removed inner case into the dashboard Slide the display unit into the case ...

Page 8: ...head screws M5 x 8 Bracket JAPANESE CAR 1 After step 2 on page 7 remove the included side bracket 2 Mount the display using the included screws 3 Mount the spacer and bracket to the display Next securely mount the factory brackets re moved from the factory radio to the display assembly ...

Page 9: ...es in size at your desired mounting location WARNING When making cut outs be careful not to damage pipes tanks electric wires etc Doing so could lead to accidents or fire 2 After step 2 on page 7 remove the included side bracket 3 Remove the spacer from the bracket 4 Mount the spacer on the display using the included screws 5 Attach the flush mount brackets to the display using the included screws...

Page 10: ...f the Velcro fastener on the spot where the microphone holder base is located 2 Insert the microphone into the Y shaped holder on the holder base Mounting the base unit 1 Decide on the installation location The trunk etc is the best place 2 Mark the positions of the mounting screws at the chosen location 3 Drill 3mm 1 8 holes or smaller WARNING When making holes be careful not to damage pipes tank...

Page 11: ...mpartment If the holder cannot be securely fastened in place with the Velcro install it using screws WARNING Do not install the product near the passenger seat s airbag Doing so could hamper airbag operation leading to accidents or injury Remote Control Holder Remote Control Console box etc Velcro tape Screw for mounting remote control unit holder M2 9 x 20 ...

Page 12: ...Lights white during MPEG2 decoding Computer terminal Used to make settings and adjustments with a computer A special cable and computer software are required For details contact your store of purchase or an Alpine Information Center Memory on off selector switch Use this to set whether or not settings and adjustments can be stored in the memory Microphone jack Use this to connect a microphone Rese...

Page 13: ...ction Remote OUT cable Connect to the amplifier or other peripheral device Illumination cable Lights the PXA H900 Operates in association with the small lamp or other light Guide control cable 2 Not used Guide control cable 1 Used to interrupt the navigation system s sound Ground terminal Connect securely to a metal part of the vehicle s body using the ground cord Battery power terminal Power is s...

Page 14: ... Cable Connect to a metal part of chassis body with a screw Remote OUT Cable Remote ON Cable Illumination Cable Guide Control Cable 1 Guide Control Cable 2 Grounding Cable Sold Separately Battery Power Cable Sold Separately NOTES When connecting a Optical Digital CD Changer When connecting a Optical Digital CD Changer change the Digital Analog switch of the CD Changer to 2 Digital Output 1 2 NOTES...

Page 15: ...n this system To External Amplifier Remote ON Cable Connect to a metal part of chassis body with a screw Fiber Optic Cable Sold Separately Grounding Cable Sold Separately Battery Power Cable Sold Separately NOTES When connecting a Optical Digital CD Changer Used for connection to an optical digital compatible head unit When connecting a Optical Digital CD Changer change the Digital Analog switch o...

Page 16: ...sed To External Amplifier Remote ON Cable Connect to a metal part of chassis body with a screw NOTES When using the PXA H900 with a non Ai NET head unit 12V is required on this line to turn on the equalizer If your head unit does not have a remote on or power antenna turn on wire an SPST switch must be connected between an ignition source and this terminal The PXA H900 can then be turned on using ...

Page 17: ...nt Tweeter Output L Front Tweeter Output R Front Mid Range Output L Front Mid Range Output R Front Mid Bass Output L Front Mid Bass Output R Rear Output L Rear Output R Subwoofer Output L Subwoofer Output R Center Output To External Amplifier RCA connection cable Ai NET Cable Included with CD Changer Fiber Optic Cable Sold Separately Ai NET Cable Included Guide Control Cable White Green Input Side...

Page 18: ... of the wires contact your store of purchase a service shop or and Alpine service center 2 Strip 7 to 10mm 1 4 3 8 of the wire s insulation NOTES If the exposed section is too short the current will not flow properly resulting in the PXA H900 not operating or breaks in the sound Making the exposed section too long may lead to short circuit 3 Pass the wire through the terminal board cover 4 Remove ...

Page 19: ...rough Victoria 3173 Australia Tel 03 9769 0000 ALPINE ELECTRONICS GmbH Kreuzerkamp 7 11 40878 Ratingen Germany Tel 02102 45 50 ALPINE ITALIA S p A Via C Colombo 8 20090 Trezzano Sul Naviglio MI Italy Tel 02 48 47 81 ALPINE ELECTRONICS FRANCE S A R L RCS PONTOISE B 338 101 280 98 Rue De La Belle Etoile Z I Paris Nord II B P 50016 F 95945 Roissy Charles de Gaulle Cedex France Tel 01 48 63 89 89 ALPI...

Reviews: