Installation
Electrical contact densimeter threshold inspection
G51--101EN03
3/4
02--2011
© ALSTOM 2010. All rights reserved. Information contained in this document is indicative only. No representation or warranty is given or should be
relied on that it is complete or correct or will apply to any particular project. This will depend on the technical and commercial circumstances. It is
provided without liability and is subject to change without notice. Reproduction, use or disclosure to third parties, without express written authority, is
strictly prohibited.
GRID
Densimeter inspection
Pressure gauge
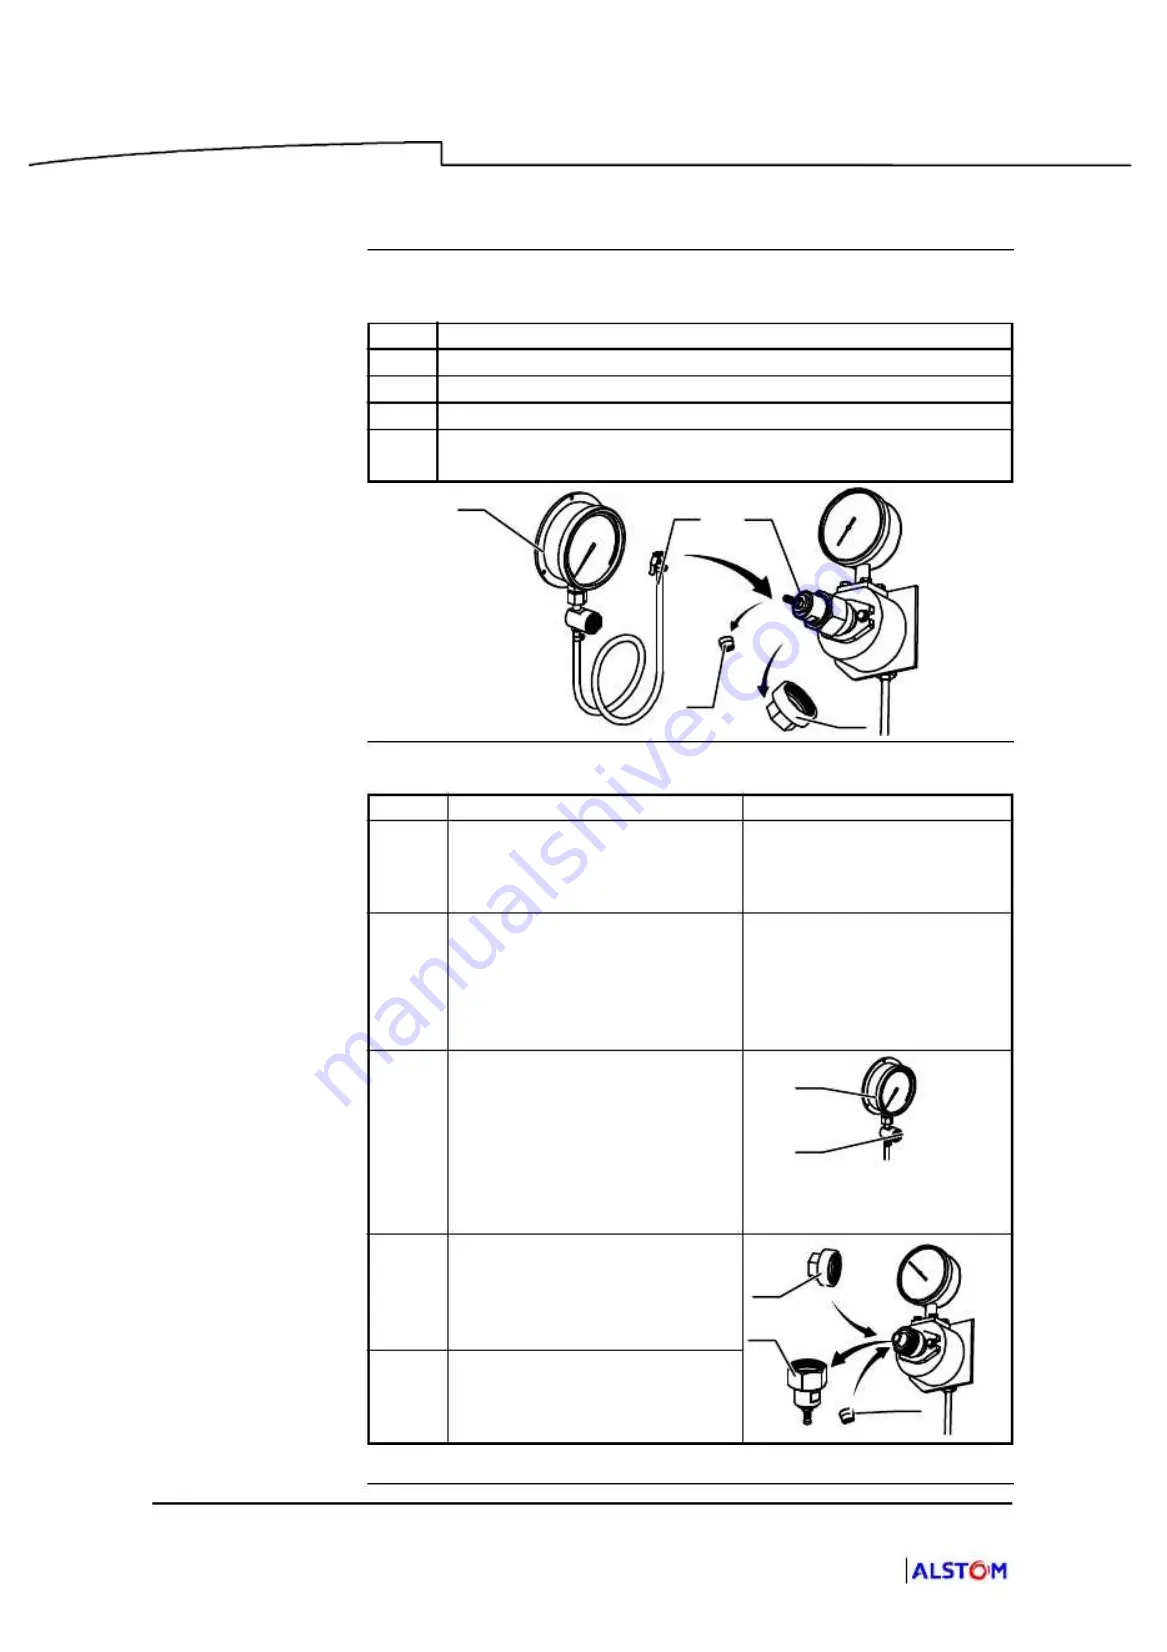
connection (tool)
The table below gives the steps of the pressure gauge connection (tool) :
Step
Action
1
Remove the plug (10).
2
Install the filling tool (14).
3
Undo the valve--cap (15).
4
Connect up the 0--1 MPa pressure inspection gauge (11) by means
of its tube (12).
14
15
11
12
10
Testing
The table below gives the steps of densimeter testing :
Step
Action
Comment/Diagram
1
Connect a test lamp to the “Alarm
pressure for the insulation”
p
ae
densimeter threshold.
Connection to the terminal
block of the operating mecha-
nism in accordance with the
electrical diagram.
2
Calculate the effective pressure at
which the “Alarm pressure for the
insulation”
p
ae
contact switches
over -- corrected in keeping with
temperature and local atmospher-
ic pressure.
Value
p
ae
see technical char-
acteristics.
3
D
Create a leak by pressing on the
pressure inspection gauge valve
(13), making sure that the contact
switches over at the previously
calculated value.
D
Proceed in the same way to
check the contact of “Minimal
pressure for the insulation”
p
me
.
11
13
If one of the thresholds does
not comply with the specified
value, replace the densimeter.
4
When the test is finished, discon-
nect the tube of the pressure in-
spection gauge. Put the valve--cap
(15) back and remove the filling
tool (14).
14
10
15
5
Reinstall the plug (10), applying a
tightening torque of 4 daN.m,
leak
tightness is only guaranteed if
this condition is respected
.
Summary of Contents for FKG1X
Page 2: ......
Page 7: ...GRID High Voltage Switchgear This page is intentionally blank...
Page 13: ...GRID High Voltage Switchgear This page is intentionally blank...
Page 17: ...GRID High Voltage Switchgear This page is intentionally blank...
Page 21: ...GRID High Voltage Switchgear This page is intentionally blank...
Page 75: ...This page is intentionally blank This page is intentionally blank...


