background image

BYK-Gardner

byko-drive S

285 025 845 E 2106

5

1.2 Safety Information

1.2.1 Safety Instructions

Caution!

Read this instruction manual completely before using the instrument.

Warning!

This manual cannot address all of the safety considerations associated with its
use. It is the responsibility of the user to consult this manual and establish ap-
propriate safety practices for use with this equipment and the individual mate-
rial being tested.

Warning!

The 

byko-drive S

 Automatic Film Applicator is designed and intended for the

use described in this manual. Using the Automatic Film Applicator for other
purposes for which it was not designed may reduce or eliminate the protection
offered by the features of the applicator. Serious injury may result.

Warning!

Never defeat the ground conductor or operate the equipment in the absence
of a suitably installed ground conductor. Contact the appropriate electrical in-
spection authority or an electrician if you are uncertain that suitable grounding
is available.

Warning!

Ultimate disposal of this product should be handled according to all national
laws and regulations.

Attention

The 

byko-drive S

 Automatic Film Applicator works with a moving traverse car-

riage. No parts of the carriage may be touched or held during operation. Once
the 

Forward

 key is pressed no work should be carried out within the travel

area of the carriage.

Summary of Contents for 2139

Page 1: ...Measure what you see byko drive S Automatic Film Applicator Operating Manual...

Page 2: ...BYK Gardner byko drive S 2 285 025 845 E 2106 Copyright 2021 BYK Gardner GmbH All rights reserved...

Page 3: ...ystem Operation 10 4 1 Start Up 10 4 2 User Interface 10 4 2 1 Home Screen 10 4 2 2 Set Speed 12 4 2 3 Set Length 12 4 2 4 Set Start Point 13 4 2 5 Set Units 14 4 2 6 Set Language 15 4 2 7 Set Brightn...

Page 4: ...for your trust and confidence If there is anything we can do better to serve your needs do not hesitate to let us know Your BYK Gardner Team https www byk instruments com 1 1 About this Document This...

Page 5: ...ator for other purposes for which it was not designed may reduce or eliminate the protection offered by the features of the applicator Serious injury may result Warning Never defeat the ground conduct...

Page 6: ...which could become caught in the moving parts 1 3 Copyright Information No portion of the software documentation or other accompanying materials may be translated modified reproduced copied or other w...

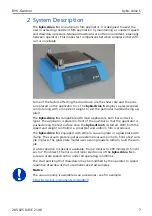
Page 7: ...he applicator is placed in front of the pushbar so that the applicator is pushed along the test surface once the byko drive S is started With both the speed and weight controlled a consistent and unif...

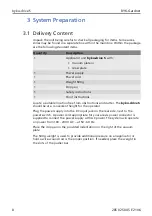
Page 8: ...ns Locate a suitable location free from obstructions and clutter The byko drive S should be at a convenient height for the operator Plug the power supply into the DC input jack on the rear side next t...

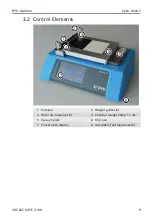
Page 9: ...285 025 845 E 2106 9 3 2 Control Elements 1 2 3 4 5 6 7 8 1 Push bar 2 Weight guide slot 3 Wire rod clearance slot 4 Push bar weight 500g 1 1 lbs 5 Vacuum plate 6 Drip pan 7 Touchscreen display 8 Adj...

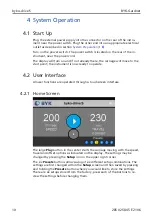
Page 10: ...ument is now ready to operate 4 2 User Interface All user functions are operated through a touchscreen interface 4 2 1 Home Screen The large Play button in the center starts the carriage moving with t...

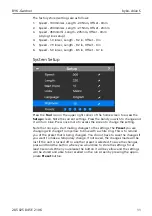
Page 11: ...change and it will turn blue Press once more to access the screen to change the setting Note that once you start making changes to the settings the Preset you are changing will change from yellow to b...

Page 12: ...standard mode Application Speeds from 50 to 3600 mm per hour may be selected in mode Drying Time Once the desired speed is set press the Save icon in the lower right of the screen to return to the Set...

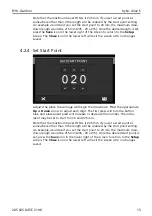
Page 13: ...justs the place the carriage will begin the drawdown Press the appropriate Up or Down arrow to adjust each digit The first press will turn the button blue and subsequent press will increase or decreas...

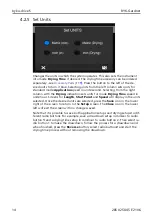
Page 14: ...n units hour Screens for Length Start Point and Speed will display in the units selected Once the desired units are selected press the Save icon in the lower right of the screen to return to the Setup...

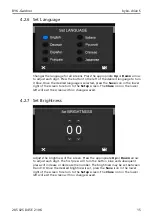
Page 15: ...tup screen The Close icon in the lower left will exit the screen with no changes saved 4 2 7 Set Brightness Adjusts the brightness of the screen Press the appropriate Up or Down arrow to adjust each d...

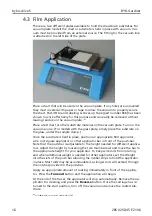
Page 16: ...Once the substrate is held in place position an appropriate Bird applicator wire rod square applicator or other applicator bar in front of the push bar Note that the push bar is adjustable to the hei...

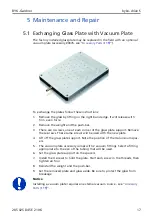
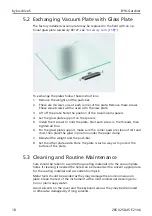
Page 17: ...of the glass plate support Remove these screws These same screws will be used with the new plate 4 Lift off the glass plate support Note the position of the 4 aluminum spac ers 5 The vacuum plate acc...

Page 18: ...tighten all four 6 For the glass plate support make sure the corner pads are clean of dirt and dust then place the glass in position under the paper clamp 7 Reinstall the weight and the push bar 8 Set...

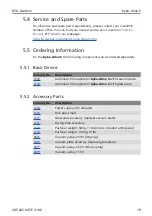
Page 19: ...separately 5 5 1 Basic Device Catalog No Description 2139 Automatic film applicator byko drive S with vacuum plate 2140 Automatic film applicator byko drive S with glass plate 5 5 2 Accessory Parts C...

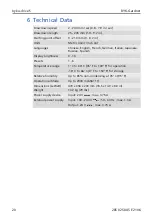
Page 20: ...n Japanese Russian Spanish Display brightness 0 10 Presets 1 6 Temperature range 1 C to 38 C 35 F to 100 F for operation 18 C to 66 C 0 F to 150 F for storage Relative humidity Up to 85 non condensing...

Page 21: ...1210 Vienna Austria Service Point France c o Eckart France S A S 31 Rue Amilcar Cipriani 93400 Saint Ouen France Service Point Spain c o Actega Art stica S A U Calle Balmes 8 Suite 3 2 08291 Ripollet...

Page 22: ...byko drive S BYK Gardner 22 285 025 845 E 2106 Notes...

Page 23: ...BYK Gardner byko drive S 285 025 845 E 2106 23 Notes...

Page 24: ...oftware from https www byk instruments com software Download your manual from https www byk instruments com p 2139 Find more information on our products and services https www byk instruments com 285...

Reviews: