background image

2

Dear customer,
thank you for having decided for a BYK-Gardner 

product. BYK-Gardner is committed to providing 

you with quality products and services. We offer 

complete system solutions to solve your problems 

in areas of gloss and physical properties. As the 

basis of our worldwide business, we strongly 

believe in total customer satisfaction. Therefore, 

in addition to our products, we offer many VALUE-

ADDED services: 
· 

Technical Sales Force

· 

Technical & Application Support

· 

Application and Technical Seminars

· 

Repair & Certification Service


BYK-Gardner is part of Altana AG and a direct 

subsidiary of BYK-Chemie GmbH, a leading 

supplier of additives for coatings and plastics. 

Together, we offer complete and unique solutions 

for you, our customer.

Thank you for your trust and confidence. If there is 

anything we can do better to serve your needs, do 

not hesitate to let us know.

Your BYK-Gardner Team

Summary of Contents for BYK spectro-guide 45/0 gloss

Page 1: ...Additives Instruments A member of Measure what you see spectro guide 45 0 gloss spectro guide sphere gloss Manual...

Page 2: ...Geretsried Germany Tel 0 800 gardner 0 800 4273637 49 8171 3493 0 Fax 49 8171 3493 140 BYK Gardner USA 9104 Guilford Road Columbia MD 21046 USA Phone 800 343 7721 301 483 6500 Fax 800 394 8215 301 48...

Page 3: ...erefore in addition to our products we offer many VALUE ADDED services Technical Sales Force Technical Application Support Application and Technical Seminars Repair Certification Service BYK Gardner i...

Page 4: ...Calibrate 20 7 Measuring procedure 23 7 1 Measuring 23 7 2 Saving 24 7 3 Opening 26 8 Multiple readings 27 8 1 Storing the mean 29 8 2 Deleting the last reading 30 8 3 Number of readings 31 9 Display...

Page 5: ...Beeper 51 10 6 8 Set time 52 10 6 9 Trigger adjustment 53 10 6 10 Language 54 10 7 Configuration 55 11 File 58 11 1 Open 58 11 2 Save 59 11 3 Delete 60 11 4 Mean 61 11 5 Print 61 12 Interface 62 13 S...

Page 6: ...uipped with safety features Nevertheless read the safety warnings carefully and use the product only as described in these instructions to avoid accidental injury or damage No claims of product liabil...

Page 7: ...danger of injury caused by electricity This sign points out additional information DANGER The term DANGER warns of possible severe injuries and danger to life WARNING The term WARNING warns of injuri...

Page 8: ...under adverse conditions after harsh treatment during shipping Safety advices for batteries Do not crush or dismantle do not heat or incinerate do not immerse in any liquid This may cause explosion or...

Page 9: ...pped bumped or shaken Avoid exposure to continuous humidity and con densation Avoid splashing with water chemicals or other liquids Please use only accessories that are available for the unit Only dev...

Page 10: ...intend not to use the instrument for a longer period of time take out the batteries Additonal information on use You will find the technical data for all system components on the respective manufactur...

Page 11: ...e observation angle is 0 With d 8 the sample is illuminated diffusely while the observation angle is 8 from the vertical Addi tionally 60 gloss is measured simultaneously Up to 1500 standards and 999...

Page 12: ...alibration standard white calibration standard with certificate green checking reference high gloss standard sample area locator software easy link interface cable USB adapter batteries hand strap man...

Page 13: ...for operation service The device runs on four AA 1 5 V alkaline or 1 2 V NiMH rechargeable battery Use only alkaline batteries or NiMH rechargeables AA LR6 Depending on the exact brand and the settin...

Page 14: ...the used batteries Only alkaline cells of the type AA LR6should be used as new primary i e non rechargeable batteries If you prefer rechargeable batteries you can insert type AA NiMH batteries The si...

Page 15: ...Battery Compartment 3 Measurement Aperture 4 Battery Compartment Release 5 Instrument Label with Serial Number 6 Operate Button 7 Cursor Buttons 8 Serial Interface Standard 9 Standard Box 10 Diaphrag...

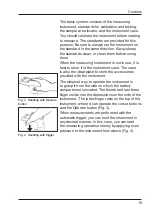
Page 16: ...the ideal place to store the accessories provided with the instrument The simplest way to operate the instrument is to grasp it from the side on which the battery compartment is located The thumb and...

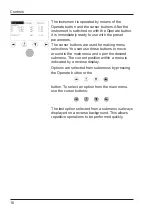
Page 17: ...selections You can use these buttons to move around in the main menu and open the desired sub menu The current position within a menu is indicated by a reverse display Options are selected from subme...

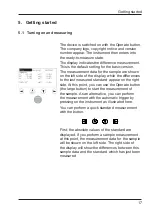
Page 18: ...last measured standard appear on the right side At this point you can use the Operate button the large button to start the measurement of the sample As an alternative you can perform the measurement w...

Page 19: ...Sample Sample Std Delete Last Smpl All Smpl One Std All Std Memory Mean On Off Del last Define N Print Standard Sample Online The framed menu options are not accessible in the basic version Display Sa...

Page 20: ...Gloss on Gloss off Illum Obs A 2 A 10 C 2 C 10 D50 2 D50 10 D55 2 D55 10 D65 2 D65 10 D75 2 D75 10 Optionen lllum Obs F2 2 F2 10 F6 2 F6 10 F7 2 F7 10 F8 2 F8 10 F10 2 F10 10 F11 2 F11 10 U30 2 U30 10...

Page 21: ...n the direction of the open lid and the front edge of the instrument is parallel to the edge of the lid This ensures that you will always perform the calibration under the same conditions The measurem...

Page 22: ...ng instrument so that the display points in the direction of the open lid and the front edge of the instrument is parallel to the edge of the lid Press the Operate button You will then be instructed t...

Page 23: ...standard and press the Operate button A beep will indicate that the measure ment has been completed Now place the instrument on the white standard and press the Operate button For gloss calibration pl...

Page 24: ...s to the last measured standard As an alternative to the Operate button you can use the automatic trigger to perform the measurement To do this hold the instrument as shown in the accompanying illustr...

Page 25: ...etter Enter any desired sequence of up to seven alphanumeric characters The last three positions are reserved for use as a combination of digits They are automatically incremented each time the measur...

Page 26: ...rent ways to store a reading If you started the measurement with the button you can store it as a new standard with the Save Standard function If you started the measurement with the Operate button yo...

Page 27: ...buttons to move the cursor to Sample Press the Operate button again The sample selection menu will appear Use the buttons to select the desired sample and press the Operate button The instrument retur...

Page 28: ...ss the Operate button The submenu will open Choose on and press the Operate button to switch on the calculation of the mean In the default setting the mean is calculated based on three readings The di...

Page 29: ...the Sample Mode option from the Display menu To do this use the buttons to place the cursor on the Display menu Then use the button to open the submenu Sample Mode is preselected Press the Operate but...

Page 30: ...he sample name appears You can select the appropriate letter at the position indicated by the arrow by using the buttons Use the buttons to move the arrow to the next letter Enter a name After perform...

Page 31: ...hen you press the Operate button Use the button to move the cursor to Del last and press the Operate button A prompt is asking whether you really want to delete the last reading If this is not the cas...

Page 32: ...the Operate button The input menu for the number of readings appears The preset value is 3 You can use the buttons to select the appropriate digit at the position indicated by the arrow Use the butto...

Page 33: ...rom the Display menu use the button to move the cursor to the Sample Mode option Press the Operate button and the display changes to Sample Mode The absolute values of the last reading are displayed i...

Page 34: ...to Difference mode The data is displayed in accordance with the selected display setting The Smpl Dif setting is preset The following display options are also possible Std Dif Smpl Std To switch use...

Page 35: ...Fail the tolerance Additionally a beep indicates when the result is Fail If the setting of individual components is selected in the configuration e g E L a b the expanded input screen appears You can...

Page 36: ...If you like to change the tolerances for a standard you must open this standard and then store it again under the same name The input screen for the tolerances will then appear and you can change the...

Page 37: ...en you press the Operate button the metamerism index for the individual illuminants appears on the display The display is determined by the selected illumination observer combination If D65 A or F2 ar...

Page 38: ...he button to move the curser to the Illumin option When pressing the Operate button the instrument switches to the next illuminant which is displayed in the lower left corner Repeat this as many times...

Page 39: ...s to browse through the menu and confirm the desired color system by pressing the Operate button The instrument returns to the previous measuring mode and the chosen color system is shown on the displ...

Page 40: ...ons and confirm the required index with the Operate button The instrument returns to the previous measuring mode The selected index appears on the display Use the buttons to exit the submenu without c...

Page 41: ...black background Then use the Operate button to measure the sample over the white background After measuring with the Std button the opacity is zero The L a and b values for the sample over the black...

Page 42: ...d After measurement has been perfor med with the Operate button the color strength is displayed The display also shows the differences between the standard and the sample after theoretical color stren...

Page 43: ...either save the measured value as Standard or as Sample See Chapter 7 2 When entering the tolerances you will also be prompted to enter a gloss range Enter the respective values and confirm your choic...

Page 44: ...n you press the Operate button The illuminants which will appear on the display are indicated by check marks You can toggle illuminants on or off by moving the cursor to the illuminant and pressing th...

Page 45: ...n the instrument so that the display points in the direction of the open lid and the front edge of the instrument is parallel to the edge of the lid Press the Operate button At this point you will be...

Page 46: ...mber and name can be changed even when AutoStore is activated From the Option menu use the button to move the cursor to the Setup option The submenu will open when you press the Operate button AutoSto...

Page 47: ...e and Pass Fail modes From the Options menu use the button to move the cursor to the Setup option In the submenu place the cursor on Auto Std and press the Operate button The toggled status is shown o...

Page 48: ...tons to change the underlined digit Use the button to move the underline to the next digit End the input operation by pressing the Operate button The instrument returns to the measuring mode To end th...

Page 49: ...ppears Use the buttons to change the underlined digit Use the button to move the underline to the next digit End the input operation by pressing the Operate button Having done this you are prompted to...

Page 50: ...menu for the E94 ratio appears Use the buttons to change the underlined digit Use the button to move the underline to the next digit End the input operation by pressing the Operate button The instrume...

Page 51: ...Setup option The submenu opens when you press the Operate button Move the cursor to the Disp Time option and press the Operate button The settings mask for the switch off time appears Use the buttons...

Page 52: ...measurement is completed From the Options menu use the button to move the cursor to the Setup option The submenu opens when you press the Operate button Move the cursor to the Beeper option and press...

Page 53: ...When you press the Operate button the input screen for the date and time appears Use the buttons to change the underlined digit Use the button to move the underline to the next digit The selection of...

Page 54: ...the trigger appears When following the prompts the menu for adjusting the sensitivity of the measuring cone appears Use the buttons to move the bar When the bar is moved toward Lighter the trigger wil...

Page 55: ...opens when you press the Operate button Move the cursor to the Language option and press the Operate button The language selection menu appears Use the buttons to select a language Confirm your select...

Page 56: ...e functions of the basic and advanced version It is also possible to define two custom menus and store them The definition and selection of these menus are secured against improper access by means of...

Page 57: ...o do this move the cursor to the Exit option This option appears in the Options menu in place of Configure Press the Operate button and the modified menu is stored The new instrument settings are take...

Page 58: ...57 Setting Custom1 Setting Custom2 Options...

Page 59: ...ds appear Use the buttons to select the desired standard then press the Operate button The cursor is always positioned on the standard which was selected most recently After the standard has been sele...

Page 60: ...to select the appropriate letter at the position of the arrow Use the button to move the arrow to the next letter When you are finished with the input press the Operate button The menu for entering th...

Page 61: ...or the standard name appears You can use the buttons to select the standard you wish to delete When you press the Operate button a prompt asks you to confirm that you want to delete the selected stand...

Page 62: ...tandards are printed in the format Name Date Time Illuminant Observer Absolute Measured Values Tolerances Samples All stored samples are printed in the format Name Date Time Illuminant Observer Absolu...

Page 63: ...easurement data can be transfered from the instrument s memory or directly after each reading to Windows applications The easy link program is included in the standard package for this purpose It cont...

Page 64: ...erences of surface colours according to the CIELAB formula ISO 7724 Paints and varnishes Colorimetry ASTM D 2244 Standard Test Method for Calculation of Color Differences From Instrumentally Measured...

Page 65: ...nd plastics ISO 2813 Paints and varnishes Determination of specular gloss of non metallic paint films at 20 60 and 85 ISO 7668 Anodized aluminium and aluminium alloys Measurement of specular reflectan...

Page 66: ...tiles Color systems CIELab CIELCh Lab h CIELab99 XYZ Yxy Rx RyRz Color differences E E h EFMC2 E94 ECMC E99 E2000 Component differences Indices Yellowness YI E313 YI D1925 Whiteness WI E313 CIE Berge...

Page 67: ...lian Spanish Japanese Chinese Display size 60 x 30 mm 2 4 x 1 2 in LCD 128 x 64 Pixel Display Absolute values differences Pass Fail Metamerism Power supply 4 AA batteries Alkaline NiCd or NiMH approx...

Page 68: ...ed Delete standards which are no longer needed or transfer to the PC Sample Memory full The maximum number of samples 999 is already stored Delete samples which are no longer needed or transfer to the...

Page 69: ...ult settings Standard memory and sample memory are not deleted To do the Instrument Reset press the buttons together until the message Reset Instrument appears Use the Operate button to confirm Instru...

Page 70: ...sing dirty or damaged standards Since the surfaces of the standards are highly sensitive cleaning must be undertaken with great care To clean standards use a new lint free cloth dust free lens paper o...

Page 71: ...uired adjust the measured values by using reference standards You will receive a certificate which includes the retraceability to international standards Loaners During the period of repair we furnish...

Page 72: ...ardner USA 9104 Guilford Road Columbia MD 21046 USA Phone 1 301 483 6500 Fax 1 301 483 6555 China BYK Gardner Shanghai Office 3 F Building 22 No 140 Tian Lin Road Xuhui District Shanghai 200233 P R Ch...

Page 73: ...sult of adapting the device to new information and improvements Copyright 2011 BYK Gardner GmbH All rights reserved No portion of the software documentation or other accompanying materials may be tran...

Page 74: ...250 020 858 E 1105...
Reviews: