User Guide USB Stick CopyStation
21
– 1.3
9
User Guide USB Stick CopyStation
21
– 1.3
8
Empty slots are shown in black. Slots are also shown in black if the memory stick they
contain cannot be recognized or does not respond.
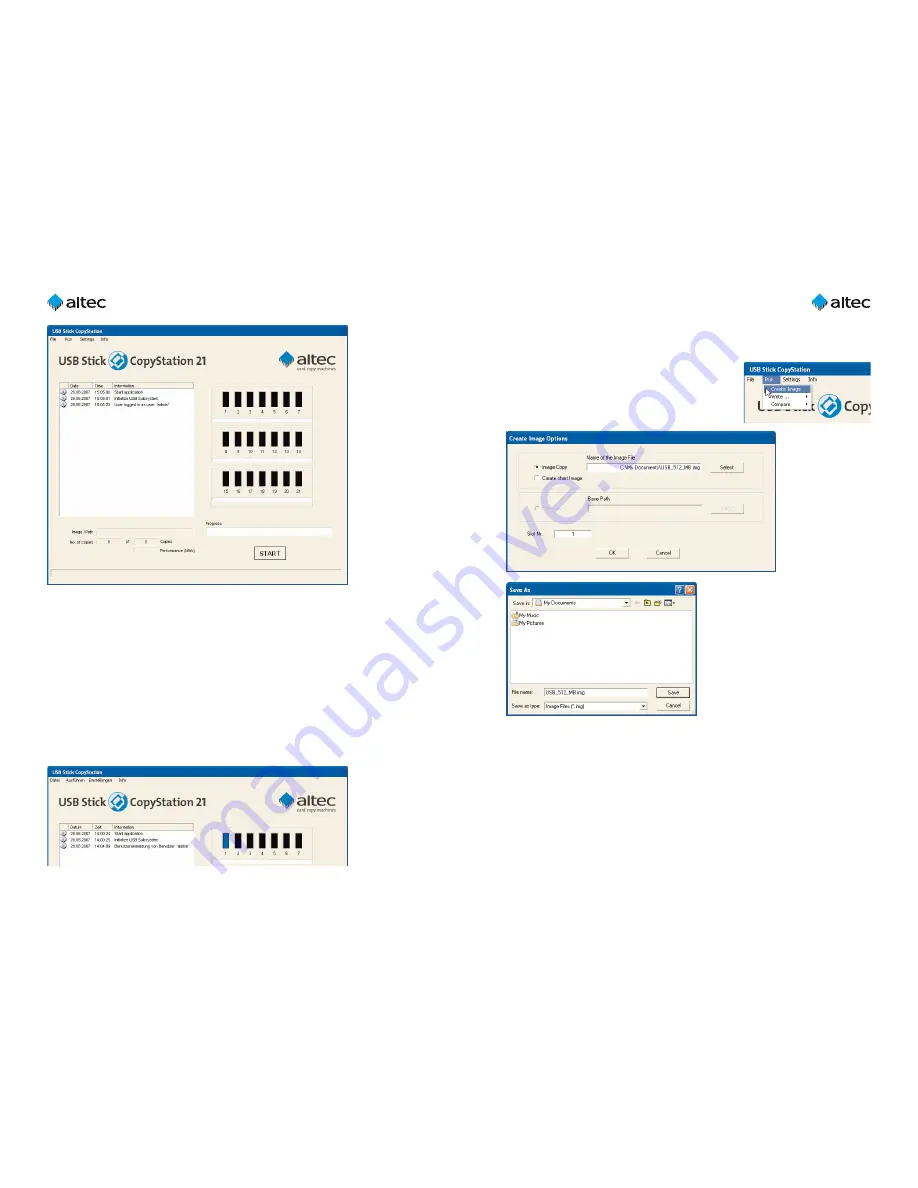
Choose "
Create Image
" in the "
Run
" menu to create an
image of the master memory stick.
This opens the "
Create Image Options
" dialog box (see
figure below).
Click the "
Select
" button and enter the
required name and location for the
image file in the "
Save As
" dialog box
which is shown (see figure left).
Use the file extension "
.img
". Click
"Save" to save your settings. Then
specify the slot which contains the
master stick by entering the slot num-
ber. Slot number 1 is on the top left.
Click "OK" to read the stick contents and create the image file. Progress is shown in the
main window using a progress bar (see figure on next page). The color of the chosen
slot changes to yellow (slot is busy).
The image has been fully created when the progress bar reaches 100 %, the message
"Operation done" appears in the message panel on the left of the main window and
the slot color changes to green again.
4. Copying from data images
4.1 Creating an image file
The storage capacity of the master (source) USB stick must be identical to the storage
capacity of the destination sticks (the sticks onto which you want to copy). Accordingly,
we strongly recommend that the master stick and the destination sticks are from the
same manufacturer and preferably from the same manufacturing batch.
After logging in as
admin
, insert the master stick in the CopyStation.
After a short delay, the color of the slot changes to blue to indicate that a stick is
inserted (see figure below).


