Luminaire Features
19
Gallery Series LED Luminaires
Installation & User’s Manual
Accessory Holder - All Models
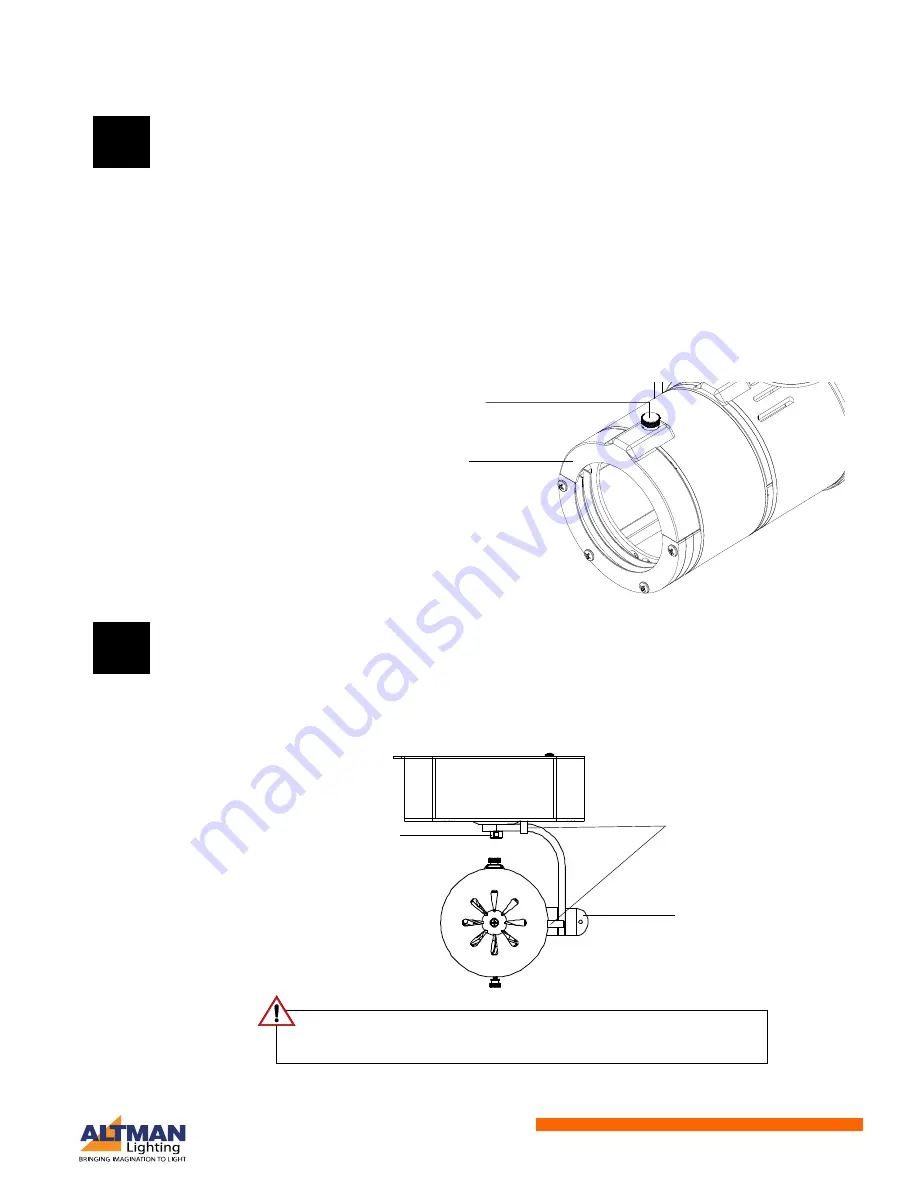
All Gallery Series LED Luminaires have a end of lens accessory holder. This holder is easily opened to
accept such optional accessories (all sold separately or by others) as:
• 4-Flap Barn Doors
• Top Hat
• Half Top Hat
• Color (Gel) Frame
A list of available accessories that fit Gallery Series LED Luminaires is found in
"Gallery Series LED
Luminaires Other Accessories" on page 5
.
To open the accessory holder, as illustrated in
Figure 15
, remove the thumb screw holding the accessory
holder clamp and insert the accessory. Once the accessory is inserted, reinstall the accessory holder
clamp and screw.
Figure 15: Accessory Holder - All Models
Pan & Tilt - All Models
All Gallery Series LED Luminaires can have their pan and tilt set by hand (without the use of tools).
To adjust pan or tilt, loosen (do not remove) thumb screw or knob as indicated in
Figure 16
and adjust pan
or tilt as desired. Once positioned as desired, re-tighten, by hand or tool (see note on tilt knob), the thumb
screw or knob. Do not over tighten!
Figure 16: Fixture Pan & Tilt
ALL
Models
Accessory Holder Thumb Screw
Accessory Holder Clamp
Note: Beam Wash model shown, same
for all models.
ALL
Models
Pan Thumb Screw
Tilt Knob*
Pan & Tilt Stops
(see note below)
NOTE:
All Gallery Series LED Luminaires are fitted with pan and tilt stop studs. The stops prevent
the fixture head from panning or tilting beyonds it limits for internal wiring travel. It is important that
these stops are never removed from the fixture or internal wiring damage may occur.
*A small screwdriver can
be inserted into knob hole
to tighten if desired.


