8
EV0306M
EV
06
11M
EV029
3M
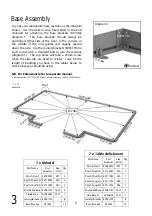
Dia. 1
EV
061
1M
EV117
2M
EV117
1M
D174M
EV
11
70
M
EV
11
69
M
EV029
3M
7 x 12
example
3
7 x 8 Model
Part Name
Part
Number
Size
(mm)
Qty
Porch Front
EV0293M
497
2
Porch Short LH EV1169M
330
2
End Gable Base EV0611M 1801
2
Joining Bracket EV0311M
-
8
Base Bracket
D174M
-
12
Porch Short RH EV1170M
330
2
Side Base 8
EV0304M 2471
1
7 x 12 Model (shown)
Part Name
Part
Number
Size
(mm)
Qty
Porch Front
EV0293M
497
2
Porch Short LH EV1169M
330
1
End Gable Base EV0611M 1801
2
Joining Bracket EV0311M
-
8
Base Bracket
D174M
-
13
Porch Short RH EV1170M
330
1
Porch Long LH EV1171M
960
1
Porch Long RH EV1172M
960
1
Side Base 12
EV306M
3731
1
EV0311M
D174M
Internal
Diagram 1
Base Assembly
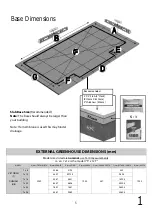
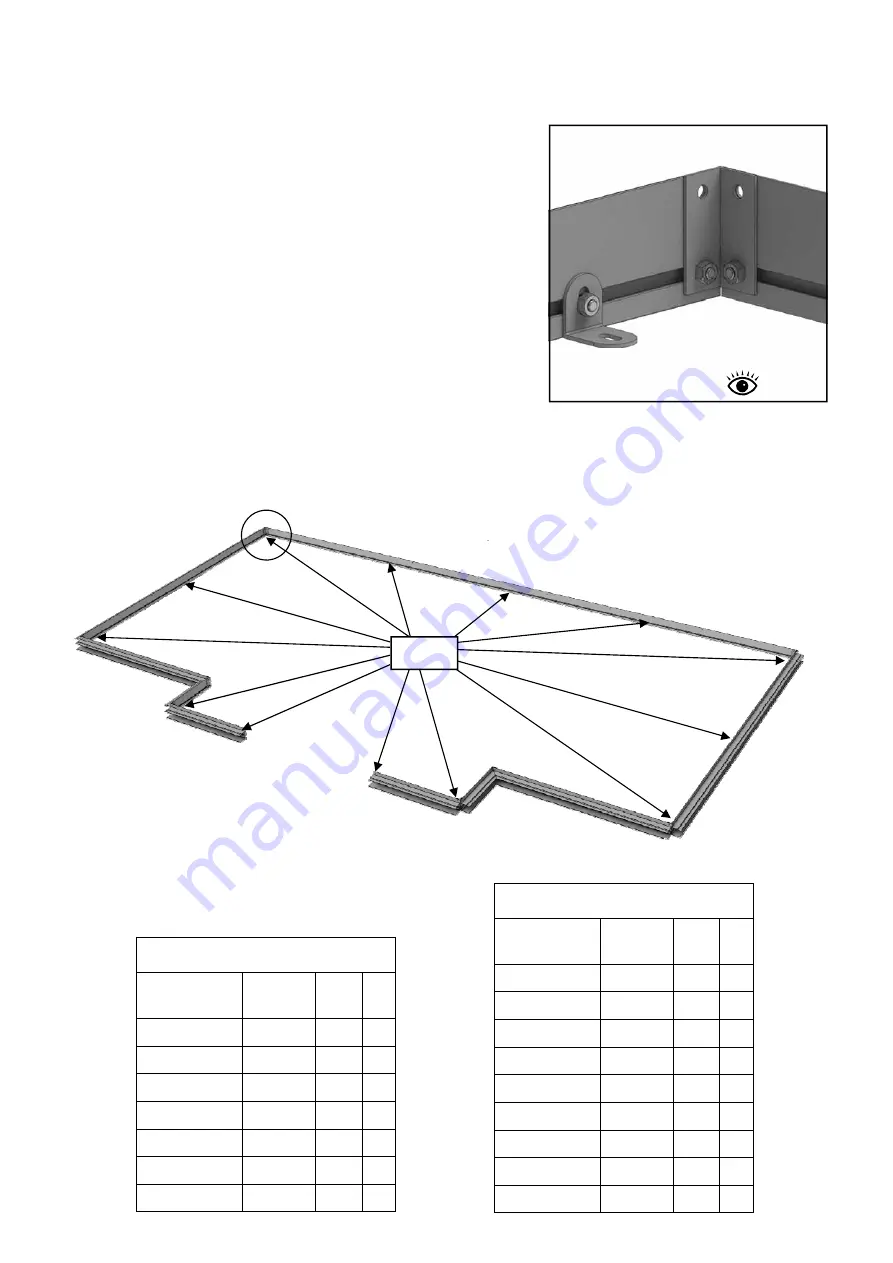
Lay out your aluminium base sections as the diagram
shows. Use the twist-in crop head bolts in the bolt
channels for attaching the base brackets (D174M),
diagram 1. The base brackets should always be
positioned either side of the door, in the corners, in
the middle of the end gables and equally spaced
down the side. Use the joining brackets (EV0311M) in
each corner with a standard bolt to join the sections
(diagram 1). The top holes will take a 25mm screw
when the side cills are fixed to it later. Look for the
length of building you have in the tables below to
check what you should be using.
NB. For Extensions refer to separate manual.
4’ base extension = EV1173M (1262mm), 8’ base extension = EV0307M (2520mm)


