20
Roof Assembly
7
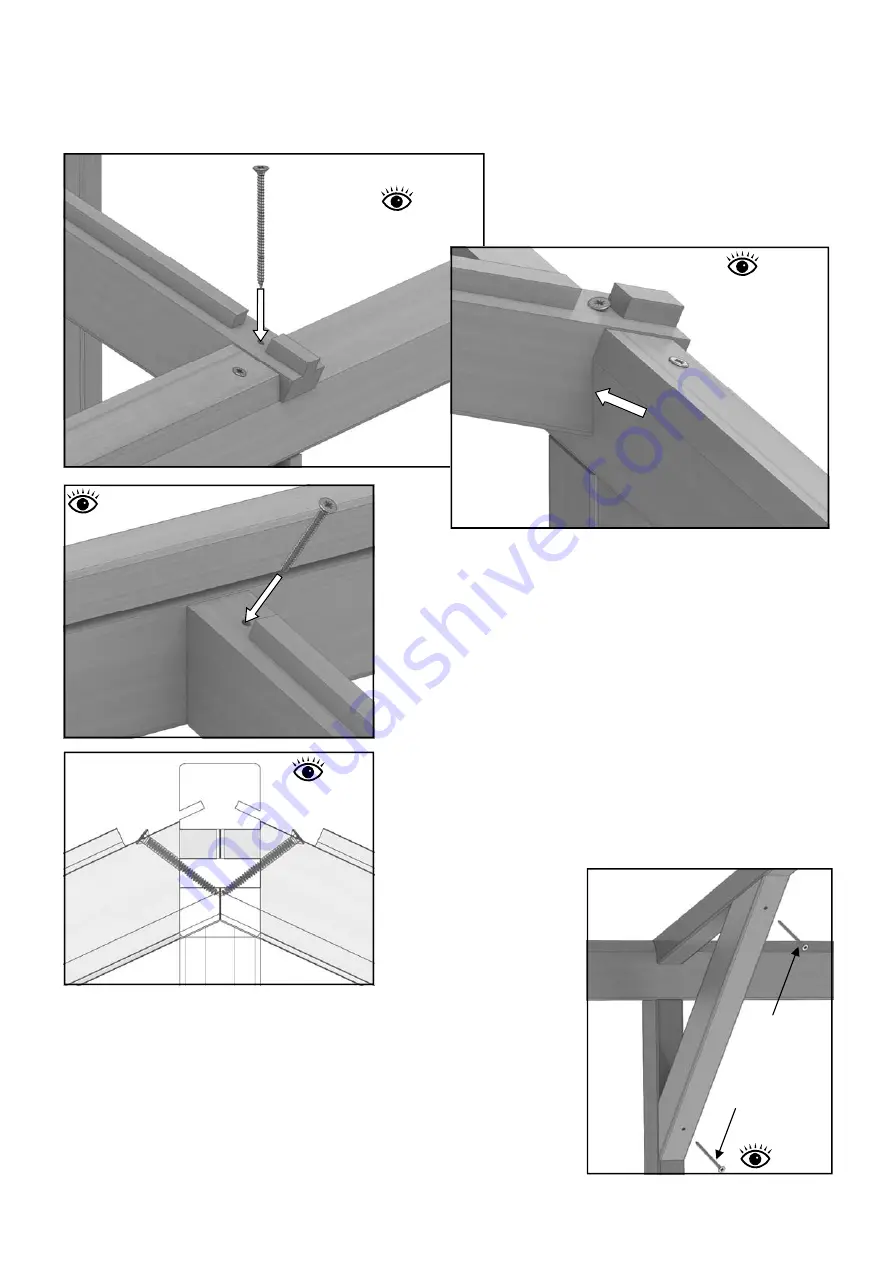
Diagram 24
X-ray
Diagram 25
5
0
m
m
S
cr
ew
EV
0
0
9
0
Internal
Once the bottom joint is fixed you can screw the glazing
bar to the ridge (diagram 23). Do this with a 50mm screw
but make sure the glazing bar is all the way into the joint.
Diagram 24 shows an X-ray view of the end of the ridge.
This shows the best angle for the screw. Again you want
to be careful the end of the screw doesn’t come through
at any point. (Don’t worry to much about the screw ends
crossing, if this happens as you are putting the screw in it
will simply push past the other screw).
Repeat this all the way round the roof until the frame is
complete.
80mm Scre
w
EV0
024
EV0
035
Keep a
tight fit
EV0035
EV
00
24
50
m
m
S
cr
ew
External
Diagram 23
External
External
Diagram 22
Before you start fitting the bracings check the
distances between the two sides along the
length of the eaves bar. On larger buildings it
may be necessary to tie the two sides together
before attaching the bracing to reduce any sag.
Fix the bottom of the roof glazing bars to
the eaves bar with 80mm screws. Make
sure the inside face of the glazing bar is
flush with the eaves bar (shown below).


