24
Frame Assembly
5
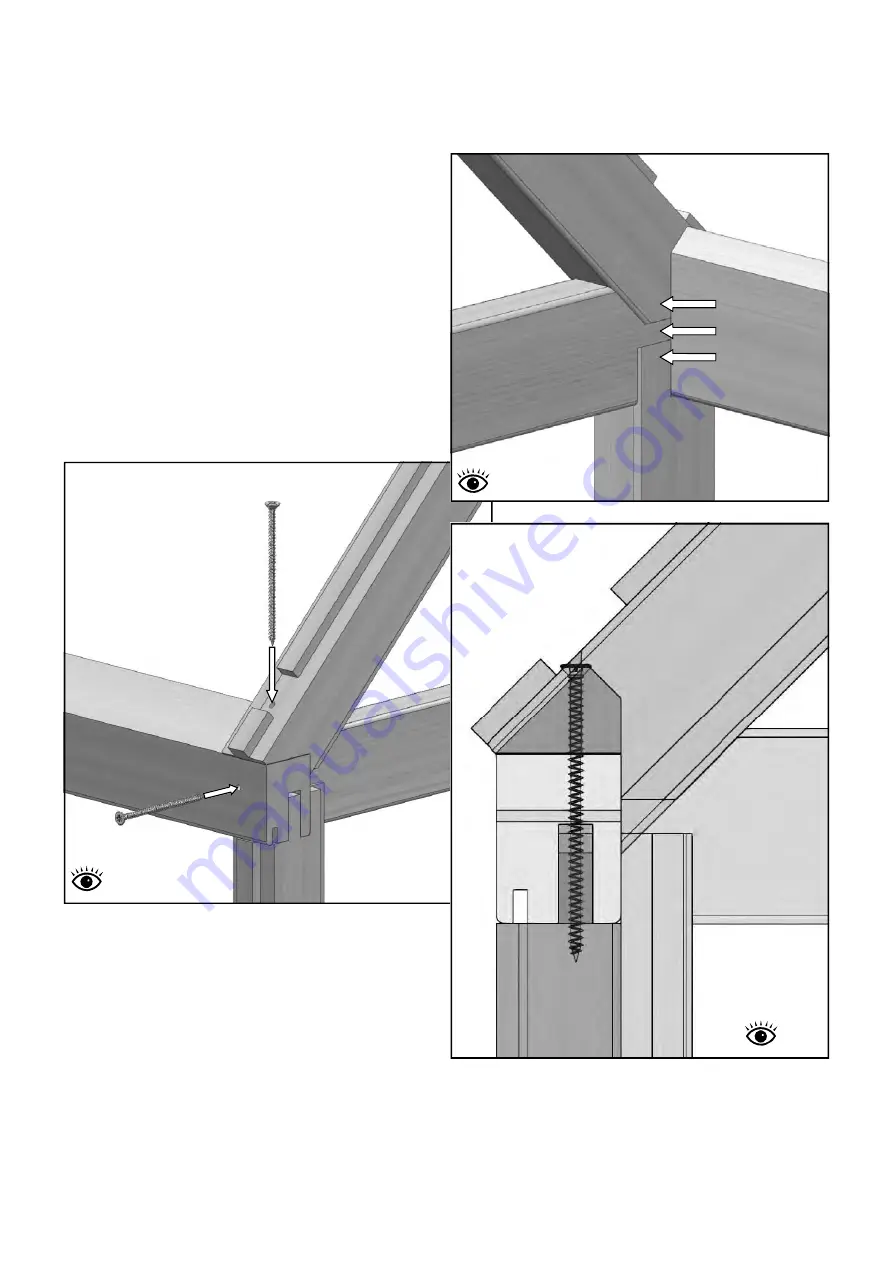
Diagram 32
Diagram 33
Diagram 31
Before fixing this corner make sure the inside
faces are all flush (diagram 31). When you are
happy that the purling is located correctly (it is
normal that the purling is set back slightly
from the glass rebate on the front of the
building) start by inserting the 80mm screw
through the side of the eaves bar into the
tenon on the end of the purling.
Next insert the 100mm screw vertically down
through the roof corner bar into the eaves bar
and finally securing the side corner bar
(diagram 33).
Internal
80m
m Sc
rew
EV
04
85
EV04
16
EV0491
Eaves ba
r
100m
m Screw
100m
m Screw
EV0416
EV
04
85
EV0491
External
X-ray
EV0491
EV04
16
EV
04
85
Eaves ba
r
Summary of Contents for VICTORIAN OAKHAM
Page 1: ...12 15...
Page 57: ...57 Finished installation 15...


