


4. Taking care to avoid any electrical wiring
in the ceiling, drill holes using a 5.0mm
drill bit through the center of the marked
locations. Push the plastic screw anchors
provided into the drilled holes. Screw the
mounting plate to the ceiling.
5. Insert the batteries as per the Quick Start
Guide, ensuring the orientation is correct.
If the batteries are already installed in your
Alarm just pull the battery tab to power the
Alarm.
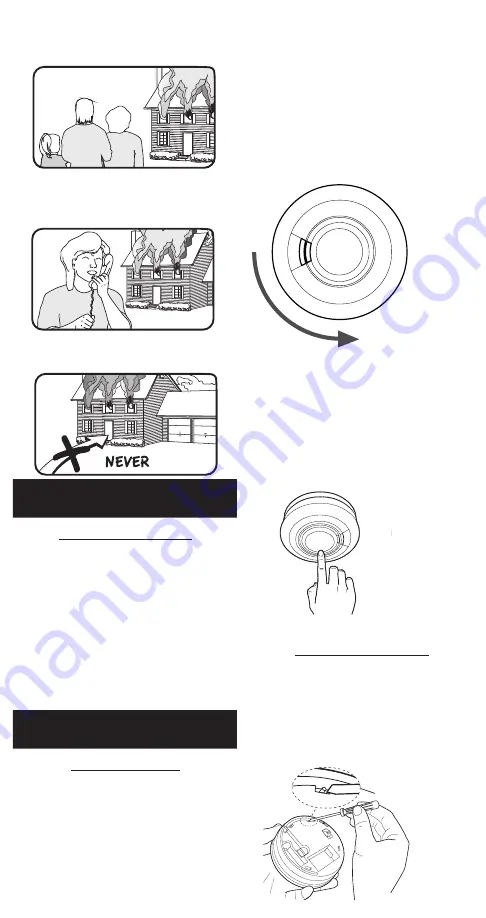
Figure 3
ROTATE UNIT ANTI-CLOCKWISE
UNIT WILL NOT TWIST OFF - IT MAY BE
TAMPERPROOFED - SEE FIGURE 5a
6. Carefully line up the Alarm on to the
mounting plate, gently press home and
twist clockwise. Install all the other Alarms
similarly.
7. Press the Test button on each Alarm to
ensure that the Alarm works (see Figure 4).
Figure 4
Figure 4
Heat Alarm
Tamperproofing the Alarm
The Alarm can be made tamperproof to
prevent unauthorized removal of the Alarm.
Break off the small pillar on the base as
shown in Figure 5a. To remove the Alarm
from the ceiling it is now necessary to use a
small screwdriver, to release the catch (push
catch towards the ceiling) and then twist off
the Alarm (see Figure 5b).
Figure 5a - How to Tamperproof
BREAK OFF
SMALL PILLAR
3. Get out as fast as you can. Do not stop
for packing. Have a prearranged meeting
place outside for all family members. Check
everybody is there.
4. Call the Fire Department from a
neighbor’s house or mobile phone.
Remember to give your name and address.
5. NEVER re-enter a burning house.
4. Alarm Limitations
Limitations of Heat Alarms
There are various situations where a Heat
Alarm may not be effective:
• Fires where the victim is intimate with a
flaming initiated fire; for example, when a
person’s clothes catch fire while cooking.
• Fires where the heat is prevented from
reaching the Heat Alarm due to a closed
door or other obstruction.
• Incendiary fires where the fire grows
so rapidly that an occupant’s egress is
blocked even with properly located Heat
Alarms.
5. Installation
Installation Procedure
1. Select a location complying with the
advice in Section 2.
2. Lift off the mounting plate from the Heat
Alarm.
3. Place the mounting plate on the ceiling
exactly where you want to mount the Alarm.
With a pencil, mark the location of the two
screw holes.
5


