background image

Page 7 of 8

10


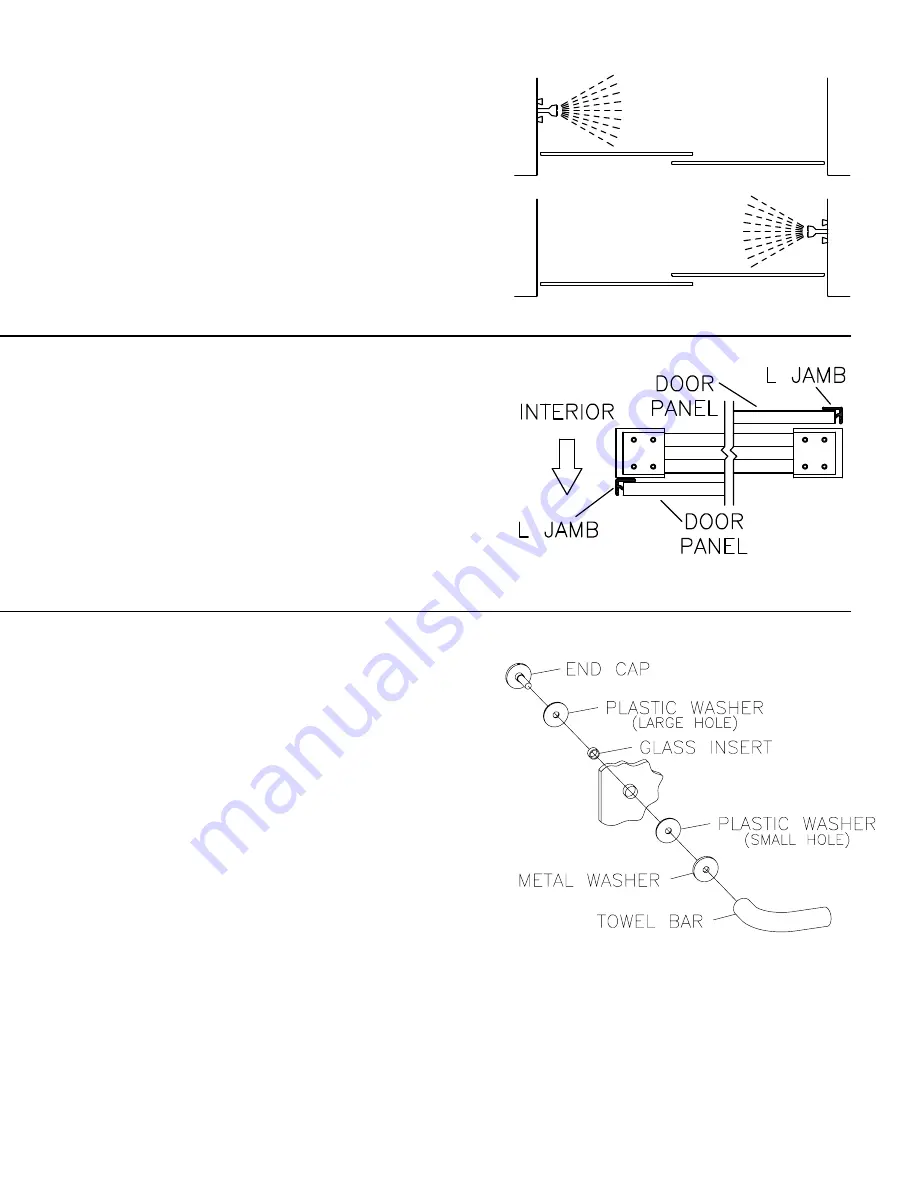
For maximum water-proofing, the interior panel 

should always be positioned closest to the shower 

head, as shown in this illustration. 

11


The vinyl L Jambs [

Q

] are installed on the outside 

of both door panels. The walls need to be clean 

and free of any dust. Use a pencil to lightly mark where 

the exterior edge of the glass meets the wall to use as a 

guide. To install the two L Jambs, peal the red tape off the 

mating surface and stick them to the walls, oriented as 

shown.  Press the mating surface firmly to the walls down 

the entire length of the L Jamb.

12


Locate the four, large hole, plastic washers [

R

] and 

place them over the threads and flush with the 

four end caps [

S

]. Next, place the four Plastic Inserts [

T

onto the four end caps and flush with the plastic washers. 

The towel bars [

U

] will be installed on the same side of 

the panels as the roller covers. Insert the threaded portion 

of an end cap through one of the holes in a glass panel, 

making sure that it is located on the same side as the 

roller covers. Place a Small Hole Plastic Washer [

V

] and a 

Metal Washer [

W

] on the end cap threads. Now, loosely, 

thread the towel bar onto the exposed threads of the end 

cap. Make another end cap assembly, and thread into 

the other end of the towel bar. Repeat this process for the 

other glass panel.

Summary of Contents for ProLine PL50

Page 1: ...INSTALLATION INSTRUCTIONS ProLine PL50 FRAMELESS SLIDING ENCLOSURE Copyright Alumax Bath Enclosures 2019 All rights reserved G031047850 3 14 19...

Page 2: ...age to the enclosure Make sure wall jamb bumpers are securely fastened in place per the installation instructions GLASS USAGE AND HANDLING WARNINGS a TEMPERED GLASS CANNOT BE CUT Attempting to cut tem...

Page 3: ...er H 8 Wall Mount Set Screw I 1 Center Guide J 2 Center Guide Insert K 2 Center Guide Screw L 8 Roller Cap M 8 Roller N 8 Roller Screw O 8 Roller Cover P 2 Bottom Seal Q 2 L Jamb R 4 Large Hole Plasti...

Page 4: ...re four large anchors and two smaller ones used to mount the center guide in Step 5 of this installation instruction OPTIONAL If the anchors are not used Drill a 1 4 diameter clearance hole just throu...

Page 5: ...e holes will help seal the holes and prevent moisture from entering the sill Place the center guide anchors into the holes Put a small bead of silicone around the interior of the outline for the cente...

Page 6: ...r door panel first It is the panel that when held has the rollers near you and the sweep leg of the bottom seal on the opposite side Lift the rollers above the bar and making sure that the bottom enga...

Page 7: ...th of the L Jamb 12Locate the four large hole plastic washers R and place them over the threads and flush with the four end caps S Next place the four Plastic Inserts T onto the four end caps and flus...

Page 8: ...L jamb on the side determined in step 10 Slide the bumper over until the rubber contacts the roller wheel Tighten the Stopper Set Screws X on the bottom until tight Move the exterior door to the oppo...

Reviews: