background image

14” Digital Photo Frame

Instructional Manual

mnl M10127

     Copyright © 2011 Aluratek, Inc.   All Rights Reserved.

aluratek.com

ADMPF114F

Summary of Contents for ADMPF114F

Page 1: ...14 Digital Photo Frame Instructional Manual mnl M10127 Copyright 2011 Aluratek Inc All Rights Reserved aluratek com ADMPF114F...

Page 2: ...g Started Operating Instructions Set Up Selecting Which Media to View Viewing Photos Adjust Speed of Slideshow Adjust the Slide Transition Effect Listen to Music Music Play Mode View Videos Video Play...

Page 3: ...18 19 20 21 22 23 24 25 Table of Contents Set the Date and Time Set the Alarm Setup Power On Off Timer Display Mode Setup Color Setup Technical Support Radio and TV Interference Statement Warranty...

Page 4: ...Menu Buttons 14 LCD Screen Quality Glossy Black Frame Power Button Frame Stand Speakers LED SD SDHC Card Slot USB 2 0 Ports Power Adapter Port 4 Frame Close Up...

Page 5: ...Off 2 SlideShow 3 Enter 4 Up Down Left Right Arrows Use arrow keys to navigate your way throught various menus 5 Exit Returns to the previous menu 6 Zoom 7 OSD On Screen Display 8 View 9 Aspect Ratio...

Page 6: ...y packaged and inspected The following should be included in your package Please inspect the contents of the package to ensure that you have received all items and that nothing has been damaged If you...

Page 7: ...ternal memory if no memory card is detected Note You must disconnect the USB cable from your computer after transferring You will not be able to scroll with the remote while the USB connection is esta...

Page 8: ...ve selected your photo press Enter 4 You may zoom in on your photos by pressing the Zoom button on the remote You may also reposition the photo using the up down left and right buttons on the remote o...

Page 9: ...slide transition options by entering the Setup menu from the main menu Adjust Speed of Slideshow 1 Select Setup and press Enter from the main menu 2 Use the up or down key to select Slideshow Time 3 U...

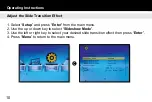
Page 10: ...nsition Effect 1 Select Setup and press Enter from the main menu 2 Use the up or down key to select Slideshow Mode 3 Use the left or right key to select your desired slide transition effect then press...

Page 11: ...ed on your media will appear on the screen Use the up and down keys on the remote control to select the desired song then press Enter You can press the to pause play 3 The next song will play automati...

Page 12: ...ode 1 Select Setup and press Enter from the main menu 2 Use the up or down key to select Music Repeat Mode 3 Use the left or right key to select Repeat One Repeat All or Repeat Off then press Enter 4...

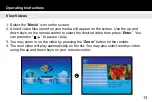
Page 13: ...screen Use the up and down keys on the remote control to select the desired video then press Enter You can press the to pause play 3 You may zoom in on the video by pressing the Zoom button on the rem...

Page 14: ...ode 1 Select Setup and press Enter from the main menu 2 Use the up or down key to select Movie Repeat Mode 3 Use the left or right key to select Repeat One Repeat All or Repeat Off then press Enter 4...

Page 15: ...using the up and down keys on your remote control and press the key You will see a next to the file name 3 Press the OSD button 4 Select Copy and press Enter on the remote 5 Select the memory card or...

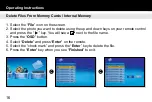
Page 16: ...he photo you want to delete using the up and down keys on your remote control and press the key You will see a next to the file name 3 Press the OSD button 4 Select Delete and press Enter on the remot...

Page 17: ...the Display Language 1 Select Setup and press Enter from the main menu 2 Use the up or down key to select Language 3 Use the left or right key to select the desired language then press Enter 4 Press...

Page 18: ...Setup and press Enter from the main menu 2 Use the up or down key to select Time 3 Use the left or right key to select what you want to change and use the up or down key to change to the correct value...

Page 19: ...arm 3 Use the left or right key to select what you want to change and use the up or down key to change to the correct value then press Enter The 1st number is the hour follow by the minute The next it...

Page 20: ...Setup from the main menu and press Enter on the remote control 2 Scroll to Auto Power On or Auto Power Off and press the button on the remote control 3 Use the up or down key to set the time in 24H f...

Page 21: ...ay Mode Setup 1 Select Setup and press Enter from the main menu 2 Use the up or down key to select Display Mode 3 Use the left or right key to select Cinema Crop and Stretch then press Enter 4 Press M...

Page 22: ...s Color Setup 1 Select Setup from the main menu and press Enter on the remote control 2 Scroll to the desired option Brightness Contrast or Saturation and press the or button on the remote control to...

Page 23: ...r assistance please contact Aluratek support department prior to returning this device E mail support aluratek com Web www aluratek com support Local Tustin CA 714 586 8730 Toll free 1 866 580 1978 Te...

Page 24: ...energy and if not installed and used in accordance with the instruction may cause harmful interference to radio communications However there is no guarantee that interference will not occur in a part...

Page 25: ...ther than Aluratek D Products sold AS IS or WITH FAULTS IN NO EVENT SHALL ALURATEK S LIABILITY EXCEED THE PRICE PAID FOR THE PRODUCT FROM DIRECT INDIRECT SPECIAL INCIDENTAL OR CONSEQUENTIAL DAMAGES RE...

Page 26: ...Aluratek Inc 14831 Myford Rd Tustin CA 92780 sales aluratek com 714 586 8730 office 714 586 8789 fax aluratek com...

Reviews: