background image

4.7.7 schedule.


Click on “Save” to store what you just select or “Undo” to give up 

Summary of Contents for CDW530AM

Page 1: ...無線路由器 WiFi Combo Broadband Gateway User Guide CDW530AM ...

Page 2: ...y with the limits for a Class B digital device pursuant to Part 15 of the FCC Rules These limits are designed to provide reasonable protection against radio interference in a commercial environment This equipment can generate use and radiate radio frequency energy and if not installed and used in accordance with the instructions in this manual may cause harmful interference to radio communications...

Page 3: ... View 5 1 4 LEDs the Front View 6 1 5 Features 7 2 Configuring WiFi Combo Broadband Router 8 2 1 Installation Considerations 8 2 1 1 Installation Instructions Get Start Networking 8 2 1 2 Establish WiFi Connection 11 3 Using the Configuration Menu 12 3 1 Wizard setting 13 3 2 Administrator s Main Menu 21 4 Troubleshooting 58 5 Technical Specifications 61 ...

Page 4: ... industry security features 1 1 Package Contents Importance Check your product package contents FIRST The WiFi Combo Broadband Router package should contain the items listed below If any of the items are missing please contact your reseller items Description Quantity 1 WiFi Combo Broadband Router 1 2 RJ 45 Cable 1 3 Power adapter 5V 2 0A 1 4 Quick Installation Guide 1 5 CD 1 6 Cradle set 1 7 Rubbe...

Page 5: ...above Wi Fi System Requirements An 802 11b 802 11g or 802 11n Adapter 1 3 Interfaces the Rear View Note Contains a reset button to restore the setting back to original factory defaulted setting as if your convenience of forgetting your applicable setting Antenna Auto MDI MDIX RJ 45 Ports Automatically sense the types of WAN and LAN when connecting to Ethernet Receptor for Power adapter Reset Butto...

Page 6: ...s LED A green light as power is on and ready LAN LED A green light as connected to local Ethernet and blinks during data is transmission WAN LED A green light as WAN is connected WiFi LED A green light as connection on WLAN available ...

Page 7: ...ring Port Scheduling z DHCP server enables all networked computers to automatically receive IP addresses z Web based interface for Managing and Configuring z Access Control to manage users on the network z Supports special applications that require multiple connections z Equipped with 2 10 100 Ethernet ports for LAN and WAN access and USB port for 3G network connection z Connects multiple computer...

Page 8: ... guidelines 1 Keep the number of walls and ceilings between the WiFi Combo Broadband Router and other network devices to a minimum Each wall or ceiling can reduce the WiFi Combo Broadband Router s range from 3 90 feet 1 30 meters Note The same considerations apply to your broadband EVDO connection 2 Keep your product aware from electrical devices such as microwaves air conditioners and televisions...

Page 9: ...dem into the USB interface see Picture 2 2 Picture 2 2 Note The WiFi Combo Broadband Router is designed to work with either UMTS or EV DO and even HSDPA 3G card that can be used as a modem support tethered data Please refer to your service provider for detailed feature information 3 Insert the Ethernet patch cable into LAN Port on the back panel of the WiFi Combo Broadband Router and an available ...

Page 10: ...bo Broadband Router Then plug the other end of the power adapter into a wall outlet or power strip Picture 2 4 Picture 2 4 5 The LEDs See Picture 2 5 a The 3G Status LED will turn ON when 3G modem inserts or flash When 3G modem doesn t insert to indicate power has been applied b When complete the following LEDs will illuminate green 3G Status LAN and WiFi c Reference the Section 1 4 LEDs the Front...

Page 11: ...WPA PSK encryption ensure these settings match your WiFi adapter settings WiFi and encryption settings must match for access to the HSPA WiFi Combo Broadband Router Configuration Menu and the Internet Please refer to your WiFi adapter documentation for additional information ...

Page 12: ...e established through the WiFi Combo Broadband Router Configuration Menu You can access this interface by performing the steps listed below 1 Open a web browser 2 Type in the IP Address http 192 168 123 254 of the WiFi Combo Broadband Router Note If you have changed the default IP Address assigned to the WiFi Combo Broadband Router ensure you enter the correct IP Address now ...

Page 13: ... button 3 1 Wizard setting z Press Wizard button Æ for basic settings with simpler way Please check section 3 1 z Or you may click on Advanced Setup Æ for advanced settings Please check the section Administrator s Main Menu each item from section 3 2 ...

Page 14: ... to get start With wizard setting steps you could configure the router in a very simple way This configuration wizard includes settings of a Login Password b WAN Setup c Wireless Setup Press Next button to start configuration ...

Page 15: ...u can change Password here It is recommended that you change the system password into the one you prefer to on the basis of security 1 Key in your Old Password if it is the first initiation the admin will be the defaulted one 2 Enter your New Password ...

Page 16: ...sword 4 Then click on Next to get into next installation Step 2 Allow you to change the Time Zone You can change Time Zone here Or you can click the button Detect Again the Time Zone will be changed to same with your PC Step 3 Select WAN Types will be used for Internet connection ...

Page 17: ... Click on Next button Step 4 Configure the LAN IP Address Host Name and WAN MAC Address LAN is short for Local Area Network and is considered your internal network These are the IP settings of the LAN interface for the WiFi Combo Broadband ...

Page 18: ...h 192 168 123 254 1 LAN IP Address The IP address of the LAN interface The default IP address is 192 168 123 254 2 Host Name is optional 3 WAN s MAC Address If you click the Clone MAC button you will find the MAC address of your NIC shown in WAN s MAC Address 4 Click on Next to continue Step 5 Configure the wireless settings 1 Select Enable or Disable The default setting is Enable 2 Network ID SSI...

Page 19: ...Click on Next to continue Step 7 Summary Click on the Apply Settings button Step 8 System is applying ...

Page 20: ...Click Finish button to back the Status Page ...

Page 21: ...3 2 Administrator s Main Menu 3 2 1 Basic Setting ...

Page 22: ...WAN Type WAN connection type of your ISP You can click WAN Type Combo button to choose a correct one from the following options Static IP Address WAN IP Address Subnet Mask Gateway Primary and Secondary DNS enter the proper setting provided by your ISP Dynamic IP Address 1 Host Name optional required by some ISPs for example Home 2 Renew IP Forever this feature enables this product to renew your I...

Page 23: ...the time of no activity to disconnect your PPTP session Set it to zero or enable Auto reconnect to disable this feature If Auto reconnect is enabled this product will connect to ISP automatically after system is restarted or connection is dropped 6 Connection Control There are 3 modes to select Connect on demand The device will link up with ISP when the clients send outgoing packets Auto Reconnect...

Page 24: ... or service provider for additional information 1 APN Enter the APN for your PC card here 2 Pin Code Enter the Pin Code for your SIM card 3 Dial Number This field should not be altered except when required by your service provider 4 User Name Enter the new User Name for your PC card here 5 Password Enter the new Password for your PC card here 6 Primary DNS This feature allows you to assign a Prima...

Page 25: ... IP address pool 4 Domain Name Optional this information will be passed to the client 5 Primary DNS Secondary DNS Optional This feature allows you to assign a DNS Servers 6 Primary WINS Secondary WINS Optional this feature allows you to assign a WINS Servers 7 Gateway Optional Gateway Address would be the IP address of an alternate Gateway This function enables you to assign another gateway to you...

Page 26: ...an know how many AP devices by scanning function in the network Therefore this function is disabled the wireless clients can not find the device from beacons 5 Channel Auto is the default Devices on the network must share the same channel Note Wireless adapters automatically scan and match the wireless settings You may also select the channel you wish to use 6 Wireless Mode Choose B G Mixed B only...

Page 27: ...must authenticate to this router first to use the Network service RADIUS Server IP address or the 802 1X server s domain name Select Encryption and RADIUS Shared Key If you select HEX you have to fill in 64 hexadecimal 0 1 2 8 9 A B F digits If you select ASCII the length of pre share key is from 8 to 63 Key value shared by the RADIUS server and this router This key value is consistent with the ke...

Page 28: ...S Wi Fi Protection Setup OPTION WPS is Wi Fi Protection Setup which is similar to WCN NET and offers safe and easy way in Wireless Connection Wireless Client List The list of wireless client is shows here ...

Page 29: ......

Page 30: ...3 2 1 4 Change Password You can change Password here We strongly recommend you to change the system password for security reason Click on Save to store what you just select or Undo to give up ...

Page 31: ...3 2 2 Forwarding Rules ...

Page 32: ...ual server is defined as a Service Port and all requests to this port will be redirected to the computer specified by the Server IP Virtual Server can work with Scheduling Rules and give user more flexibility on Access control For Detail please refer to Scheduling Rule For example if you have an FTP server port 21 at 192 168 123 1 a Web server port 80 at 192 168 123 2 and a VPN server at 192 168 1...

Page 33: ...Service Port Server IP Enable 21 192 168 123 1 V 80 192 168 123 2 V 1723 192 168 123 6 V Click on Save to store what you just select or Undo to give up ...

Page 34: ... make an application work try setting your computer as the DMZ host instead 1 Trigger the outbound port number issued by the application 2 Incoming Ports when the trigger packet is detected the inbound packets sent to the specified port numbers are allowed to pass through the firewall This product provides some predefined settings 1 Select your application and 2 Click Copy to to add the predefined...

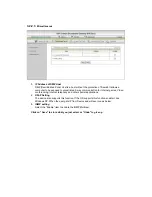
Page 35: ... for Internet games Video conferencing Internet telephony and other special applications 2 UPnP Setting The device also supports this function If the OS supports this function enable it like Windows XP When the user gets IP from Device and will see icon as below 3 IGMP setting Select the Enable item to enable the IGMP Multicast Click on Save to store what you just select or Undo to give up ...

Page 36: ...3 2 3 Security Setting ...

Page 37: ...ach direction inbound or outbound For each rule you can define the following Source IP address Source port Destination IP address Destination port Protocol TCP or UDP or both Use Rule For source or destination IP address you can define a single IP address 4 3 2 1 or a range of IP addresses 4 3 2 1 4 3 2 254 An empty implies all IP addresses For source or destination port you can define a single po...

Page 38: ...Each rule can be enabled or disabled individually Click on Save to store what you just select or Undo to give up ...

Page 39: ...on when someone accesses the specific URLs 4 Privilege IP Address Range Setting a group of hosts and privilege these hosts to access network without restriction 5 Domain Suffix A suffix of URL can be restricted for example com xxx com 6 Action When someone is accessing the URL met the domain suffix what kind of action you want Check drop to block the access Check log to log these access 7 Enable C...

Page 40: ...Click on Save to store what you just select or Undo to give up ...

Page 41: ...words Domain filter can block specific website while URL Blocking can block hundreds of websites by simply a keyword 1 URL Blocking Enable Check if you want to enable URL Blocking 2 URL If any part of the Website s URL matches the pre defined word the connection will be blocked For example you can use pre defined word sex to block all websites if their URLs contain pre defined word sex 3 Enable Ch...

Page 42: ... the client can t access to the Internet either Choose allow or deny to allow or deny the clients whose MAC addresses are not in the Control table please see below to connect to this device 3 Association control Check Association control to enable the controlling of which wireless client can associate to the wireless LAN If a client is denied to associate to the wireless LAN it means the client ca...

Page 43: ... to this product to perform administration task You can use subnet mask bits nn notation to specified a group of trusted IP addresses for example 10 1 2 0 24 NOTE When Remote Administration is enabled the web server port will be shifted to 80 You can change web server port to other port too 3 Discard PING from WAN side When this feature is enabled any host on the WAN cannot ping this product 4 DoS...

Page 44: ...3 2 4 Advanced Setting ...

Page 45: ...want to enable Email alert send syslog via email 3 SMTP Server IP and Port Input the SMTP server IP and port which are concated with If you do not specify port number the default value is 25 For example mail your_url com or 192 168 1 100 26 4 Send E mail alert to The recipients who will receive these logs you can assign more than 1 recipient using or to separate these email addresses 5 E mail Subj...

Page 46: ... service provider Before you enable Dynamic DNS you need to register an account on one of these Dynamic DNS servers that we list in provider field To enable Dynamic DNS click the check box next to Enable in the DDNS field Next you can enter the appropriate information about your Dynamic DNS Server You have to define Provider Host Name Username E mail Password Key You will get this information when...

Page 47: ...e packets in this field 5 Remote IP Define the Remote IP address of packets here 6 Remote Ports Define the Remote port of the packets in this field 7 QoS Priority This defines the priority level of the current Policy Configuration Packets associated with this policy will be serviced based upon the priority level set For critical applications High or Normal levels are recommended For non critical a...

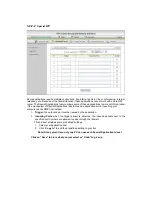
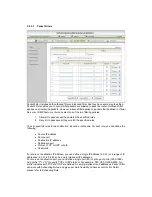
Page 48: ...4 7 7 schedule Click on Save to store what you just select or Undo to give up ...

Page 49: ...Setting the community of GetRequest your device will response 3 Set Community Setting the community of SetRequest your device will accept IP 1 IP 2 IP 3 IP 4 Input your SNMP Management PC s IP here User has to configure to where this device should send SNMP Trap message 4 SNMP Version Please select proper SNMP Version that your SNMP Management software supports 5 WAN Access IP Address If the user ...

Page 50: ... dynamic routing 2 Dynamic Routing Routing Information Protocol RIP will exchange information about destinations for computing routes throughout the network Please select RIPv2 only if you have different subnet in your network Otherwise please select RIPv1 if you need this protocol 3 Static Routing For static routing you can specify up to 8 routing rules You can enter the destination IP address su...

Page 51: ... to consult UTC time 3 Auto Synchronization Select the Enable item to enable this function 4 Sync with Time Server Select if you want to set Date and Time by NTP Protocol 5 Sync with my PC Select if you want to set Date and Time using PC s Date and Time Click on Save to store what you just select or Undo to give up ...

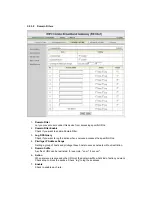
Page 52: ...ill be turned on or off Select the Enable item Press Add New Rule You can write a rule name and set which day and what time to schedule from Start Time to End Time The following example configure ftp time as everyday 14 10 to 16 20 Click on Save to store what you just select ...

Page 53: ...3 2 5 Tool Box ...

Page 54: ...3 2 5 1 System Info You can view the System Information and System log And download clear the System log in this page ...

Page 55: ......

Page 56: ...g the Backup Setting button and save it as a bin file Once you want to restore these settings please reference the Section 3 2 5 2 Firmware Upgrade 3 2 5 4 Reset to Default You can also reset this product to factory default by clicking the Reset to default button 3 2 5 5 Reboot You can also reboot this product by clicking the Reboot button ...

Page 57: ...oy this feature the target device must be Wake on LAN enabled and you have to know the MAC address of this device say 00 11 22 33 44 55 Clicking Wake up button will make the router to send the wake up frame to the target device immediately 2 Domain Name or IP address for Ping Test You can key in URL or IP address and then click the Ping button for test ...

Page 58: ...ws four replies Note If you have changed the default IP Address ensure you ping the correct IP Address assigned to the WiFi Combo Broadband Router Ensure that your Ethernet Adapter is working properly and that all network drivers are installed properly Note Network adapter names will vary depending on your specific adapter The installation steps listed below are applicable for all network adapters...

Page 59: ...ors etc 4 Why I am unable to achieve a wireless connection Note An Ethernet connection is required to troubleshoot the WiFi Combo Broadband Router If you have enabled Encryption on the WiFi Combo Broadband Router you must also enable encryption on all wireless clients in order to establish a wireless connection For 802 11g the encryption settings are 64 or 128 bit Ensure that the encryption bit le...

Page 60: ...er clip to press the Reset button 4 Hold for 10 seconds and then release 5 After the WiFi Combo Broadband Router reboots it is reset to the factory default settings Note Please note that this process will take a few minutes 7 What is VPN VPN stands for Virtual Private Networking VPNs create a tunnel through an existing Internet connection using PPTP Point to Point Tunneling Protocol or IPSec IP Se...

Page 61: ...第十二條 型式認證合格之低功率射頻電機 非經許可 公司 商號或 使用者均不得擅自變更頻率 加大功率或變更原設計之特性 及功能 第十四條 低功率射頻電機之使用不得影響飛航安全及干擾合法通 信 經發現有干擾現象時 應立即停用 並改善至無干擾時 方得繼續使用 前項合法通信 指依電信法規定作業之無線電通信 低功率射頻電機須忍受合法通信或工業 科學及醫療用電波 輻射性電機設備之干擾 ...

Page 62: ......

Page 63: ......
Reviews: