©2008 Alvin & CompAny, inC.
• P.O. Box 188, Windsor, CT 06095-0722
Phone: 860-243-8991 • Toll-Free: 800-444-2584 • Fax: 860-242-8037 • Toll-Free Fax: 800-777-2896
www.alvinco.com
LIT-A7424 1/08
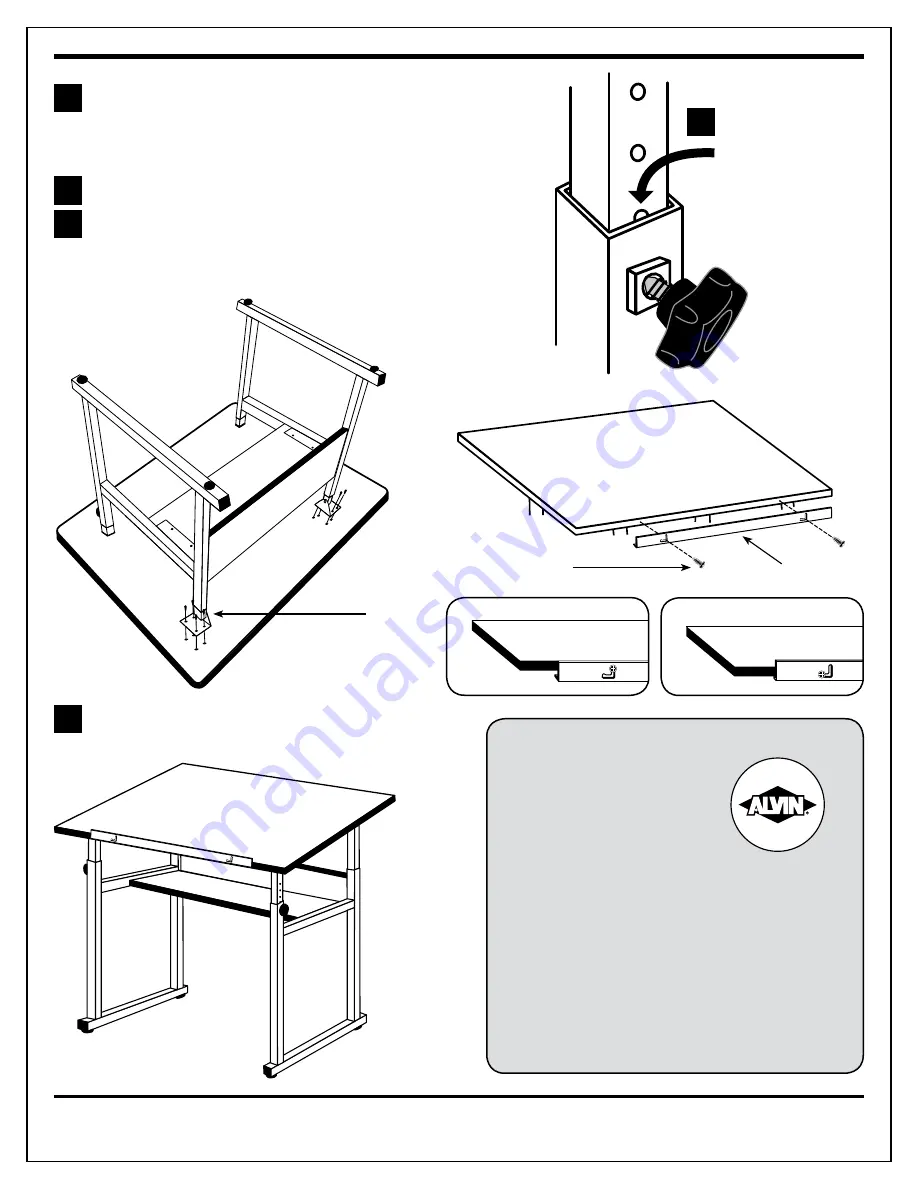
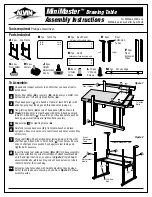
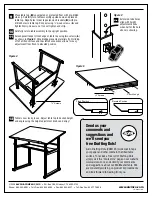
Place table top (
B
) on carpeted or protected floor with pre-drilled
side up. Carefully turn table assembly upside down and place on
table top. Align holes in rear leg extension brackets (
E
) with pre-
drilled holes in table top. Connect using
5
⁄
8
" wood screws (
L
) and
tighten firmly. Use care not to over tighten and strip.
Carefully return table assembly to the upright position.
Attach pencil ledge to front edge of table top using two screws (
L
)
as shown in
Figure 5
. Pencil ledge prevents materials from sliding
off of a tilted surface and the slotted connection allows for easy
adjustment from flush to elevated position.
9
10
11
12
Figure 3
Figure 4
5
⁄
8
"
Screws
Flush Position
Elevated Position
Figure 5
Table is now ready to use. Adjust table top to desired height
and angle using the height adjustment knobs and enjoy!
Send us your
comments and
suggestions and
we’ll send you
free Drafting Dots!
Alvin Drafting Dots (#DM123) work well to tape
your paper and other media to the tilted table
surface. To receive a free roll of Drafting Dots,
simply visit the “Contact Us” page on our website
www.alvinco.com and submit your comments
and suggestions about our MiniMaster table. We
are constantly working on product improvements
and look forward to hearing from you.
Extension tube holes
align with height
adjustment knobs
when half of the hole
above is showing.
Hint
5
⁄
8
"
Screws
Pencil Ledge


