background image


M1701_POS_Pro_Manual V1.0 2012-06-12 


5.


BATTERY REPLACEMENT 


1.


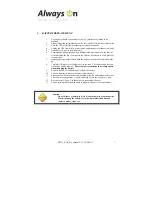
Your battery should run anywhere from 3-5 years before it needs to be 
replaced. 

2.


Please follow the instructions below for easy, trouble free, battery replacement. 

3.


Turn the UPS off (follow procedure previously mentioned) 

4.


Unplug the UPS from utility power source and disconnect all connected loads. 

5.


Disconnect AC power cord from unit. 

6.


Turn unit upside down and using a Phillips screwdriver, unscrew the four (4) 
screws holding the top of the unit to the bottom.  Put screws in a safe place for 
reconnection. 

7.


Holding the top together firmly with the bottom, turn the entire unit right side 
up. 

8.


Carefully lift top cover off and place it to the side.  The connecting wires and 
electronics will be exposed.  

Be careful not to touch any inner components 

when changing the battery

9.


Remove the two (2) connecting wires from the battery. 

10.


You can now easily remove the battery from the unit 

11.


Place your new battery in the same position, direction and reconnect the wires.  
The red wire to the positive (+) pole and black wire to the negative (-) pole. 

12.


Reverse steps 5, 4 and 3 (in that order) to reassemble the unit. 

13.


Follow start-up instructions in order to properly reconnect your equipment. 

Caution: 

Do not dispose of battery in a fire. Do not attempt to open the battery. 
When replacing the battery use tools with insulated handles and 
remove watches, rings, etc…


Summary of Contents for P.O.S. Pro 600VA

Page 1: ...OS_Pro_Manual V1 0 2012 06 12 P O S Pro Series Single Phase Input Single Phase Output Uninterruptible Power Supply P O S Pro 600VA Line Interactive UPS PWM 600VA with Integrated DC Power Supply User s...

Page 2: ...ful to the skin and eyes It may be toxic CAUTION A battery can present a risk of electrical shock and high short circuit current The following precautions should be observed when working on or with th...

Page 3: ...ions below 1 Do not remove the UPS cover unless authorized by factory Removing the cover will void the warranty 2 The UPS can only be connected to a 2 pole 3 wire plug 3 Do not install the UPS in an e...

Page 4: ...n the UPS 5 4 2 Switching Off the UPS 5 4 3 Self Test 5 4 4 Silence the Alarm 5 4 5 Cold Start 5 4 6 Shutdown Mode 5 4 7 Green Function 6 4 8 Back Up Slow Alarm 6 4 9 Low Battery Rapid Alarm 6 4 10 Ov...

Page 5: ...w voltage state Also included with our UPS system is a cyclic self testing function to verify both the operation of the UPS and the condition of the battery The integrated DC power supply and multiple...

Page 6: ...the loads and flash rapidly when the battery requires replacement 2 ON OFF TEST SILENCE button Press and hold the button for more than 3 seconds to turn the UPS ON or OFF press and hold the button les...

Page 7: ...ry The UPS charges its battery whenever the UPS is in LINE mode For best results charge the battery for 4 hours initially before connecting the load 3 5 Connecting the Loads Plug the loads into the ou...

Page 8: ...onditions Store the UPS covered and upright in a cool dry location with its battery fully charged Before storing charge the UPS for at least eight 8 hours Remove any accessories in the accessory slot...

Page 9: ...the self test the UPS operates in back up mode During the self test the UPS briefly operates the loads with battery power the LED flashes every 2 seconds If the UPS passes the self test it returns to...

Page 10: ...normal operation Press the On Off Test Silence Button during back up mode to silence the beeping 4 9 Low Battery Rapid Alarm In back up mode when the battery energy runs low the UPS beeps rapidly unti...

Page 11: ...ith the bottom turn the entire unit right side up 8 Carefully lift top cover off and place it to the side The connecting wires and electronics will be exposed Be careful not to touch any inner compone...

Page 12: ...ile AC power is connected yet starts after pushing power on off switch Breaker at back panel open No AC input UPS AC detecting circuit fail Switch breaker Check AC power Call for service UPS goes into...

Page 13: ...cut off immediately or input fuse protection BATTERY Type Maintenance free Sealed Lead Acid Typical Recharge Time 6 hours to 90 of full capacity Protection Automatic self test discharge protection re...

Page 14: ...ge without prior notice to reflect upgrades and improvements in technology 7 1 DC Power Supply Specifications Output Voltage 24VDC Regulation 1 Ripple and Noise 150mV Rated Current 1 5A Continuous 2A...

Page 15: ...s alwayson com Website www alwayson com 8 2 QA Warranty Questions Always On UPS Systems Inc Bldg 1 150 Campion Road Kelowna BC Canada V1X 7S8 Phone 250 491 9777 Ext 209 Fax 250 491 9775 Email qa alway...

Reviews: