Timekeeper™
Users Manual
01/11/20
•
Connect the transmit port of the second Timekeeper™ to the receive port of the first Timekeeper™.
•
Connect as many remote displays as you like to the first Timekeeper™.
•
Configure the second Timekeeper™ to send key press commands. Set the “Time of day clock” setup
parameter to “
CA
”.
•
Now, either Timekeeper™ will operate all timer functions.
Additional operating instructions
Standard Momentary Controls
•
RESET
– Timer Reset
•
START
– Timer Start/Stop
•
SELECT
– Select between setting hours / minutes / seconds.
•
MODE
– Change to Count Up, Count down.
•
CLOCK
– Change to time of day clock mode.
•
PRESET
– Recall stored settings.
•
HISTORY
– Recall the 16 most recent counter or timer values (if this option is ordered).
Standard Press-and-Hold Controls
•
RESET
– Store power up settings (if this option is ordered).
•
START
– Set special timer mode or set button delay for remote inputs
•
SELECT
– Set warning times or counter scale factor.
•
MODE
– Change the beeper mode.
•
CLOCK
– Set the time of day clock.
•
PRESET
– Store settings.
•
HISTORY
– Not used.
Clock Mode
•
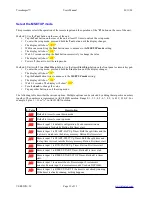
Press the clock button to enter the clock mode. The Hours:Minutes:Seconds in 24 hour mode will be
selected.
•
Press the clock button again to display Clock Minutes:Seconds.
•
Press the clock button again to display Hours:Minutes:Seconds in 12 hour mode.
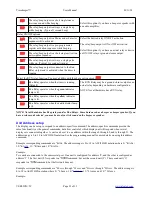
NOTE: On a timer with only 4 digits, only the hours and minutes will be displayed. On a timer with 6 digits, the hours,
minutes and seconds will be displayed.
The remote displays are updated once per minute with the correct time of day.
Device control Outputs
•
Optional Relay Control signal (BEEP). Activated whenever the timer reaches time zero. Beep relay.
VERSION=5C
Page 7 of 33


