background image


Model 2110A Pull-Type  

Peanut Combine


MAN143 

1st Edition, Beg. S/N 540000 


December 2015


©2015 


Read this manual before 
using this product.  Failure 
to follow the instructions 
and safety precautions in 
this manual can result in 
serious injury or death. 

Summary of Contents for 2110A

Page 1: ...Peanut Combine MAN143 1st Edition Beg S N 540000 December 2015 2015 Read this manual before using this product Failure to follow the instructions and safety precautions in this manual can result in se...

Page 2: ......

Page 3: ...You can find us on the Web at www amadas com or e mail us at amadas amadas com or call us at 757 539 0231 Mailing Addresses P O Box 1833 Suffolk VA 23439 P O Box 3687 Albany GA 31701 Shipping Addresse...

Page 4: ......

Page 5: ...ocess 24 Hitching Combine to Tractor 27 Attaching and Checking Driveline 28 Daily Pre Start Check 30 Operating Procedure 33 Proper Operation 36 Hydraulic Bin Lip Dirt Trap 37 Road Towing Combine with...

Page 6: ...ment 60 Optional Dual Speed Cylinder Drives61 Variable Pitch Vine Spreaders 62 6 Performance 63 Fine Tuning Operation 64 Achieving Maximum Ground Speed 65 Increasing Separating Capacity 66 Harvesting...

Page 7: ...hank you for choosing AMADAS Industries We are strongly committed to your satisfaction and safety Our goal is for you to be satisfied with our machinery for many years and it is our hope that you will...

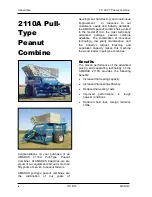
Page 8: ...he AMADAS peanut combine has evolved to the model 2110A the most technically advanced pull type peanut combine available The combination of innovative technology low yearly maintenance and the industr...

Page 9: ...er Optional PTO input 1000 PTO 850 RPM input 2 speed option 1000 PTO 790 RPM input standard Tongue Side shift hydraulic height adjustable with pin hitch Hitch type 2 5 16 ball ball pin type option Pic...

Page 10: ...Introduction 2110A PT Peanut Combine Dimensions 6 Row 25 6 19 6 13 10 15 8 with bin lip extended vi 12 18 15 MAN143...

Page 11: ...Peanut Combine Safety 1 Safety Safety at All Times 2 Safety Practices 3 Additional Safety for this Machine 10 Safety Decals 11 This symbol means ATTENTION BECOME ALERT YOUR SAFETY IS INVOLVED MAN143 1...

Page 12: ...e that follows it ALWAYS follow the recommended precautions and safe operating procedures accompanying this symbol If you have any questions please contact your dealer or the manufacturer Safety Signa...

Page 13: ...ht of the tractor Sudden braking can cause a towed load to swerve and upset Reduce speed if towed load is not equipped with brakes Avoid Electrical Power Lines Make sure all components are secured in...

Page 14: ...etrate gloves as well as your skin Always avoid direct contact of any high pressure fluid flow If an accident occurs respond as follows o Seek medical treatment immediately Any fluid injected into the...

Page 15: ...r doctors ambulance service hospital and fire department near your telephone Handle Fuel Safety Avoid Fires Handle fuel with care it is highly flammable Do NOT refuel the machine while smoking or when...

Page 16: ...ious injury Potentially hazardous chemicals used with AMADAS equipment include such items as lubricants coolants paints and adhesives Before you start any job using a hazardous chemical check the MSDS...

Page 17: ...where welding will take place Do all work in an area that is well ventilated to carry toxic fumes and dust away Dispose of paint coatings and solvent properly Avoid Using Heat Near Pressurized Fluid L...

Page 18: ...rovide secure support for them If left in a raised position hydraulically supported devices can settle or leak down Do NOT support the machine on cinder blocks hollow tiles or props that may crumble u...

Page 19: ...Some items may not apply to this type of machine Pay Close Attention to Notes Throughout the manual information that needs to be emphasized is set apart with either a NOTE or IMPORTANT heading Please...

Page 20: ...overhead electrical line could cause electrocution death or serious personal injury Tow Combine Safely NEVER exceed the maximum towing speed of 10 MPH loaded and 20 MPH empty NEVER tow the combine wi...

Page 21: ...te the following about the decals Keep them clean and legible Never remove a safety decal from the machine When you replace a part with a safety decal also replace that decal For replacement decals ca...

Page 22: ...Safety 2110A PT Peanut Combine 4 80945 6 80947 5 80946 12 12 18 15 MAN143...

Page 23: ...2110A PT Peanut Combine Safety 7 80949 8 80950 11 80936 9 80941 10 80563 MAN143 12 18 15 13...

Page 24: ...Safety 2110A PT Peanut Combine 12 80959 13 80564 14 80886 15 80717 80887 only on OCS equipped machines 14 12 18 15 MAN143...

Page 25: ...Combine Safety Decal Locations 12 Behind Tire 9 Behind Shield 9 9 Behind Shield 2 2 Behind Shield 1 Note that the location number indicated on the photo corresponds to the first number of the decal MA...

Page 26: ...Safety 2110A PT Peanut Combine 2 Behind shield 12 Behind shield 8 9 1 5 3 11 1 9 4 10 7 5 2 Behind shield 15 Behind tire 16 12 18 15 MAN143...

Page 27: ...2110A PT Peanut Combine Preparation 2 Preparation Overview 18 Safety Strut 18 Pre Delivery Checks 19 MAN143 2 29 16 17...

Page 28: ...aily Checklist It is important that you perform these checks each day you intend to use your combine These checks are intended to help you detect problems early reduce downtime and extend the life of...

Page 29: ...ary 5 If equipped with combine hydraulics check the hydraulic oil level in tank approximately 32 gallon capacity Level should be above midway in sight gauge when cold 6 Check and lubricate all lubrica...

Page 30: ...can cause serious damage to the air duct system 12 Slowly raise and lower the bin and header several times to work air out of the lines Check alignment Turnbuckles Check alignment as bin is slowly low...

Page 31: ...chains belts sprockets etc Check for heat in pulleys and belts indicating looseness Also check for overheated gearbox and hot bearings 18 Check machine to ensure that all safety decals are in place 19...

Page 32: ...Preparation 2110A PT Peanut Combine NOTES 22 2 29 16 MAN143...

Page 33: ...mbine Process 24 Hitching Combine to Tractor 27 Attaching and Checking Driveline 28 Daily Pre Start Check 30 Operating Procedure 33 Proper Operation 36 Hydraulic Bin Lip Dirt Trap 37 Road Towing Combi...

Page 34: ...lled and powered by a farm tractor capable of speeds as low as 1 MPH while maintaining engine RPMs that will produce a combine speed readout of 100 Optimum harvest conditions exist when windrows are h...

Page 35: ...econd and third cylinders for increased harvesting aggressiveness 4 Peanuts and vine material fall through the extraction holes 8 in the fourth cylinder concave onto the disc separator 9 or travel bac...

Page 36: ...terial and sticks advance across the disc separator and out of the back of the combine 9 As the good peanuts fall into the stemmer saws their stems are removed Cleaned peanuts fall into the collection...

Page 37: ...h grease If combine is equipped with optional pin hitch lower raise jack until the pin hitch will be between the draw bar and the upper pin plate Once in position install the pin and pin keeper An opt...

Page 38: ...ANT Your AMADAS 2110A has been equipped with a constant velocity PTO driveline Because of the double Cardan Joint incorporated into this shaft you can expect a constant output shaft speed with minimal...

Page 39: ...eck the drawbar setting and move the drawbar out NOTE In most cases the tractor will turn until the tire is very close to the combine tongue without the telescoping shaft bottoming out If this is not...

Page 40: ...bars for damaged or broken spring teeth Also inspect for metal wood or other foreign material lodged within the picking chamber 9 Remove vines wrapped around the spring tooth cylinder and beater cyli...

Page 41: ...ulic system for leaks and adequate fluid 16 Check the cleaning fan for obstruction in intake or damaged blades 17 Replace all covers and shields and remove the bin safety strut Lower the bin 18 Check...

Page 42: ...ngs etc DANGER Replace all shields before starting combine operation If shields are missing death or serious personal injury can result ALWAYS use safety chains when towing the combine If the combine...

Page 43: ...ustable overhead teeth and concave teeth adjustment handles to the disengaged position Securely tighten the T handles 3 Set the cleaning air control handle three fourths open and tighten the T handle...

Page 44: ...ntrols and Adjustments for more information 8 Under normal conditions operate the tractor at 1 to 2 miles per hour Travel down the windrow about 50 yards 9 Stop and check for proper operation See Prop...

Page 45: ...imately 790 RPM PTO when the combine is equipped with standard drives If the combine speed cannot be maintained 1 by the tractor engine installation of the optional RPM PTO kit should be considered 79...

Page 46: ...oard as needed Tails are being left on the peanuts Engage the concave teeth if equipped in 1 increments beginning with the front set There are NO leaves or other light foreign material present in the...

Page 47: ...ulics long enough for the bin lip to reach its fully extended position If you dump the bin without having the bin lip fully extended peanuts will not fall uniformly from the lip but will spill out of...

Page 48: ...Engage the hydraulic tongue shift cylinder to move the tongue to the center position 3 Install the 1 x 4 hitch pin and safety clip Side Shift Cylinder Specifications Retracted Length 20 Extended Lengt...

Page 49: ...ut Combine Unloading Conveyor 4 Unloading Conveyor Before Using the Conveyor 40 Conveyor Safety 40 Using the Conveyor 41 Conveyor Tracking 42 Conveyor Maintenance 43 Conveyor Troubleshooting 45 MAN143...

Page 50: ...ine as the conveyor extends several feet past the rear of the combine When not using the conveyor retract it into its stowed position Make sure the conveyor is in place on the conveyor rest Always mak...

Page 51: ...conveyor at the factory Connect the ends to your tractor hydraulics 2 Remove the shipping strap 3 Operate the remote for the swing out cylinder until all air is out of the system Once the swing out cy...

Page 52: ...sier access 2 Extend the rod to push the belt away from that side or shorten the rod to bring closer 3 If the adjustment is not enough to correct it may be necessary to use the tension rods at the upp...

Page 53: ...ase points weekly 1 2 pumps at each point is sufficient Grease point on hydraulic arm pivot Bearings on each end Grease point on conveyor support on pivot Grease point for basket pivot point Bearing g...

Page 54: ...Unloading Conveyor 2110A PT Peanut Combine Conveyor Maintenance Grease point for basket pivot point Grease point for conveyor support pivot 44 12 18 15 MAN143...

Page 55: ...perates properly then the remote is the problem Contact your tractor dealer for service to the tractor 4 Check for a foreign object e g rock etc under the conveying augers If an auger is stalled the c...

Page 56: ...Unloading Conveyor 2110A PT Peanut Combine NOTES 46 12 18 15 MAN143...

Page 57: ...ing Air Control 52 Tailboard Adjustment 53 Elevator Air Control 54 Automatic Elevator Air Control 54 Manual Elevator Air Control 54 Standard Pickup Header Speed Control 55 Remote Auger Reverse 55 Pick...

Page 58: ...ine s performance fine tune The picking operation by adjusting the retention board overhead teeth combine input speed or the concave teeth The cleaning operation by adjusting the cleaning air and tail...

Page 59: ...and Adjustments Control Locations Elevator air control Cleaning air control Header auger adjustment Adjustable retention board Optional concave teeth Forward adjustable overhead teeth Rear adjustable...

Page 60: ...an wrapping vines from the corresponding spring tooth cylinder thus increasing that cylinder s effectiveness If the vines are green and or tough progressively engage the overhead teeth to allow more t...

Page 61: ...ation more difficult In tough conditions or to remove very small peanuts from bunch type vines clustered around the tap root move the control handle toward engaged Only engage the handle enough to ens...

Page 62: ...too low proper separation will not occur and peanuts may ride over the disc separator with the vines The maximum opening of the cleaning air fan door should be at least 10 3 8 Opening the cleaning ai...

Page 63: ...teners and evenly raise or lower the tail board across the width of the machine Raise the tail board in wet or heavy vines where more cleaning air is needed This allows the use of more cleaning air by...

Page 64: ...anut Tech package the elevator air may be controlled in auto mode When auto mode is chosen the controller monitors air pressure combine speed and elevator air dampener position to determine the optimu...

Page 65: ...auger and pickup When the remote auger reverse is engaged the pickup stops and the header auger reverses allowing material jamming the auger to be discharged over the pickup and onto the ground There...

Page 66: ...and peanut loss will occur Dry vines typically require higher pick up speeds than green vines Regularly check around the breather cap on the hydraulic tank for dirt buildup If it is not clean the brea...

Page 67: ...speed monitor should read 100 Consistent combine speed is important for the best harvesting performance If the combine speed fluctuates check the combine drive belts and tractor PTO system for the sou...

Page 68: ...70 RPM 110 an alarm will sound The combine design speed is 100 on the combine speed monitor or 790 PTO RPM For very dry peanuts reduce the combine speed to below 100 to aid in performance For tough or...

Page 69: ...raulic cylinder Operate the header low enough to pick up all the vines in the windrow but high enough to allow dirt clods soil and other debris to fall out This reduces the amount of foreign material...

Page 70: ...stance moving the crop Under normal conditions the header auger is run at the halfway setting or lower for more efficient conveyance of crop and less rolling of vine material The header auger adjustme...

Page 71: ...shing with less damage and leaving the vine material in larger pieces for better separation The low speed cylinder drive setting results in around a 23 reduction in cylinder speed This is a substantia...

Page 72: ...elp reduce this problem a set of variable pitch flails has been designed To make adjustments remove the inner flail mounting bolt and rotate the flail around the outer bolt as shown in the diagram Med...

Page 73: ...2110A PT Peanut Combine Performance 6 Performance Fine Tuning Operation 64 Achieving Maximum Ground Speed 65 Increasing Separating Capacity 66 Harvesting Under Wet Conditions 67 MAN143 12 18 15 63...

Page 74: ...refer to Chapter 5 Controls and Adjustments for more information on fine tuning your combine using the combine s standard controls Be sure to follow all safety guidelines when working on the combine C...

Page 75: ...atisfactorily at the last speed tried 4 When performance deteriorates incomplete threshing or excessive separator loss is seen drop back to the next lower gear selection that offered satisfactory perf...

Page 76: ...dual speed cylinder drives in the low range capacity can be increased by switching to high range Each of these adjustments increases aggressiveness and may cause some shelling You must decide if highe...

Page 77: ...ts and other surfaces subject to buildup After harvesting peanuts where buildup occurs it is important to 1 Clean the stemmer saw with a wire brush and scrape out the stemmer bottom 2 Remove the eleva...

Page 78: ...Performance 2110A PT Peanut Combine NOTES 68 12 18 15 MAN143...

Page 79: ...2110A PT Peanut Combine Maintenance 7 Maintenance Belt Adjustment 70 Chain Adjustment 71 Lubrication 73 PTO 74 Schedule 75 Post Season Maintenance 77 Troubleshooting 78 MAN143 12 18 15 69...

Page 80: ...engine is shut off 2 Open shields covering drive belts Latch shields open 3 Check belts and sheaves for wear Replace if necessary 4 The main drive belt should have no more than of deflection when che...

Page 81: ...wear Replace if necessary 4 The chains should have no more than one inch of play when checked in the middle Adjust using the chain idlers Note that chains linking the disc separator shafts together s...

Page 82: ...are tight and aligned and replace all shields before operating the machine Some idlers are shown in the photos DANGER Replace all shields before starting operation of combine Death or serious personal...

Page 83: ...e shown on the lubrication table and chart NOTE To avoid damaging bearing seals do NOT use a power grease gun and do NOT exceed the specified lubrication intervals Some sealed bearings contain no grea...

Page 84: ...ential for proper operation There are two grease fittings located 180 degrees apart on the telescoping shaft IMPORTANT Daily lubrication of the CV driveline is essential to driveline longevity it will...

Page 85: ...cate PTO Shaft A X X Lubricate U Joint on gearbox output A X Lubricate Bin Pivot Points A X Lubricate Bearings A X Check Hyd Tank Fluid Level optional B X X Change Hyd Tank Fluid and Filter optional B...

Page 86: ...ombine Lubrication Locations NOTE For OCS equipped conveyor combines refer to the OCS section for additional lubrication points and schedule Bin Pivot Points Wheel bearings Gearbox U joint Ball hitch...

Page 87: ...al parts of the combine with light oil or another rust inhibitor 4 Release tension on all belts 5 Remove and clean all chains Store in a container of oil or oil diesel mix if possible If not reinstall...

Page 88: ...alker cylinders Combine PTO not at or near design speed Adjust and observe combine speed monitor Ground speed too high for conditions Shift tractor to lower gear Good peanuts being discharged over dis...

Page 89: ...ce combine RPM Increase to a higher tractor gear and ground speed if needed Moisture level in windrows too high Lift windrows or wait for moisture to dissipate Obstruction in elevator air duct Shut of...

Page 90: ...tor system Remove inspection door in jet tunnel and remove nest Dirt buildup on inside of duct Inspect and clean Tractor PTO load excessive Tractor PTO not at or near design speed Adjust and observe c...

Page 91: ...2110A PT Peanut Combine Maintenance NOTES MAN143 12 18 15 81...

Page 92: ...Maintenance 2110A PT Peanut Combine NOTES 82 12 18 15 MAN143...

Page 93: ...ing and Control 8 Peanut Tech Monitoring and Control Key Features 84 Peanut Tech Home Screen Functions and Controls 85 Peanut Tech Help Basic Instruction Screens 86 Peanut Tech All Information Screen...

Page 94: ...he damper closes The goal is to apply as much air as needed but not so much as to create LSKs Display and alarm of Peanut Duct Load The controller monitors duct air pressure combine speed and elevator...

Page 95: ...sensor and settings readings 5 Mutes the audible portion of an alarm for 5 minutes Unmutes the audible portion of an alarm during the 5 minutes 6 Returns to the home screen from the help screen Butto...

Page 96: ...ays basic instructions for the Peanut Tech System 1 2 Use to return to the home screen 3 Use to go to Page 2 of instructions View 2 This screen displays more basic instructions for the Peanut Tech Sys...

Page 97: ...d auto elevator control The current state is displayed on the screen above the button 7 Use to return to home screen Left column display the actual sensor information the controller is receiving Right...

Page 98: ...Peanut Tech Monitoring and Control 2110A PT Peanut Combine NOTES 88 12 18 15 MAN143...

Page 99: ...dence of the date of delivery of the peanut combine and 3 make the combine available to an AMADAS authorized dealer within a reasonable period of time E NoDealerWarranty The selling dealer makes no wa...

Reviews: