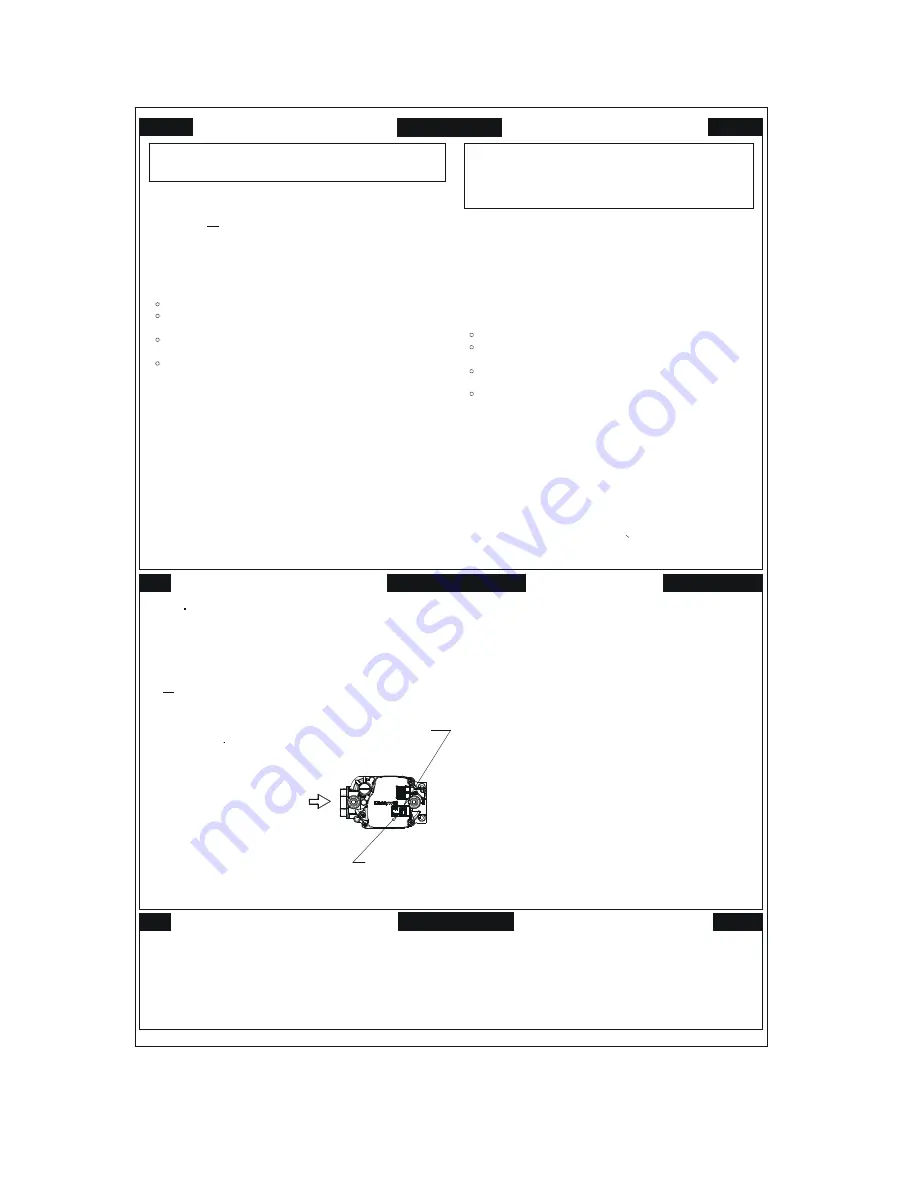
background image

15 


risque   de   déclencher   un   incendie   ou   une   explosion

     because   some   gas   is   heavier   than   air   and   will

DU GAZ

ARRIVEE

INLET

GAS

   position.

     gaz.   Renifler   tout   autour   de   l'appareil,   y   compris prés   du

"OFF/ ARRET"

"ON/MARCHE”

        ARRÊTEZ

.

IN   "ON"   POS

LEVER   SHOWN

MANUAL   GAS

"ON/MARCHE"

MANUEL, EN POS

ROBINET A GAZ

     plancher,   pour   déceler   une   odeur   de   gaz.   Si   c ' est   le   cas,

   STOP.

     faut   procéder   à   des   operations   d'entretien.

 DE   GAZ   DE   L'APPAREIL

POUR   COUPER   L'ADMISSION

ARRÊTEZ.

       Ne  pas  tenter  d'allumer  d'appareils.

     S'il   n'y   a   pas   d'odeur   de   gaz,   passer   à   l'etàpe   suivante.

   sur  la  portion  superieure  de  cette  etiquette.

                         Passer  à  l'etape  B  des  instructions  de  securite

   position.

6. Attendre   cinq   (5)   minutes   pour   laisser   echapper   tout   le

  STOP.            "B"

     gas, go   to   next   step.

     on   this   label   if   you   don't   smell

     in   the   safety   information   above

   then  smell  gas,                Follow

   smell  for  gas,  including  near  the  floor.  If  you

6. Wait   five   (5)   minute s   to   clear   out   any   gas. Then

10. Set thermostat to desired setting.

        Immediately  call  your  gas  supplier  from  a  neighbor's

                                      to  light  the  burner  by  hand.

       qualifié   ou   le   fournisseur   de   gaz.

       de   gaz   de   l'appareil   et   appeler   un   technicien

       instructions   intitulées   Comment   couper   l'admission

                                          loss  of  life.

                             explosion  may  result  causing  property

exactly, a   fire   or

0140F00681   REV   A

   Ne  pas  forcer.

"OFF/ ARRET”

A.

     d'allumer   le   brûleur   manuellement.

     automatiquemen t   le   brûleur.   Ne   pas   tenter

     muni   d'un dispositif   d'allumage   qui   allume

       Cet   appareil   ne   comporte   pas   de   veilleuse.   Il est

        "ON".

   "OFF”

       service   technician   or   gas   company.

    Off  Gas  To Appliance"  and  call  your

       follow   the   instructions   “To Turn

11. If   the   appliance   will   not   operate,

     power   to   the   appliance.

9.   Turn   on   all   electric

8. Replace   access   panel.

TO TURN OFF GAS TO APPLIANCE

OPERATING   INSTRUCTIONS

READ   BEFORE   OPERATING

FOR  YOUR  SAFETY

   "OFF”

     WHAT   TO   DO   IF   YOU   SMELL   GAS

       BEFORE OPERATING

WARNING:

damage, personal   injury   or

                      If  you  do  not  follow  these  instructions

4. Replace   control   access   panel.

   Do  not  force.

3. Push  the  gas  control  l ever  to                 Position.

   if  service  is  to  be  performed.

2.   Turn   off   all   electric   power   to   the   appliance

1. Set   the   thermostat   to   lowest   setting.

   to

7. Push   gas   control   lever

     Do   not   force.

5.  Push  the  gas  control  lever  to                  Position.

     Do   not   try   to   light   the   burner   by   hand.

   device  which  automatically  lights  the  burner.

4. This   appliance   is   equipped   with   an   ignition

3. Turn   off   all   electric   power   to   the   appliance.

2. Set   the   thermostat   to   lowest   setting.

   this  label.

1.                Read  the  safety  information  above  on

     system   and   any   gas   control   which   has   been   underwater.

   the  appliance  and  to  replace  any  part  of  the  control

   Immediately  call  a  qualified  service  technician  to  inspect

D. Do   not   use   this   appliance   if   any   part   has   been   underwater.

     or   explosion.

   technician.  Force  or  attempted  repair  may  result  in  a  fire

     hand,   don't   try   to   repair   it, call   a   qualified   service

     Never   use   tools.   If   the   lever   will   not   push   in   or   turn   by

C. Use   only   your   hand   to   push   in   or   turn   the   gas   control   lever.

        call  the  fire  department.

        If  you  cannot  reach  your  gas  supplier,

        phone.  Follow  the  gas  supplier's  instructions.

        do  not  use  any  phone  in  your  building.

        Do  not  touch  any  electric  switch;

        Do  not  try  to  light  any  appliance.

   settle  on  the  floor.

     area   for   gas.   Be   sure   to   smell   next   to   the   floor

B.                                          smell  all  around  the  appliance

   the  burner.   Do  not  try

     with   a n   ignition   device   which   automatically   lights

A. This   appliance   does   not   have   a   pilot.   It   is   equipped

11. Si   l'appareil   ne   se   met   pas   en   marche, suivre   les

10. Régler   le   thermostat   à   la   température   désirée.

9. Mettre   l'appareil   sous   tension.

8. Remettre   en   place   le   panneau   d'accés.

MISE EN   MARCHE

EN   MARCHE LIRE

LIRE  AVANT  DE  METTRE

     QUE FAIRE   S'IL   Y   A   UNE   ODEUR   DE   GAZ

B. AVANT   DE   LE   FAIRE   FONCTIONNER,

AVERTISSEMENT:

corporelles   ou   la   perte   de   vies   humaines.

entraînant   des   dommages   matériels,   des   lesions

la   lettre   les   instructions   dans   le   presént   manuel 

Quiconque   ne   respecte   pas   à

4. Remettre   en   place   le   panneau   d'accés.

   position.

3. Pousse   le   levier   du   contrôle   du   gaz   à

2. Couper   l'alimentation   électrique   de   l'appareil   s'il

1. Régler   le   thermostat   à   la   température   la   plus   bassé.

7. Pousse   l e   levier   du   contrôle   du   gaz   à

5. Pousse   le   levier   du   contrÔle   du   gaz   a

     allumer   le   brûleur   manuellement.

     d'allumage   automatique,   ne   pas   essayer   à

4. Cet   appareil   menager   etant   dote   d'un   systeme

3. Couper   l'alimentation   électrique   de   l'appareil.

2. Régler   le   thermostat   à   la   température   la   plus   basse.

     section   supérieure   de   cette   étiquette.

1.                            Lisez  les  instructions  de  sécurité  dans  la

     plongées   dans   l'eau.»

     systéme   de   contrôle   et   toute   commande   qui   ont   été

     par   un   technicien   qualifié   et   remplacer   toutr   partie   du

   l'eau,  même  partiellement.  Faire  inspecter  l'appareil

D. Ne   pas   se   servir   de   cet   appareil   s'il   a   été   plongé   dans

     provoquer   un e explosion   ou   un   incendie.»

     tente   de   forcer   la   manette   ou   de   la   réparer   peut

     réparer;   appelez   un   technicien   qualifié.     Quiconque

     Si   la   manette   reste   coincée,   ne   tenter   pas   de   la

     qu'à   la   main.     Ne   jamais   emploer   d'outil   à   cette   fin. 

C. Ne   pousser   ou   tourner   la   manette   d'admission   du   gaz

        appelez  le  service  des  incendies.»

        Si vous  ne  pouvez  rejoindre  le  fournisseur  de  gaz,

        un  voisin.  Suivez  les  instructions  du  fournisseur  de  gaz

        Appelez  immédiatement  votre  fournisseur  de  gaz  depuis

        des  téléphone s  dans  le  bâtiment.

        Ne  toucher  à  aucun  interrupteur;  ne  pas  vous  servir

       peuvent   s'accumuler   au   niveau   du   sol.

       certains   gaz   son t   plus   lourds   que   l'air et

       une   odeur   de   gaz.   Renifler   prés   du   plancher,   car

       renifler   tout   autour   de l'appariel   pour   decéler

OPERATING INSTRUCTIONS

Summary of Contents for ACES80

Page 1: ...RVICE OR REPAIR HEREINAFTER SERVICE THE EQUIPMENT SPECIFIED IN THIS MANUAL SHOULD SERVICE THE EQUIPMENT THE MANUFACTURER WILL NOT BE RESPONSIBLE FOR ANY INJURY OR PROPERTY DAMAGE ARISING FROM IMPROPER SERVICE OR SERVICE PROCEDURES IF YOU SERVICE THIS UNIT YOU ASSUME RESPONSIBILITY FOR ANY INJURY OR PROPERTY DAMAGE WHICH MAY RESULT IN ADDITION IN JURISDICTIONS THAT REQUIRE ONE OR MORE LICENSES TO S...

Page 2: ...OR CONSUMERS AND SERVICERS RECOGNIZE SAFETY SYMBOLS WORDS AND LABELS WARNING TO PREVENT THE RISK OF PROPERTY DAMAGE PERSONAL INJURY OR DEATH DO NOT STORE COMBUSTIBLE MATERIALS OR USE GASOLINE OR OTHER FLAMMABLE LIQUIDS OR VAPORS IN THE VICINITY OF THIS APPLIANCE TABLE OF CONTENTS WARNING HIGH VOLTAGE DISCONNECT ALL POWER BEFORE SERVICING OR INSTALLING THIS UNIT MULTIPLE POWER SOURCES MAY BE PRESEN...

Page 3: ...4 4729 U S only email us at customerservice goodmanmfg com fax us at 731 856 1821 Not a technical assistance line for dealers CONSUMER INFORMATION LINE AMANA BRAND PRODUCTS TOLL FREE 1 877 254 4729 U S only email us at hac consumer affairs amanahvac com fax us at 731 856 1821 Not a technical assistance line for dealers Outside the U S call 1 713 861 2500 Not a technical assistance line for dealers...

Page 4: ...como daño cerebral permanente ó muerte Las emisiones de monóxido de carbono pueden circular a través del aparato cuando se opera en cualquier modo B10259 216 RISQUE D EMPOISONNEMENT AUMONOXYDE DE CARBONE Cette ventilation est nécessaire pour éviter le danger d intoxication au CO pouvant survenir si un appareil produisant du monoxyde de carbone continue de fonctionner au sein de la zone confinée is...

Page 5: ...d Minor Revision G Goodman A Initial Release V GMC B 1st Revision Configuration M Upflow Horizontal Major Revision D Dedicated Downflow A Initial Release B 1st Revision S PSC Motor Nox E Constant Torque Motor Multi Speed ECM N Natural Gas V Variable Speed ECM X Low NOx Gas Vale Motor Cabinet Width S Single Stage Single Speed A 14 B 17 5 C 21 AFUE D 24 5 80 80 AFUE Maximum CFM 3 1200 CFM MBTU h 4 1...

Page 6: ...mana Brand A Ini al Release B 1st Revision Configura on M Upflow Horizontal Major Revision C Downflow Horizontal A Ini al Release B 1st Revision Motor V Variable Speed ComfortNet Nox E High Efficiency N Natural Gas S Single Speed X Low NOx Gas Valve Cabinet Width M Modula ng A 14 C 2 Stage B 17 5 S Single Stage C 21 D 24 5 AFUE 97 97 AFUE Maximum CFM 80 80 AFUE 3 1200 CFM 4 1600 CFM MBTU h 5 2000 CFM 4...

Page 7: ... Amana Brand 80 gas furnace 33 3 8 tall upflow horizontal right of left installation positions Releases new Broad ocean Motor 0131F00041 1 3HP 4SP 6PL aluminum winding motor MODEL MFG 80 GAS FURNACES ACES80 ACES8000403AXAA ACES8000603AXAA ACES8000804BXAA ACES8001005CXAA Amana Brand 80 gas furnace 33 3 8 tall dedicated downflow installation Induced draft two tone gray cabinet and panels Multi speed...

Page 8: ... or right side g GMES80 GMES800403A BC GMES800603A BC GMES800604B BC GMES800804B BC GMES800805C BC GMES801005C BC GMES801205D BB Goodman Brand 80 gas furnace 33 3 8 tall upflow horizontal right of left installation positions Induced draft Goodman gray cabinet and panels Multi speed PSC motor 120 volt carbide mini Igniter with integrated circuit board Left or right side g GMES80 GMES800403A BD GMES...

Page 9: ...BB GCES800603A BB GCES800804B BB GCES801005C BB Goodman Brand 80 gas furnace 33 3 8 tall dedicated downflow installation Induced draft Goodman gray cabinet and panels Multi speed PSC motor 120 volt carbide mini Igniter with integrated circuit board Left or right side gas entry Aluminized steel heat exchangers GCES80 GCES800403A BC GCES800603A BC GCES800804B BC GCES801005C BC Goodman Brand 80 gas f...

Page 10: ... LP Low Pressure Shut Off Kit Twining Kit Twining Kit High Altitude Orifices W Pressure Switch Masonry Vent Kit Masonry Vent Kit AMES800403AXAD 1 AMES800603AXAD 1 AMES800604BXAC 1 AMES800804BXAC 1 AMES800805CXAC 1 AMES801005CXAC 1 AMES801205DXAC 1 AMES801405DNBC 1 ACES800403AXAD 1 ACES800603AXAC 1 ACES800804BXAC 1 ACES801005CXAC 1 approved for this model AMANA BRAND S Model Furnace Accessories Mod...

Page 11: ... Pressure Switch High Altitude Orifices W Pressure Switch Masonry Vent Kit Masonry Vent Kit Sound Reduction Kit Sound Reduction Kit Sound Reduction Kit Sound Reduction Kit GMES800403A 1 2 3 4 GMES800603A 1 2 3 4 GMES800604B 1 2 3 4 GMES800804B 1 2 3 4 GMES800805C 1 2 3 4 GMES801005C 1 2 3 4 GMES801205D 1 5 4 GCES800403A 1 2 3 GCES800603A 1 2 3 GCES800804B 1 2 3 GCES801005C 1 2 3 approved for this ...

Page 12: ... Pressure Shut Off Kit Twinning Kit High Altitude Orifices W Pressure Switch Masonry Vent Kit Masonry Vent Kit GMES800403A BE 1 2 GMES800603A BE 1 2 GMES800604B BD 1 2 GMES800804B BD 1 2 GMES800805C BD 1 2 GMES801005C BD 1 2 GMES801205D BC 1 2 GCES800403A BE 1 2 GCES800603A BE 1 2 GCES800804B BD 1 2 GCES801005C BD 1 2 approved for this model 2 5 000 10 000 ft altitude GOODMAN BRAND S Model Furnace...

Page 13: ...T KIT MASONARY VENT KIT VMES800403ANAA 1 2 VMES800603ANAA 1 2 VMES800604BNAA 1 2 VMES800804BNAA 1 2 VMES800805CNAA 1 2 VMES801005CNAA 1 2 VCES8000603AX 1 2 NOT VCES8000804BX 1 2 APP 1 W R 2 5 00 GMC BRAND S Model Furnace Accessories SBT21 LPT03 LPLP02 LPLP03 TK 400 HANG21 MVK 01 MVK 02 DOWNFLOW SUBBASE 21 PROPANE GAS CONVERSION KIT LP LOW PRESSURE SHUT OFF KIT TWINNING KIT HIGH ALTITUDE ORIFICES W...

Page 14: ...not have a pilot It is equipped with an ignition device which automatically lights the burner Do not try to light the burner by hand B BEFORE OPERATING smell all around the appliance area for gas Be sure to smell next to the floor because some gas is heavier than air and will settle on the floor Do not try to light any appliance Do not touch any electric switch do not use any phone in your buildin...

Page 15: ... appliance if any part has been underwater or explosion technician Force or attempted repair may result in a fire hand don t try to repair it call a qualified service Never use tools If the lever will not push in or turn by C Use only your hand to push in or turn the gas control lever call the fire department If you cannot reach your gas supplier phone Follow the gas supplier s instructions do not...

Page 16: ...r birth defects or other reproductive harm are known to the This product contains fiberglass insulation State of California to product could expose California to cause known bythe State of contains a chemical Fiberglass insulation cancer 0140F00688 Rev A call a qualified service technician will not operate don t try to repair it gas If you then smell gas STOP 8 Move the gas control switch or knob ...

Page 17: ...from its container Follow Steps 1 through 3 if installing the control on a furnace Return any old or new controls to their containers before touching any ungrounded object Product Application This product is designed for use as a residential home gas furnace It is not designed or certified for use in mobile home trailer or recreational vehicle applications This furnace can be used in the following...

Page 18: ...ks paint removers varnishes hydrochloric acid cements and glues antistatic fabric softeners for clothes dryers and masonry acid washing materials Seal off a non direct vent furnace if it is installed near an area frequently contaminated by any of the above substances This protects the non direct vent furnace from airborne contaminants To ensure that the en closed non direct vent furnace has an ade...

Page 19: ...ration Use the flame of a match or candle f After it has been determined that each appliance connected to the venting system properly vents when tested as outlined above return doors windows exhaust fans fireplace dampers and any other gas burning appliance to their previous conditions of use g If improper venting is observed during any of the above tests the common venting system must be correcte...

Page 20: ...located within the space Rooms communicating directly with the space in which the appliances are installed through openings not furnished with doors and through combustion air openings sized and located in accordance with 9 3 2 3 are considered a part of the required volume 9 3 2 1 Standard Method The minimum required volume shall be 50 ft 3 per 1 000 Btu hour 4 8m3 kW 9 3 2 2 Known Air Infiltrati...

Page 21: ...air duct Inlet air duct Figure A 9 3 3 1 2 All Combustion Air From Outdoors through Horizontal Ducts 9 3 3 2 One Permanent Opening Method One permanent openings commencing within 12 in 300 mm of the top of the enclosure shall be provided The appliance shall have clearances of at least 1 in 25 mm from the sides and back and 6 in 150 mm from the front of the appliance The opening shall directly comm...

Page 22: ...more than one fireblock is removed 9 3 8 2 Ducts shall terminate in an unobstructed space allowing free movement of combustion air to the appliances 9 3 8 3 Ducts shall serve a single space 9 3 8 4 Ducts shall not serve both upper and lower combustion air open ings where both such openings are used The separation between ducts servicing upper and lower combustion air openings shall be maintained t...

Page 23: ...L AND THE INDUCED DRAFT BLOWER Make sure all wires are at least one inch from flue pipe Relo cate junction box to right side of cabinet if nec essary Refer to Electrical Connections section of this manual for instructions Masonry Chimneys Wash Crown Clay Tile Size 8 x 8 x12 Each x 24 Length Clay Tile Size Generally 12 x 12 24 Length 1 2 to 1 Air Space Second Floor First Floor Attic Floor Roof Line...

Page 24: ...a building within a horizontal distance of 10 feet In addition the chimney must terminate at least 3 feet above any forced air inlet located within 10 feet The chimney must extend at least five feet above the highest connected equipment draft hood outlet or flue collar If the chimney does not meet these termination requirements but all other requirements in the checklist can be met it may be possi...

Page 25: ... be vented inside the liner Venting one appliance inside the liner and another appliance outside the liner is not acceptable Next use a flashlight and small mirror to sight up the liner B vent must be supported so as to not come into direct contact with the chimney walls or tile liner If it is not it can probably be rehung so as to be acceptable A thimble or fire stop may be helpful here Flexible ...

Page 26: ...ferenced is the Standard for Chimneys Fireplaces Vents and Solid Fuel Burning Appliances ANSI NFPA 211 Fix 4 Relining Relining options include B vent and flexible liners If the chimney has diagonal offsets B vent probably cannot be used If B vent is to be used it must be supported adequately Supports such as fire stops or thimbles must be used to prevent the B vent from coming into direct contact ...

Page 27: ...product Specification Sheet for a tabular listing of appropriate man ufacturer s kits for propane gas and or high altitude instal lations The indicated kits must be used to insure safe and proper furnace operation All conversions must be performed by a qualified installer or service agency WARNING FAILURE TO FOLLOW THESE INSTRUCTIONS CAN RESULT IN BODILY INJURY OR DEATH CAREFULLY READ AND FOLLOW A...

Page 28: ... itself This control may be set only to the ON or OFF position Refer to the Lighting Instructions Label or the Putting the Furnace Into Operation section of this manual or the installation instructions for use of this control during start up and shut down periods GAS PIPING CONNECTIONS CAUTION TO AVOID POSSIBLE UNSATISFACTORY OPERATION OR EQUIPMENT DAMAGE DUE TO UNDERFIRING OF EQUIPMENT USE THE PR...

Page 29: ...system with pressures in excess of 1 2 psig 3 48 kPa Isolate this unit from the gas supply piping system by closing its external manual gas shutoff valve before pressure testing supply piping system with test pressures equal to or less than 1 2 psig 3 48 kPa PROPANE GAS TANKS AND PIPING WARNING PROPANE GAS IS HEAVIER THAN AIR AND ANY LEAKING GAS CAN SETTLE IN ANY LOW AREAS OR CONFINED SPACES TO PR...

Page 30: ...ge Regulator Maximum Propane Capacities listed are based on 2 psig pressure drop at 10 psig setting Capacities in 1 000 BTU hour To convert to capacities at 15 psig settings multiply by 1 130 To convert to capacities at 5 psig settings multiply by 0 879 3 8 1 2 5 8 3 4 7 8 1 2 3 4 1 1 1 4 1 1 2 10 39 92 199 329 501 275 567 1 071 2 205 3 307 20 26 62 131 216 346 189 393 732 1 496 2 299 30 21 50 107...

Page 31: ...lass 1 and must comply with all applicable codes The furnace must be electrically grounded in accordance with local codes or in their absence with the latest edition of The National Electric Code ANSI NFPA 70 and or The Canadian Electric Code CSA C22 1 Use a separate fused branch electrical circuit containing properly sized wire and fuse or circuit breaker The fuse or circuit breaker must be sized...

Page 32: ...GE The single stage furnace will have a W terminal and will use a single stage thermostat The following drawing illustrates the typical field wiring for a heat only single stage system and a single stage heating single stage cooling system Refer to the following figures for proper connections to the integrated control module Typical Field Wiring 24 VAC Control Circuit CONTINUOUS FAN OPERATION SING...

Page 33: ...ion of the minimum filter area to ensure proper unit performance COUNTERFLOW FILTER INSTALLATION This furnace has provisions for the installation of return air filters at the counterflow top return Refer to Minimum Filter Area tables to determine filter area requirement NOTE Filters can also be installed elsewhere in the duct system such as a central return Horizontal Installations Filter s must b...

Page 34: ...ext call from thermostat The adjustable delay off timing allows the installer to cus tomize the comfort level Cooling Mode The normal operational sequence in cooling mode is as follows 1 R and Y thermostat contacts close initiating a call for cool 2 Integrated control module performs safety circuit checks 3 Outdoor fan and compressor are energized 4 Circulator blower is energized on cool speed fol...

Page 35: ...ch is closed when the induced draft blower is off it waits until the fault is corrected The diagnostic light code for this problem is two short flashes followed by a longer pause The probable cause is either a faulty pressure switch or wiring 4 Pressure Switch Stuck Open If after the induced draft blower is energized the pressure switch does not close within 5 minutes the control will go into a 1 ...

Page 36: ...erate Integrated control module diagnostic LED is flashing TWO 2 flashes 2 2 FLASHES Induced draft blower pressure switch contacts sticking Shorts in pressure switch circuit Inspect pressure switch hose Repair if necessary Inspect flue for block age proper length el bows and termination Correct as necessary Correct pressure switch setpoint or contact motion Tighten or correct wiring connection Pre...

Page 37: ...7 7 FLASHES Flame sensor is coated oxidized Flame sensor incorrectly positioned in burner flame Lazy burner flame due to improper gas pressure or combustion air Induced draft blower and circulation blower runs continuously No furnace operation Integrated control module diagnostic LED is flashing FIVE 5 flashes Flame sensed with no call for heat Correct short at flame sensor or in flame sensor wiri...

Page 38: ...Y OF UNMARKED TRANSFORMERS If meter reads approximately 96 volts the primary to secondary are in phase if reads approximately 144 volts out of phase reverse low voltage wires NOTE For flame rectification the common side of the secondary voltage 24 V is cabinet grounded If you were to bench test a transformer the primary neutral and secondary common must be connected together for testing purposes S...

Page 39: ...uate heating or cooling performance Filters should be cleaned permanent or replaced disposable every two months or as required It is the owner s responsibility to keep air filters clean When replacing a filter it must be replaced with a filter of the same type and size Filter Removal Depending on the installation differing filter arrangements can be applied Filters can be installed in the central ...

Page 40: ...40 seconds for the hand on the cubic foot dial to make one complete revolution with all appliances off except the furnace Take this information and locate it on the gas rate chart Observe the forty 40 seconds locate and read across to the one 1 cubic foot dial column There we find the number 90 which shows that ninety 90 cubic feet of gas will be consumed in one 1 hour Let s assume the local gas u...

Page 41: ... 160 400 20 45 90 180 360 900 46 78 157 391 21 43 86 171 343 857 47 19 38 76 153 383 22 41 82 164 327 818 48 75 150 375 23 39 78 157 313 783 49 147 367 24 37 75 150 300 750 50 18 36 72 144 360 25 36 72 144 288 720 51 141 355 26 34 69 138 277 692 52 69 138 346 27 33 67 133 265 667 53 17 34 136 340 28 32 64 129 257 643 54 67 133 333 29 31 62 124 248 621 55 131 327 30 30 60 120 240 600 56 16 32 64 12...

Page 42: ... Ignition Control Test Control S 313 Gas Valve or Gas Supply Shut Off Turn Valves to On Position S 317 Faulty Induced Draft Blower Test Induced Draft Motor S 303 Faulty Blower Motor PSC ECM Test Blower Motor PSC ECM S 16A B C Broken or Shorted Ignitor Test Ignitor S 308 Dirty Flame Sensor Low UA Clean Flame Sensor S 314 Stuck Gas Valve Replace Gas Valve S 304 Faulty Gas Valve Replace Gas Valve S 3...

Page 43: ...T CONTROL 46 S 301 CHECKING AUXILIARY LIMIT CONTROL 47 S 302 CHECKING FLAME ROLLOUT CONTROL 48 S 303 INDUCED DRAFT BLOWER MOTOR 48 S 304 CHECKING GAS VALVE REDUNDANT 49 S 305 CHECKING MAIN BURNERS 49 S 306 CHECKING ORIFICES 49 S 307 CHECKING GAS PRESSURE 49 S 308 CHECKING HOT SURFACE IGNITOR 52 S 309 CHECKING FOR FLASHBACK 52 S 310 CHECKING PRESSURE CONTROL 52 S 311 HIGH ALTITUDE APPLICATION USA 5...

Page 44: ...insulation of the same gauge or its equivalent CHECKING THERMOSTAT WIRING AND ANTICIPATOR S 3A THERMOSTAT AND WIRING DISCONNECT ALL POWER BEFORE SERVICING WARNING 1 Remove the blower compartment door to gain access to the thermostat low voltage wires located at the furnace integrated control module terminals 2 Remove the thermostat low voltage wires at the furnace control panel terminal board 3 Ju...

Page 45: ... CHECKING AIR CIRCULATOR BLOWER MO TOR DISCONNECT ALL POWER BEFORE SERVICING WARNING 1 Remove blower compartment door to gain access to the circulator blower motor and integrated ignition control 2 Disconnect the motor wire leads from its connection point at the integrated ignition control module and capacitor if applicable 3 Using a ohmmeter test for continuity between each of the motor leads 4 T...

Page 46: ...ully or partially open position 2 Place thermometers in the return and supply ducts as close to the furnace as possible Thermometers must not be influenced by radiant heat by being able to see the heat exchanger SUPPLY AIR RETURN AIR Checking Temperature Rise 3 Subtract the return air temperature from the supply air temperature to determine the air temperature rise Allow adequate time for thermome...

Page 47: ...mmeter test between these two terminals as shown in the following drawing The ohmmeter should read continuous unless heat exchanger tem perature is above limit control setting If not as above replace the control Testing Primary Limit Control S 301 CHECKING AUXILIARY LIMIT CONTROL BLOWER HOUSING AUXILIARY LIMIT CONTROL Auxiliary Limit Control Location WARNING HIGH VOLTAGE DISCONNECT ALL POWER BEFOR...

Page 48: ...OHM METER G N D RED RESET BUTTON COLOR IDENTIFYING TAB Checking Flame Rollout Switch a If no voltage is measured on either side of control it indicates ignition control or wiring to control problem b If voltage is measured on one side of the control and not the other it indicates the control is open c If voltage is measured on both sides of the control the wiring to gas valve or valve is at fault ...

Page 49: ...nsumed The only time resizing is required is when a reduction in firing rate is required for an increase in altitude Orifices should be treated with care in order to prevent dam age They should be removed and installed with a box end wrench in order to prevent distortion In no instance should an orifice be peened over and redrilled This will change the angle or deflection of the vacuum effect or e...

Page 50: ...FORE SERVICING OR INSTALLING THIS UNIT MULTIPLE POWER SOURCES MAY BE PRESENT FAILURE TO DO SO MAY CAUSE PROPERTY DAMAGE PERSONAL INJURY OR DEATH 5 Disconnect manometer after turning off gas at manual shutoff valve Reinstall plug before turning on gas to furnace 6 Turn OFF any unnecessary gas appliances started in step 3 7 Turn on gas to furnace and check for leaks If leaks are found repair and the...

Page 51: ...barb fitting c Turn ON the gas supply d Turn on power and close thermostat R and W1 contacts to provide a call for low stage heat e Measure the gas manifold pressure with burners fir ing Adjust manifold pressure using the Manifold Gas Pressure table shown below f Remove regulator cover screw from the outlet pres sure regulator adjust tower and turn screw clockwise to increase pressure or countercl...

Page 52: ...ow velocity coming from a burner port Flashback may occur at the moment of ignition after a burner heats up or when the burner turns off The latter is known as extinction pop Since the end results of flashback and delayed ignition can be the same burning in the burner venturi a definite attempt should be made to determine which has occurred If flashback should occur check for the following 1 Impro...

Page 53: ...4 Main burner orifice s deformed or out of alignment to burner replace S 313 CHECKING INTEGRATED IGNITION CON TROL BOARDS NOTE Failure to earth ground the furnace reversing the neutral and hot wire connection to the line polarity or a high resistance connection in the neutral line may cause the control to lockout due to failure to sense flame TO AVOID THE RISK OF ELECTRICAL SHOCK WIRING TO THE UNI...

Page 54: ... PERSONAL INJURY OR DEATH 1 Disconnect the orange flame sensor wire from the sensor 2 Connect a micro amp meter in series with this wire and the sensor terminal 3 Place the unit into a heating cycle LINE VOLTAGE NOW PRESENT WARNING 4 As soon as flame is established a micro amp reading should be evident once proof of flame micro amp read ing is established the hot surface ignitor will be de en ergi...

Page 55: ...5 1 00 0130F00042 GCES800403A AA 0 60 06 0 72 B1370142 GCES800603A AA 0 70 06 0 85 B1370158 GCES800603A BA BB 0 60 06 0 72 B1370142 GCES800804B 0 60 06 0 72 B1370142 GCES801005C AA 0 70 06 0 85 B1370158 GCES801005C BA BB 0 80 05 1 00 0130F00042 VCES800603ANAA 0 60 06 0 72 B1370142 VCES800804BNAA 0 60 06 0 72 B1370142 ACES8000403AXA 0 60 06 0 72 B1370142 ACES8000603AXA 0 60 06 0 72 B1370142 ACES800...

Page 56: ...O DO SO MAY CAUSE PROPERTY DAMAGE PERSONAL INJURY OR DEATH TYPICAL SCHEMATIC MES80 CES80 MODEL FURNACES WR 50T55 289 INTEGRATED IGNITION CONTROL MES80 CES80 0005 3M K5 K2 HEAT COOL PARK PARK CIR NEU K8 GAS VALVE HIGH LIMIT AUX LIMIT PRESSURE SWITCH FLAME SENSOR PROBE IGNITOR FP IGN GND MV MV PS HLO HLI CIRCULATOR BLOWER XFMR HOT XFMR NEU 24 VAC TH RO1 RO2 R TR C Y G W COMPRESSOR CONTACTOR COIL THE...

Page 57: ...URE SWITCH STUCK CLOSED STEADY ON NORMAL OPERATION OFF CONTROL FAILURE 5 0 1 2 3 4 6 FLASHES OPEN ROLLOUT COLOR CODES PU PURPLE OR ORANGE YL YELLOW 6 7 C BK BLACK GR GREEN BR BROWN PK PINK RD RED GY GRAY BL BLUE WH WHITE RATING OF AT LEAST 105 NOTES TO 115VAC 1Ø 60 HZ POWER SUPPLY WITH OVERCURRENT PROTECTION DEVICE JUNCTION BOX MUST BE WARNING SWITCH WIRING TO UNIT BEFORE SERVICING DISCONNECT POWE...

Page 58: ...rm on one of the following links Goodman Brand Products http www goodmanmfg com about contact us Amana Brand Products http www amana hac com about us contact us You can also scan the QR code on the right for the product brand you purchased to be directed to the feedback page GOODMAN BRAND AMANA BRAND ...

Reviews: