background image

13

TROUBLESHOOTING

First try the solutions suggested here or visit our website and reference FAQs (Frequently Asked Questions)

to possibly avoid the cost of a service call.

In the U.S.A., www.amana.com     In Canada, www.amanacanada.ca

Refrigerator Operation

The refrigerator will not operate

Power cord unplugged? Plug into a grounded 3 prong outlet.

Is outlet working? Plug in a lamp to see if the outlet is 
working.

Household fuse blown or circuit breaker tripped? Replace 
the fuse or reset the circuit breaker. If the problem continues, 
call an electrician. 

Are controls on? Make sure the refrigerator controls are on. 
See “Using the Control(s).”

New installation? Allow 24 hours following installation for the 
refrigerator to cool completely.   

NOTE: Adjusting the temperature controls to coldest setting 
will not cool either compartment more quickly.

The motor seems to run too much

Your new refrigerator may run longer than your old one due to its 
high-efficiency compressor and fans. The unit may run even 
longer if the room is warm, a large food load is added, doors are 
opened often, or if the doors have been left open.

The refrigerator seems noisy

Refrigerator noise has been reduced over the years. Due to this 
reduction, you may hear intermittent noises from your new 
refrigerator that you did not notice from your old model. Below are 
listed some normal sounds with explanations.

Buzzing - heard when the water valve opens to fill the ice 
maker

Pulsating - fans/compressor adjusting to optimize 
performance

Hissing/Rattling - flow of refrigerant, movement of water 
lines, or from items placed on top of the refrigerator

Sizzling/Gurgling - water dripping on the heater during 
defrost cycle

Popping - contraction/expansion of inside walls, especially 
during initial cool-down

Water running - may be heard when ice melts during the 
defrost cycle and water runs into the drain pan

Creaking/Cracking - occurs as ice is being ejected from the 
ice maker mold.

The doors will not close completely

Door blocked open? Move food packages away from door. 

Bin or shelf in the way? Push bin or shelf back into the 
correct position. 

The doors are difficult to open

Gaskets dirty or sticky? Clean gaskets and contact surfaces 
with mild soap and warm water. Rinse and dry with soft cloth.

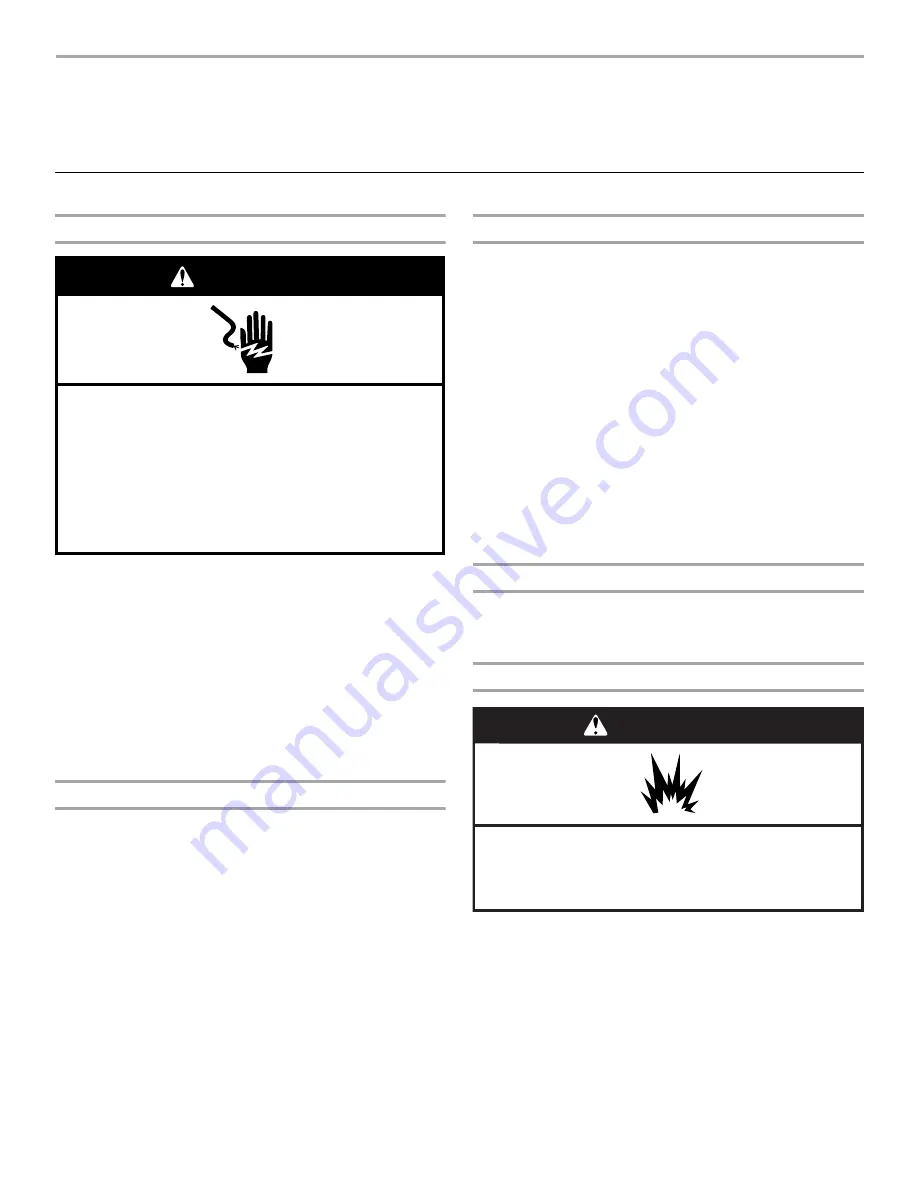
Electrical Shock Hazard

Plug into a grounded 3 prong outlet.

Do not remove ground prong.

Do not use an adapter.

Do not use an extension cord.

Failure to follow these instructions can result in death, 
fire, or electrical shock.

WARNING

WARNING

Explosion Hazard

Use nonflammable cleaner.

Failure to do so can result in death, explosion, or fire.

Summary of Contents for AFI2538AEB5

Page 1: ...ATER FILTER CERTIFICATIONS 15 PERFORMANCE DATA SHEETS 16 WARRANTY 18 SÉCURITÉ DU RÉFRIGÉRATEUR 19 INSTRUCTIONS D INSTALLATION 20 UTILISATION DU RÉFRIGÉRATEUR 26 ENTRETIEN DU RÉFRIGÉRATEUR 30 DÉPANNAGE 31 FEUILLES DE DONNÉES SUR LA PERFORMANCE 34 GARANTIE 36 REFRIGERATORUSERINSTRUCTIONS W10329366A You can be killed or seriously injured if you don t immediately You can be killed or seriously injured...

Page 2: ...tlet Do not remove ground prong Do not use an adapter Do not use an extension cord Disconnect power before servicing Replace all parts and panels before operating Remove doors from your old refrigerator Use nonflammable cleaner Keep flammable materials and vapors such as gasoline away from refrigerator Use two or more people to move and install refrigerator Disconnect power before installing ice m...

Page 3: ...fused grounded electrical supply is required It is recommended that a separate circuit serving only your refrigerator be provided Use an outlet that cannot be turned off by a switch Do not use an extension cord NOTE Before performing any type of installation cleaning or removing a light bulb turn the control Thermostat Refrigerator or Freezer Control depending on the model to OFF and then disconne...

Page 4: ...ions before you begin IMPORTANT If you turn on the refrigerator before the water line is connected turn off the ice maker to avoid excessive noise or damage to the water line Connect to Water Line 1 Unplug refrigerator or disconnect power 2 Turn OFF main water supply Turn ON nearest faucet long enough to clear line of water 3 Find a to 1 12 7 mm to 31 8 mm vertical cold water pipe near the refrige...

Page 5: ...ly fill the ice container RefrigeratorDoorsandDrawer All graphics referenced in the following instructions are included later in this section after Final Steps Remove and Replace Handles Style 1 1 Using a or hex key loosen the two setscrews located on the side of each handle See Style 1 Handle graphics 1 and 2 2 Pull the handle straight out from the door Make sure you keep the screws for reattachi...

Page 6: ...for the refrigerator door while the hinges are being moved Do not depend on the door gasket magnets to hold the door in place while you are working 3 Align the door so that the bottom of the refrigerator door aligns evenly with the top of the freezer drawer Tighten all screws 4 Reconnect the wiring plug on top of the left hand side refrigerator door 5 Reconnect the water line by pulling back the l...

Page 7: ...nge Cover Screw B Top Hinge Cover C 5 16 Hex Head Hinge Screws D Top Hinge A Hinge Pin Cover C Hinge Screws B Bottom Hinge Bottom Hinges A B C A 3 32 or 1 8 Setscrew A 3 32 or 1 8 Setscrew A A Style 1 Handle Style 1 Handle Style 2 Handle Style 2 Handle 1 1 2 2 B A C D Connections A B A Wiring Plug B Water Line Connection ...

Page 8: ...s can be opened and closed either separately or together There is a vertically hinged seal on the left refrigerator door When the left side door is opened the hinged seal automatically folds inward so that it is out of the way When both doors are closed the hinged seal automatically forms a seal between the two doors UsingtheControls The control center is located on the front of the ice and water ...

Page 9: ... again to return to the normal refrigerator set point NOTE The Max Cool feature will automatically shut off in approximately 2 hours When Max Cool is on you cannot adjust the temperature Humidity Control on some Models The humidity control feature turns on a heater to help reduce moisture on the door hinge seal Use in humid environments or when you notice moisture on the door hinge seal The refrig...

Page 10: ... in place for proper ice dispensing 1 Press the switch to the ON position 2 Slide the ice bin into the guide rails located on either side of the enclosure 3 Push the ice bin in until resistance is felt Raise the front slightly and push the ice bin in until an audible click is heard Ice Production Rate Allow 24 hours to produce the first batch of ice Discard the first three batches of ice produced ...

Page 11: ...tentional dispensing by small children and pets NOTE The dispenser lock does not shut off power to the product to the ice maker or to the dispenser light It just deactivates the dispenser lever To Lock and Unlock Dispenser Press and hold the Lock Unlock touch pad for 3 seconds to lock the dispenser The indicator light will illuminate when Lock is on Press and hold the Lock Unlock touch pad again f...

Page 12: ...8 9900 U S A or 1 800 807 6777 Canada IMPORTANT This cleaner is for stainless steel parts only Do not allow the Stainless Steel Cleaner and Polish to come into contact with any plastic parts such as the trim pieces dispenser covers or door gaskets If unintentional contact does occur clean plastic part with a sponge and mild detergent in warm water Dry thoroughly with a soft cloth 4 There is no nee...

Page 13: ...e to this reduction you may hear intermittent noises from your new refrigerator that you did not notice from your old model Below are listed some normal sounds with explanations Buzzing heard when the water valve opens to fill the ice maker Pulsating fans compressor adjusting to optimize performance Hissing Rattling flow of refrigerant movement of water lines or from items placed on top of the ref...

Page 14: ...closed completely Close the door firmly If it does not close completely see The doors will not close completely Large amount of ice recently removed Allow 24 hours for ice maker to produce more ice Ice cube jammed in the ice maker ejector arm Remove ice from the ejector arm with a plastic utensil Water filter installed on the refrigerator Remove filter and operate ice maker If ice volume improves ...

Page 15: ... top of the refrigerator door See Refrigerator Doors and Drawer Reverse osmosis water filtration system connected to your cold water supply This can decrease water pressure See Water Supply Requirements Water is leaking from the dispenser system NOTE One or two drops of water after dispensing is normal Glass not being held under the dispenser long enough Hold the glass under the dispenser 2 to 3 s...

Page 16: ...benzene Carbofuran Toxaphene Cysts Turbidity Asbestos Tetrachloroethylene and Lindane Substance Reduction Aesthetic Effects NSF Reduction Requirements Average Influent Influent Challenge Concentration Maximum Effluent Average Effluent Minimum Reduction Average Reduction Chlorine Taste Odor Particulate Class I 50 reduction 85 reduction 2 00 mg L 14 000 000 mL 2 0 mg L 10 At least 10 000 particles m...

Page 17: ...rements Average Influent Influent Challenge Concentration Maximum Effluent Average Effluent Minimum Reduction Average Reduction Chlorine Taste Odor Particulate Class I 50 reduction 85 reduction 2 00 mg L 14 000 000 mL 2 0 mg L 10 At least 10 000 particles mL 0 06 mg L 370 000 mL 0 050625 mg L 196 666 mL 97 00 97 40 97 52 99 00 Contaminant Reduction NSF Reduction Requirements Average Influent Influ...

Page 18: ...ana s published installation instructions 11 Replacement parts or repair labor on major appliances with original model serial numbers that have been removed altered or cannot be easily determined 12 Any damage or discoloration of dry erase door surface caused by markers other than dry erase markers in the recommended colors listed in the Use and Care Guide 13 Any damage or discoloration caused by ...

Page 19: ...SSEMENT DANGER Voici le symbole d alerte de sécurité Ce symbole d alerte de sécurité vous signale les dangers potentiels de décès et de blessures graves à vous et à d autres Tous les messages de sécurité suivront le symbole d alerte de sécurité et le mot DANGER ou AVERTISSEMENT Ces mots signifient AVERTISSEMENT réfrigérateur prendre quelques précautions fondamentales y compris les suivantes Pour r...

Page 20: ... s assurer qu un espace additionnel est prévu à l arrière pour permettre les connexions des conduites d eau En cas d installation du réfrigérateur près d un mur fixe laisser un minimum de 3 9 5 cm entre le réfrigérateur et le mur pour permettre l ouverture de la porte AVERTISSEMENT Risque de suffoquer Enlever les portes de votre vieux réfrigérateur Le non respect de cette instruction peut causer u...

Page 21: ...n tube en cuivre et vérifier l absence de fuites Installer les tubes en cuivre seulement à des endroits où la température se maintient au dessus du point de congélation Pour les modèles avec filtre à eau le filtre à eau jetable doit être remplacé au moins tous les 6 mois Pression de l eau Une alimentation en eau froide avec une pression entre 35 et 120 lb po2 241 et 827 kPa est nécessaire pour fai...

Page 22: ...étanche Ne pas serrer excessivement 7 Enfiler l écrou et la bague de compression du raccord sur le tube en cuivre comme on le voit sur l illustration Insérer l extrémité du tube aussi loin que possible dans l ouverture de sortie du robinet Visser l écrou de compression sur le raccord de sortie avec une clé à molette Ne pas serrer excessivement car ceci pourrait provoquer l écrasement du tube en cu...

Page 23: ...ous soyez prêt à les soulever pour les dégager de la caisse REMARQUE Prévoir un support additionnel des portes pendant le retrait des charnières La force d attraction des aimants des portes ne suffit pas à les maintenir en place pendant la manutention OUTILLAGE REQUIS Clés à douille à tête hexagonale de et tournevis Torx T20 tournevis Phillips n 2 et tournevis à lame plate 1 Débrancher le réfrigér...

Page 24: ...çade du tiroir 1 Ouvrir le tiroir de congélation complètement 2 Desserrer les quatre vis fixant les glissières du tiroir à la façade du tiroir Voir l illustration de dépose de la façade du tiroir REMARQUE Desserrer les vis en appliquant trois à quatre tours Laisser les vis sur la façade du tiroir 3 Glisser la façade du tiroir vers le haut et hors des vis Voir l illustration de dépose de la façade ...

Page 25: ...e de la charnière C Vis de charnière B Charnière inférieure Charnières inférieures A B C A Vis de retenue de 3 32 ou 1 8 A Vis de retenue de 3 32 ou 1 8 A A Poignée Style 1 Poignée Style 1 Poignée Style 2 Poignée Style 2 1 1 2 2 Dépose de la façade du tiroir A Réinstallation de la façade du tiroir A Desserrer les 4 vis bride de porte B A C D Raccordements A B A Prise de raccordement B Raccordement...

Page 26: ... Il faudra peut être plusieurs tours et tourner les deux vis de façon égale 4 Réinstaller la grille de la base UTILISATION DU RÉFRIGÉRATEUR Ouvertureetfermeturedesportes Il y a deux portes pour le compartiment de réfrigération Les portes peuvent être ouvertes et fermées séparément ou ensemble Il y a sur la porte de gauche du réfrigérateur un joint à charnière verticale Lors de l ouverture de la po...

Page 27: ...uisse se stabiliser Autres caractéristiques du centre de commande Max Cool refroidissement maximum La caractéristique Max Cool est utile lors de périodes d utilisation intense du réfrigérateur de l addition d un grand nombre d aliments ou de l élévation temporaire de la température de la pièce Appuyer sur la touche Max Cool pour régler le congélateur et le réfrigérateur aux réglages de température...

Page 28: ...me d approvisionnement en eau avant de mettre en marche la machine à glaçons Voir Distributeurs d eau et de glaçons La machine à glaçons et le bac d entreposage sont situés dans la partie supérieure gauche du compartiment de réfrigération Mise en marche arrêt de la machine à glaçons Le commutateur On Off marche arrêt est situé sur la machine à glaçons Pour mettre en marche la machine à glaçons app...

Page 29: ...produits Distribution de glaçons et d eau IMPORTANT Le distributeur fournit de l eau ou des glaçons ou les deux à la fois La caractéristique Front Fill remplissage en façade permet la distribution d eau dans des contenants trop gros pour la zone de distribution tels que les bouteilles de sport Distribution d eau ou de glaçons 1 Sélectionner l eau ou les glaçons en appuyant sur la touche correspond...

Page 30: ...eau ne sera pas filtrée Si cette option est choisie remplacer le filtre par un dispositif de décharge bleu ENTRETIEN DU RÉFRIGÉRATEUR Nettoyage Les sections de réfrigération et de congélation se dégivrent automatiquement Toutefois nettoyer les deux sections environ une fois par mois pour éviter une accumulation d odeurs Essuyer les renversements immédiatement IMPORTANT Comme l air circule entre le...

Page 31: ...er le protège ampoule au delà du point de verrouillage 5 Brancher le réfrigérateur ou reconnecter la source de courant électrique DÉPANNAGE Essayer d abord les solutions suggérées ici ou visiter notre site Internet et la FAQ foire aux questions pour éviter le coût d un appel de service Aux É U www amana com Au Canada www amanacanada ca Fonctionnementduréfrigérateur Le réfrigérateur ne fonctionne p...

Page 32: ...r la température au bout de 24 heures Voir Utilisation de la des commande s La température est trop basse dans le réfrigérateur L évent du réfrigérateur est il obstrué Si l évent situé dans la partie supérieure gauche du compartiment du réfrigérateur est obstrué par des articles placés directement devant le réfrigérateur deviendra trop froid Écarter les articles de l évent Le bac d entreposage est...

Page 33: ...l alimentation en eau et le robinet d arrêt d eau est il ouvert Brancher le réfrigérateur à l alimentation en eau et ouvrir le robinet d arrêt d eau complètement La canalisation de la source d eau du domicile comporte t elle une déformation Redresser la canalisation d eau S agit il d une nouvelle installation Rincer et remplir le système de distribution d eau Voir Distributeur d eau et de glaçons ...

Page 34: ... classe I et en vertu de la norme NSF ANSI 53 réduction de plomb mercure atrazine benzène p dichlorobenzène carbofuran toxaphène kystes turbidité amiante tétrachloroéthylène et lindane Réd de substances Effets esthétiques Critères de réduction NSF Affluent moyen Concentration dans l eau à traiter Effluent maximal Effluent moyen de réd minimale de réd moyenne Goût odeur de chlore Particules classe ...

Page 35: ...ine tétrachloroéthylène et lindane Réd de substances Effets esthétiques Critères de réduction NSF Affluent moyen Concentration dans l eau à traiter Effluent maximal Effluent moyen de réd minimale de réd moyenne Goût odeur de chlore Particules classe I réduction de 50 réduction de 85 2 00 mg L 14 000 000 mL 2 0 mg L 10 Au moins 10 000 particules mL 0 06 mg L 370 000 mL 0 050625 mg L 196 666 mL 97 0...

Page 36: ......

Page 37: ......

Page 38: ......

Page 39: ......

Page 40: ... ou ne peuvent pas être facilement identifiés 12 Tout dommage ou décoloration de la surface effaçable à sec de la porte causé par des marqueurs autres que les marqueurs effaçables à sec de couleurs recommandées listées dans le Guide d utilisation et d entretien 13 Tout dommage ou décoloration causé par tout marqueur sur les surfaces de réfrigérateur non désignées comme surfaces effaçables à sec 14...

Reviews: