2
WARNING
!
To avoid risk of personal injury or death due to
electrical shock:
•
Electrical grounding is required on this device.
•
Check with a qualified electrician if you are not sure
this appliance is properly grounded.
•
DO NOT ground to gas line.
•
DO NOT ground to cold water pipe if pipe is
interrupted by plastic, nonmetallic gaskets, or other
insulating (non-conducting) materials.
•
DO NOT modify plug on power cord. If plug does
not fit electrical outlet, have a proper outlet installed
by a qualified electrician.
•
DO NOT have a fuse in the neutral or ground
circuit. A fuse in the neutral or ground circuit could
result in an electrical shock.
•
DO NOT use an extension cord with this appliance.
•
DO NOT pinch power cord.
•
DO NOT remove warning tag from power cord.
•
Observe all local codes and ordinances.
BASIC TOOLS NEEDED
•
Tight-fitting gloves
•
Standard screwdriver
•
Phillips screwdriver
•
Pliers
•
Sharp knife
•
Carpenter’s bubble level
•
3
/
8
" open-end wrench or adjustable wrench
•
¼" hex socket and ratchet
•
Tape measure
•
Electric drill
•
1
/
8
" drill bit
CAUTION
!
To avoid risk of personal injury or product damage
due to the weight of this device and sharp edges that
may be exposed:
•
Have someone help install unit. Air conditioner
weighs between 80 and 150 pounds (depending
upon model). Use proper lifting and carrying
techniques to prevent injury or strain.
•
Inspect location where unit is to be installed. Be
sure it will support the weight of the unit for an
extended period of time.
•
Handle air conditioner with care. Wear protective
gloves whenever lifting or carrying unit. Avoid sharp
metal fins on front and rear coils.
•
Make sure air conditioner does not fall during
installation.
Installation Instructions
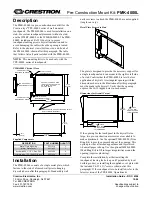
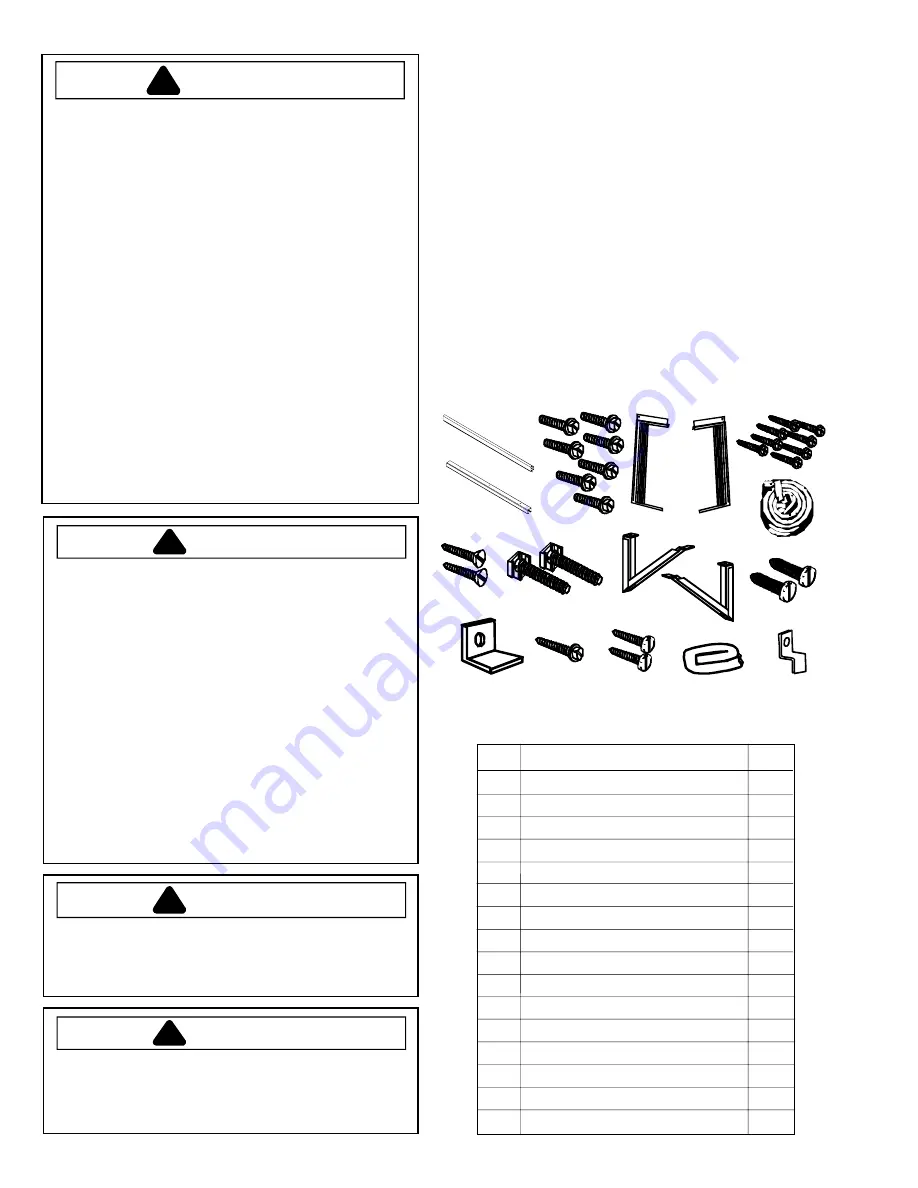
Step 1 – Lay Out Kit Parts
Parts are numbered in the order used.
CAUTION
!
To avoid risk of personal injury, property damage, or
damage to air conditioner if unit falls, hold air condi-
tioner securely in place until indoor sash on window
is securely seated in top channel on outer case.
CAUTION
!
To prevent damage to window locking or lifting
mechanisms from improperly placed sash bracket
screw, inspect window carefully before drilling or
installing screw in sash.
2
3
4
9
1
5
6
7
8
Installation Kit Parts
10
11
Item
Description
QTY
1
Top Rail
1
2
3
/
8
" Hex Head Screw
7
3
Bottom Rail
1
4
Left-hand Curtain Assembly
1
5
Right-hand Curtain Assembly
1
6
¼" Hex Head Screw
8
7
Window Sill Gasket (½" x ¼")
44"
8
7
/
8
" Countersunk Screw
2
9
4" Adjusting Foot
2
10
Outside Supports
2
11
½" Screw
2
12
Sash Bracket
1
13
7
/
8
" Sash Bracket Screw
1
14
5
/
8
" Phillips Screw
2
15
Window Seal Strip (¾" x 1-½")
48"
16
Basepan Clip
1
12
13
14
15
16