background image

6

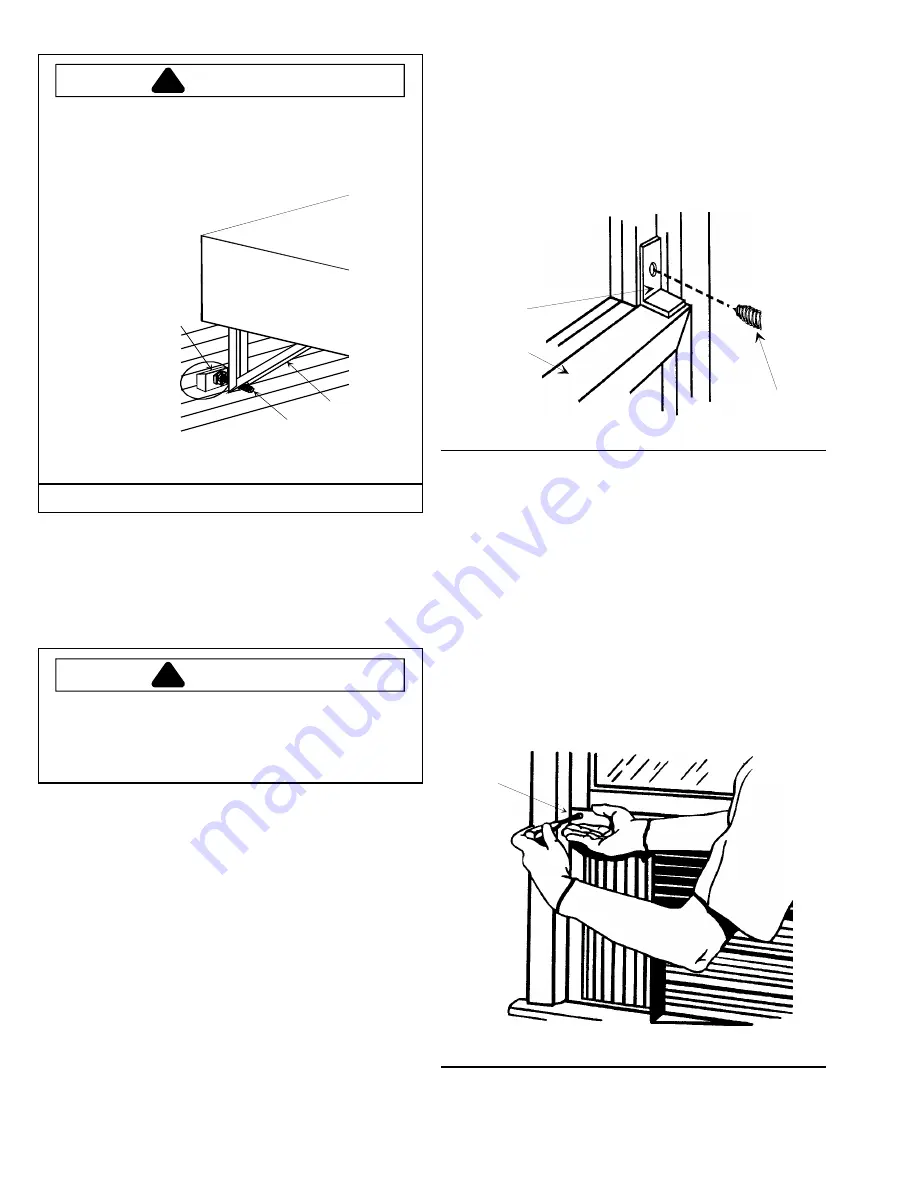
Step 7 – Secure Side Curtains
For proper seal, pull each expandable side curtain out
and up until it fits tightly against window frame. Using hole
in top of each curtain for guide, mark hole location and
drill 

1

/

8

" pilot hole into window sash. Secure each curtain

to sash using 

5

/

8

" Phillips head screws (Item 14).

If you do not want to make holes in window sash, let
downward force of window hold side curtains in place.
However, if curtains do not stay in place, air seal will not
be good and electricity usage will rise.

Step 6 – Install Sash Bracket
Install sash bracket (Item 12) on top of indoor window
sash with 

7

/

8

" sash bracket screw (Item 13) to prevent

raising of window from outside. Screw anchor directly into
side of window frame. For hard wood or metal window
frames, 

1

/

8

" pilot hole may be needed to start screw.

CAUTION

!

To prevent damage to window locking or lifting
mechanisms from improperly placed sash bracket
screw, inspect window carefully before drilling or
installing screw in sash.

Turn each adjusting foot until it begins to contact wall.
Back of outer case should be ¼" to 

3

/

8

" lower than front—

at ¼ bubble on carpenter’s level.

CAUTION

!

To avoid damage to outside wall of house, especially
if wall is weak or outside supports sit between studs
in wall, place wood blocks (not provided) between
wall and each adjusting foot. Place wood blocks
before adjusting outer case slope.

C

B

A

A.

Outside support

B.

Adjusting foot

C.

Wood block

Turn adjusting foot to contact wall

B

A

C

A.

Sash bracket

B.

Sash bracket screw

C.

Indoor sash

Install sash bracket

A.

Phillips screw

Secure side curtains

A

Summary of Contents for RAWK3

Page 1: ...l Time If your problem cannot be solved by phone contact an authorized Amana servicer The contact and service will be at your expense Safety Information Be sure electrical service is adequate for chosen model of air conditioner Complete electrical rating for air conditioner is found on serial plate located behind front grille Be sure electric plug receptacle is close enough for power cord to reach...

Page 2: ...r conditioner weighs between 80 and 150 pounds depending upon model Use proper lifting and carrying techniques to prevent injury or strain Inspect location where unit is to be installed Be sure it will support the weight of the unit for an extended period of time Handle air conditioner with care Wear protective gloves whenever lifting or carrying unit Avoid sharp metal fins on front and rear coils...

Page 3: ...fting and carrying techniques to prevent injury or strain Attach bottom rail Item 3 to outer case with three 3 8 screws Item 2 From inside of case insert screws through case and into holes in bottom rail Slide left hand curtain assembly Item 4 into left ends of top and bottom rails Repeat for right hand curtain assembly Item 5 on right ends of top and bottom rails Fasten curtain retainer strips to...

Page 4: ...3 countersunk wood screws not supplied with kit to provide smooth surface for mounting air conditioner Mobile home window installation Add wood strip at least 1 wide along entire width of window sill Thickness of wood strip should match height of front lip of window frame Fasten wood strip to sill with at least 3 countersunk wood screws not supplied with kit to provide smooth surface for mounting ...

Page 5: ...close to sill as possible Insert back tab into large holes along both sides of outer case Align hole in front tab of support angle with small hole in outer case Drive screw into front tab When installing outside support brackets on solid bottom outer case tap screw holes in support brackets before attaching brackets to sides of outer case B A A 7 8 countersunk screw 2 pieces B Front support rail S...

Page 6: ...or directly into side of window frame For hard wood or metal window frames 1 8 pilot hole may be needed to start screw CAUTION To prevent damage to window locking or lifting mechanisms from improperly placed sash bracket screw inspect window carefully before drilling or installing screw in sash Turn each adjusting foot until it begins to contact wall Back of outer case should be to 3 8 lower than ...

Page 7: ... helps keep unit in window make sure window sash contacts outer case before reinstalling chassis With assistance replace chassis in outer case Install basepan clip Item 16 into slot in outer case bottom and secure to basepan using 3 8 hex head screw Item 2 Replace front panel air filter and grille CAUTION To avoid risk of personal injury or product damage due to the weight of this device and sharp...

Page 8: ... home may cause warping or bowing of windows To fill holes or cracks and ensure a tight seal use suitable plastic sealer available at hardware stores To begin operation plug unit into electrical outlet as recommended in Use Care Manual Read Use Care Manual thoroughly to become familiar with operation of room air conditioner CAUTION To avoid risk of personal injury or product damage due to the weig...

Reviews: