background image

Summary of Contents for SZD20MPE

Page 1: ...nl iiiii ilnll II I I IIIIII _ana_ 24 Deep Side By Side Built In Refrigerator Use Care Manual _ aea 20 i l i HI n i ...

Page 2: ...e should warranty service be needed Serial No Model No Manufacturing No Date of Purchase Selling Dealer WARNING Electrical Grounding Instructions This appliance is equipped with a three prong grounding plug for your protection against possible shock hazards Where a two prong wall receptacle is encountered it is the personal responsibility end obligation of the customer to contact a qualified elect...

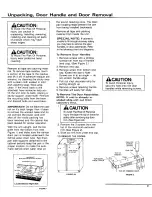
Page 3: ...cabinet bottom keep the pan in the proper location to make the auto matic defrost drain water drop on the sound reducing cone The drain pan locating stops prevent the pan from being installed backwards Remove all tape and packing material from inside the unit SPECIAL NOTE If cabinet is unable to fit through doorway safely you may have to remove the door handles or door assemblies Refer to the foll...

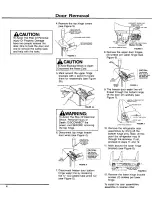
Page 4: ...loosening the 1 4 O D plastic tube union nut see Figure 5 O SCONNECT WATER TU_ R_ MOV_ THE TUB_ CLAMp SCR_ W REMOVE TH_ TUB_ __LAMP WArE 1UBE LOOSEN THIS p_ AgTIC UNION A_IO pt_LL THE TUBE P _TTO_I OF FR_EZE_I OOOR FIGURE 5 8 Remove the upper door hinges 3 screws per upper hinge see Figure 6 r_UT DRIVER H_NG_ B_GKE _ GROUND WIRES k CRITICAL I FIGURE 6 g The freezer door water line will thread thro...

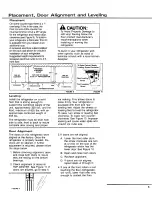
Page 5: ...ner 24 1 TOP OF COUNTER _L _ J 1 O VE_HANG FIGURE The refrigerator must be level from side to side front to back to insure complete door closing and proper ___l I_ _ _ Rear Leveling i Screw _ FIGURE 10 ice making This allows doors to close firmly Your refrigerator is equipped with front and rear leveling feet Adjust the wheels or leveling feet to level the refrigerator To raise turn screw or level...

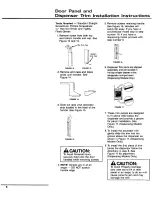
Page 6: ... compartment Dispensing Modets Oniy 3 Slide out gray vinyl decorator strip located in the inset of the handle See Figure 15 FIGURE 15 CAUTION To Avoid Personal Injury securely hold onto the door handles while removing screws 4 NOTE Screws are in at an angle DO NOT scratch handle edge g FIGURE 17 These trim pieces are designed to fit above AND below the dispenser and provide a groove for panel inst...

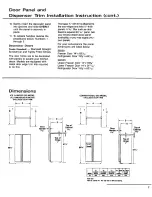
Page 7: ...oor edges and hold lt4 thick panels A _ 16 filler such as card board is requiredfor 1h6 panel Ask your Amana dealer about panel availability or you may supply your own panels For your convenience the panel dimensions are listed below SBI20 Freezer Door 14 x 631A6 5 s Refrigerator Door 19_ x 631 _s SBD20 Upper Freezer Door 14 x 18 Lower Freezer Door 14 x 3111 ts Refrigerator Door 19 x 631A6 Dimensi...

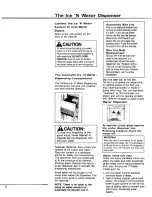
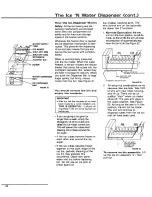
Page 8: ...n automaticallywhen it s dark If you wouldprefer not to use the nite litefeature there is an on offswitch just above the ice and water dis pensing bars Push this switch in once to turn off the nite lite Nite Lite Bulb Replacement Should the nite lite bulb ever need to be replaced it is located just above the water dispenser bar Replace with a 120 volt 6 watt Sylvania 6S6 bulb or order from your Am...

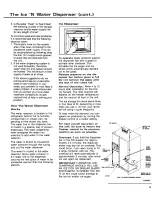
Page 9: ...Some water remains in tt e water line to the dispenser causing the first glass of water to be somewhat warmer than the following glasses Ice Dispenser To operate apply pressure against the dispenser bar with a glass or activate other container This activates the ice auger and ice wheel which automatically delivers ice to the glass Release pressure on the dis penser bar before glass is full Do not ...

Page 10: ...empty the storage bin of all ice cubes and raise the ice maker control arm This will prevent the cubes from freezing into a mass around the ice auger if the ice cubes become frozen to each other and around the ice auger if the ice cubes become frozen together on the back ledge of the ice bin periodic cleaning of the ice bin may alleviate this occurrence Clean with warm water and dry before replaci...

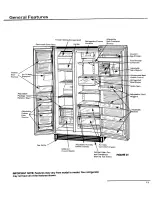
Page 11: ...ral Features i Ill Food Storage Oefrosl Drain Pan and Condenser FIGURE Behind Toe Grille IMPORTANT NOTE Features may vary from model to model Your refrigerator may not have all of the features shown i i 11 ...

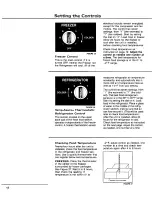
Page 12: ...in more cold air if temperature rises as little as 172 F from your setting The control has seven settings from 1 the warmest to 7 the cold est The best food storage tem perature is in the 38 to 40 F range Start by setting the dial on 4 Load food in the refrigerator Place a glass of water in the middle of the refrig erator section making sure that air can flow around it This wilt be used later to c...

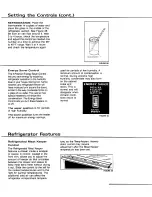
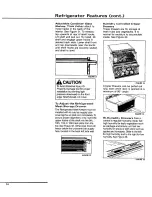
Page 13: ...hese heaters on or off The upper position is for periods of high humidity The lower position turns the heater off for maximum energy savings used for periods of low humidity A minimum amount of condensation is normal During extreme high humidity condensate may also form on the cabinet sides and doors This is normal and will disappear when climatic condi tions return to normal Refrigerator Features...

Page 14: ...ply tube covering the air inlet port completely To ensure proper alignment only insert the upper hooks of the shelf into the 9th 10th 11th or 12th track slots from the top See Figure 32 Otherwise food will freeze below the uncovered air supply hole located in the back left side wall Humidity Controlled Crisper Drawers These drawers are for storage of fresh fruits and vegetables It is normal for mo...

Page 15: ...ers to reheat foods in a microwave OVen TO REMOVE ROTATE TO RELEASE FIGURE 39 Door Shelves Door shelves can be moved up or clown to fit storage needs See Figure 39 To remove loosen shelf by tapping upwards gently underneath both ends _ Lift shelf slightly Rotate bottom out and up to release mounting hooks from door slots To install tilt shelf and insert upper hooks into any two door slots as shown...

Page 16: ...s frost before it starts Under normal operating conditions you ll never have to defrost the unit because it s automatic Air Circulation Air to cool the condenser is drawn in the grille at the bottom front passes over the condenser and is then exhausted through the same grille Therefore the unit is designed to be enclosed completely at the top back and sides for the total built in look Do not block...

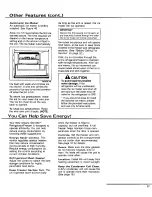
Page 17: ... water damage If the refrigerator will be unattended raise the ice maker wire shut off arm and turn the water shut off valve for the refrigerator to OFF If you should choose to install the optional ice maker please follow the provided instructions and use only Amana parts You Can Help Save Energy Your New Amana Stor Mor _ Refrigerator Freezer is designed to operate efficiently You can help reduce ...

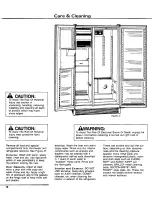
Page 18: ... and water Rinse and dry Apply a light film of petroleum jelly to the gaskets on the hinge side to keep them soft and pliable Interior Wash the liner with warm soapy water Rinse and dry Interior components such as shelves and drawers may be washed with 4 tablespoons baking soda dissolved in 1 quart of warm water to sweeten these parts Rinse and dry thoroughly Interior and Exterior DO NOT USE abras...

Page 19: ...ate the problem Always begin with Method L Use Method II and III only if the odor persists Method I 1 Unplug the Unit 2 Remove all food 3 Thoroughly wash the inside of the unit including all shelves drawers accessories and gaskets with a mix ture of 4 tablespoons of baking soda dissolved in 1 quart of warm water Pay special attention to any corners crevices or grooves into which odors causing liqu...

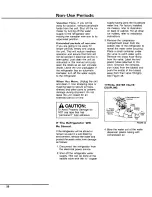
Page 20: ...rmanent type adhesive If The Refrigerator Will Be Stored If the refrigerator will be stored or remain unused in a sub freezing environment remove the water and protect the water valve from damage as follows 1 Disconnect the refrigerator from the electrical power source 2 Shut off the refrigerator water supply This can be done at the saddle valve with the 1 4 copper supply tubing joins the househol...

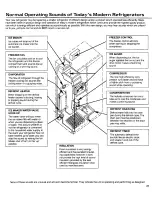
Page 21: ...ater This occurs whether or not the refrigerator is connected to the household water supply In the event your refrigerator has not been hooked up to water you can stop the sound by raising the Ice Maker shut off arm to the up position INSULATION Foam insulation is very energy efficient and has excellent insulat ing capabilities however it does not provide the high level of sound insulation provide...

Page 22: ...frost cycle Wait 30 minutes to see if the unit witl restart If it does not remove the toe grille The defrost timer is located behind the grille Turn the timer knob clockwise until you hear a click The refrigerator should begin running If the unit still won t operate Be sure you have completed the steps listed above Take the steps necessary to preserve the food stored in the unit Dry ice may be pla...

Page 23: ...g proper closure Check to confirm drawer is in proper position in assembly Apply thin layer of petroleum jelly to slide channels Make sure refrigerator is level If there is an odor in the unit or ice cubes Clean product See page 19 Cover all foods tightly Use freezer containers or freezer wrap If ice forms in the inlet tube to the ice maker Indicates sediment in solenoid valve which has not allowe...

Page 24: ...360001 EXTENDED SERVICE PLAN Rest assured against unexpected repair bills Amana is pleased to offer an impor tant opportunity for long term service protection on your new Amana appliance The Amana Asure Extended Service Plan is specially designed to supplement the strong warranty that already accompanies your appliance and it combines with this standard warranty to provide budget protecting covera...

Reviews: