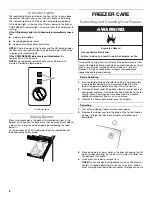
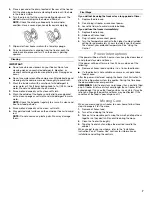
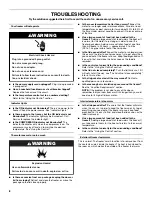
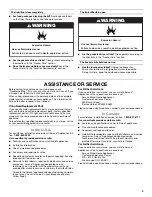
background image

5

Electrical Requirements

Before you move your freezer into its final location, it is important 
to make sure you have the proper electrical connection.

Recommended Grounding Method

A 115 Volt, 60 Hz, AC only, 15-amp fused and grounded (earthed) 
electrical supply is required.
It is recommended that a separate circuit serving only your freezer 
be provided. Use an outlet that cannot be turned off by a switch. 
Do not use an extension cord.
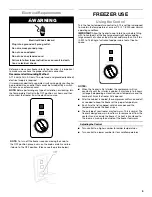
NOTE: Before performing any type of installation or cleaning, turn 
the Temperature Control to the OFF position as shown and then 
disconnect the freezer from the electrical source. 

FREEZER USE

Using the Control

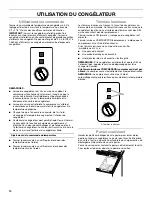
Turn the freezer temperature control to 3. This setting is designed 
to maintain the temperature at or near 0°F (-17.8°C) under normal 
operating conditions.
IMPORTANT: Allow the freezer to cool 6 to 8 hours before filling 
with frozen food. Let the freezer cool overnight before adding 
large amounts of unfrozen food. Do not add more than 2 to 3 lbs 
(0.907 to 1.360 kg) of unfrozen food per cubic foot of freezer 
space. 

NOTES: 

When the freezer is first started, the compressor will run 
constantly until the interior is cooled. It may take 6 to 8 hours 
(or longer), depending on location, room temperature and the 
number of times the freezer lid is opened.

After the cabinet is cooled, the compressor will turn on and off 
as needed to keep the freezer at the proper temperature.

Each time the lid is opened, cold air escapes and the 
temperature inside the freezer rises.

The outside of your freezer may feel warm. This is normal. The 
freezer’s design and main function is to remove heat from the 
contents and air inside the freezer. The heat is transferred to 
the room air, making the outside of the freezer feel warm. 

Adjusting the Control

Turn control to a higher number for colder temperatures.

Turn control to a lower number for less cold temperatures.

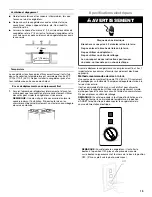
Electrical Shock Hazard

Plug into a grounded 3 prong outlet.

Do not remove ground prong.

Do not use an adapter.

Do not use an extension cord.

Failure to follow these instructions can result in death, 
fire, or electrical shock.

WARNING

NOTE: 

To turn off the freezer requires moving the knob to

the OFF position, place a coin on the knob carefully and turn
it down to the OFF position. (Please see the picture below)

``

Summary of Contents for Upright and Chest Freezer

Page 1: ...0 843 0304 In Canada call for assistance 1 800 807 6777 or visit our website at www amana com or www amana ca CONG LATEUR COFFRE Guide d utilisation et d entretien Au Canada pour assistance composez l...

Page 2: ...ING 8 ASSISTANCE OR SERVICE 9 In the U S A 9 In Canada 9 WARRANTY 10 TABLE DES MATI RES S CURIT DU CONG LATEUR 11 Mise au rebut appropri e de votre vieux cong lateur ou r frig rateur 12 INSTRUCTIONS D...

Page 3: ...the word DANGER or WARNING These words mean follow instructions instructions DANGER WARNING IMPORTANT SAFETY INSTRUCTIONS To reduce the risk of fire electric shock or injury when using your freezer fo...

Page 4: ...y between 32 F 0 C and 110 F 43 C Do not install the freezer near an oven radiator or other heat source Upon Moving to Final Location 1 Level the freezer from side to side and front to back so that th...

Page 5: ...eezer space NOTES When the freezer is first started the compressor will run constantly until the interior is cooled It may take 6 to 8 hours or longer depending on location room temperature and the nu...

Page 6: ...ll lessen the performance of the freezer Complete defrosting and cleaning should be done at least twice a year or when frost has built up to about 0 6 cm thickness In high humidity areas a freezer may...

Page 7: ...e the drain cap 2 Do not plug in freezer or reconnect power 3 Leave the lid ajar to avoid moisture buildup If you will use the freezer immediately 1 Replace the drain cap 2 Replace all frozen food 3 P...

Page 8: ...rder to conserve energy try to get everything you need out of the freezer at once keep food organized so it is easy to find and close the lid as soon as the food is removed Is the control set correctl...

Page 9: ...n our full line of appliances Installation information Use and maintenance procedures Accessory and repair parts sales Specialized customer assistance Spanish speaking hearing impaired limited vision...

Page 10: ...numbers that have been removed altered or cannot be easily determined 12 Any damage or discoloration of dry erase door surface caused by markers other than dry erase markers in the recommended colors...

Page 11: ...e l utilisation du cong lateur prendre quelques pr cautions fondamentales y compris les suivantes AVERTISSEMENT CONSERVEZ CES INSTRUCTIONS Brancher l appareil sur une prise 3 alv oles reli e la terre...

Page 12: ...Enlever les portes ou le couvercle de votre vieux cong lateur ou r frig rateur Le non respect de cette instruction peut causer un d c s ou des l sions c r brales AVERTISSEMENT Risque du poids excessi...

Page 13: ...cifications lectriques Avant de d placer le cong lateur son emplacement final il est important de vous assurer d avoir le raccordement lectrique appropri M thode recommand e de mise la terre Une sour...

Page 14: ...r ti de Ajustement de la commande de temp rature Tourner la commande un chiffre plus lev pour des temp ratures plus froides Tourner la commande un chiffre moins lev pour des temp ratures moins froides...

Page 15: ...l orifice de vidange l arri re du cong lateur Tirer le bouchon de vidange ext rieur jusqu ce que le trou du tube de vidange soit visible 6 Tourner le tube de vidange de sorte que la fl che soit dirig...

Page 16: ...on suivre ces tapes pour pr parer le d m nagement 1 Enlever tous les aliments congel s 2 Eteindre et D brancher le cong lateur 3 Retirer toutes les pi ces amovibles bien les envelopper et les attacher...

Page 17: ...lus chaud lorsque le couvercle est ouvert fr quemment Pour garder le cong lateur froid essayer de prendre tout ce dont on a besoin dans le cong lateur en une fois garder les aliments organis s de sort...

Page 18: ...nge d origine dans votre r gion nous appeler ou contacter le centre de service d sign le plus proche Pour assistance installation ou service nous contacter sans frais au 1 800 807 6777 Nos consultants...

Page 19: ...u dans une r gion loign e o un fournisseur de services d entretien ou de r paration Amana autoris n est pas disponible 10 La d pose et la r installation de votre gros appareil m nager si celui ci est...

Page 20: ...rez ces renseignements sur la plaque signal tique situ e sur le produit Nom du marchand ______________________________________________ Adresse ________________________________________________________...

Reviews: