background image

INSTALLATION 

This section provides step-by-step instructions for installation of your fireplace. 

WARNING 

The outlet must be 

15A/125V

 
CAUTION 

1.  This fireplace is designed to be able to hang on solid walls or insert into a wall hole after proper 

construction. Select a suitable location, which is not susceptible to moisture, safe, dust free, away from 
high traffic and away from things may catch fire or block openings such as drapes, furniture, etc.  

2.  The fireplace must be installed at a suitable position where at least 50cm above the floor and no higher 

than 180cm. 


NOTE 

It is a good idea to place your fireplace near an existing outlet, for ease of electrical hook up. 


CAUTION 

Store your fireplace insert in a dry, safe and dustless place when placing the mantel or 
building the wall construction.  


WARNING 

Do not attempt to wire you own new outlets or circuits. To reduce the risk of fire, electric shock 
or injury to persons, always use a licensed electrician. 

1.  If there's no


15A/125V 

outlet near the desired location, install a new one near or behind mantel. 

2.  Make sure the fireplace insert is switched off (refer to operation instruction section). 
3.  Plug the fireplace into a 

15A/125V

 outlet. Wiring the cord along the corner of wall. 

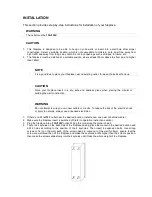
4.  There is 4 keyholes on the back side of the fireplace casing, place the mantel in the desired location and 

drill 4 holes according to the position of the 4 keyholes. Then insert 4 expansion bolts.  Use strong 
screws to fix it on the wall, each of the screw needs to come out of the wall for 8mm, ensure that the 
screw are well fixed then lift the fireplace and make the keyholes a little higher than the screw’s position, 
then make the screws slide slowly into the keyholes until it take the whole weight of the fireplace. 


Summary of Contents for WM-1641

Page 1: ...INSTALLATION AND OPERATING INSTRUCTIONS FOR WALL MOUNT UNIT WM 1641 INSTALLER LEAVE THIS MANUAL WITH THE APPLIANCE CONSUMER RETAIN THIS MANUAL FOR FUTURE REFERENCE...

Page 2: ......

Page 3: ...This odor is a normal condition caused by the initial heating of internal heater parts and will not occur again III If your heater does not emit heat please ensure the Heater Switch is on For further...

Page 4: ...t use on soft surfaces like a bed where openings may become blocked 13 All electrical heaters have hot and arcing or sparking parts inside Do not use it in areas where gasoline paint or flammable liqu...

Page 5: ...e wall construction WARNING Do not attempt to wire you own new outlets or circuits To reduce the risk of fire electric shock or injury to persons always use a licensed electrician 1 If there s no 15A...

Page 6: ...s the eye of receiver do not cover B Operation On the first usage of remote controller install the batteries first open the battery box by sliding its cover along the arrow install two AAA batteries a...

Page 7: ...icro light is on low power status Another press HEAT button when full time bright is on high power status Then press HEAT button when dark the heater is power off Note before the heater emits heat or...

Page 8: ...ulbs to avoid burning of skin I Bulb Requirements Quantity of 1 clear chandelier or candelabra bulbs with an E 14 small socket base rating voltage 230 volts rating power 40 watts CAUTION Do not exceed...

Page 9: ......

Page 10: ...nt possible harm to the environment or human health from uncontrolled waste disposal recycle it responsibly to promote the sustainable reuse of material resources To return your used device please use...

Page 11: ...www amantii com Date of Purchase Dealer Information...

Reviews: